
photoshop怎样制作滚动签名
发布时间:2017-04-13 11:42
相关话题
我们经常在一些个人网站或者淘宝上面看到可以滚动的个性签名,那么大家知道photoshop怎样制作滚动签名吗?下面是小编整理的photoshop怎样制作滚动签名的方法,希望能帮到大家!
photoshop制作滚动签名的方法
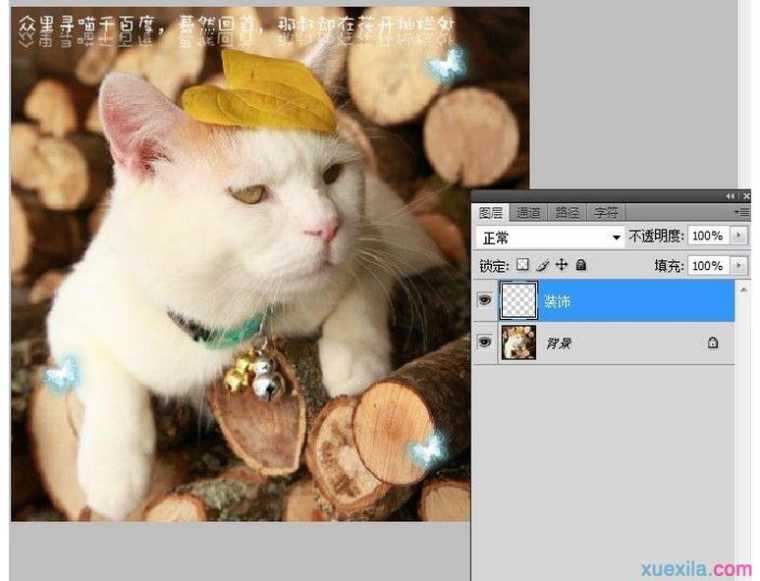
1.首先打开我们想要的图片,简单的装饰一下。
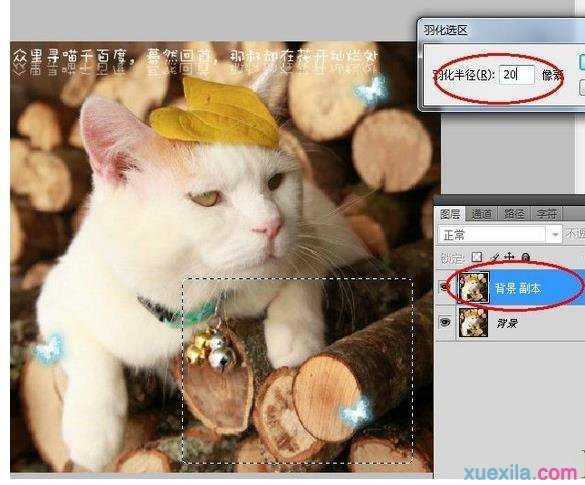
2.复制出一个副本,使用矩形选框工具在想要文字滚动的地方绘制出选区,使用羽化工具羽化20像素。
3.先使用Ctrl+C复制选区里的部分,选择Delete删除,再使用Ctrl+V将删除的部分复制到新的图层中。

4.用文字工具拉出一个文字选框,选框的大小不要超出透明部分,输入文字后,先隐藏背景和删除部分的图层。
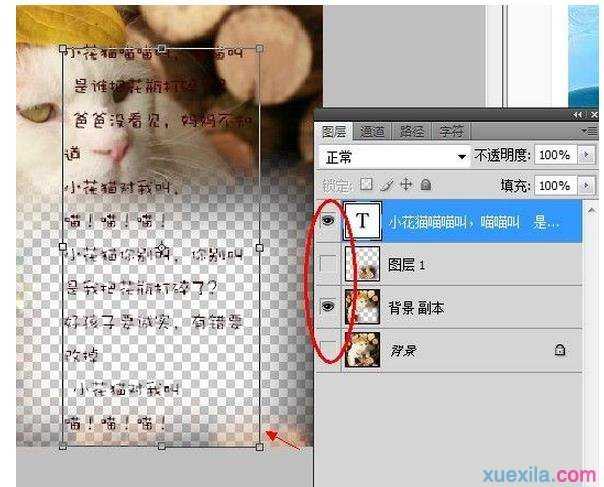
5.显示所有图层,并将图层排序,如图所示。

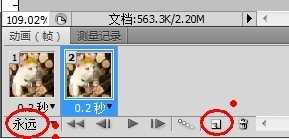
6.接下来就是动画部分,使用窗口-动画,点开动画编辑栏,如图复制出一个帧,循环设置成永远,秒数视情况调整,我调的是0.2秒。第一帧的文字按住Shift像下拖动,只要露出开头部分的文字,第二帧使用同样方法向上拖动,至文字的结尾部分。
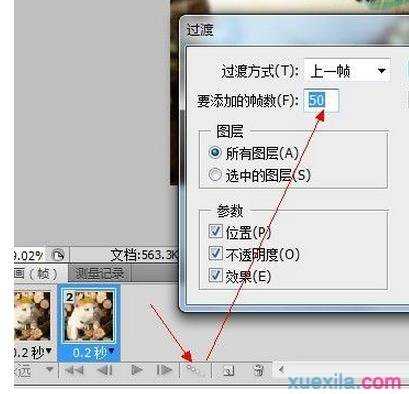
7.如图,点开过渡栏,将添加的帧数设置为50-70(看文字的长度调整)。
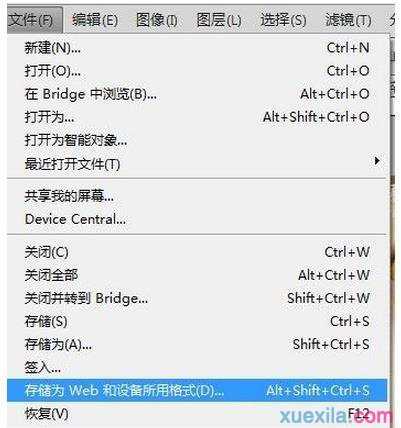
8.使用如图所示选项存储gif格式图片,就OK了。
最终效果图

photoshop怎样制作滚动签名的评论条评论