
Photoshop沙滩字制作教程
发布时间:2016-12-24 11:06
相关话题
Adobe Photoshop的图层样式是迄今为止最快最有效的创造各类效果的功能。本教程会通过各类材质、画笔和选区选项带领你了解图层样式的组合威力,并创建出逼真的在沙子上写字的效果。下面是小编为大家整理的Photoshop沙滩字制作教程,仅供大家参考~
Photoshop沙滩字制作教程如下:
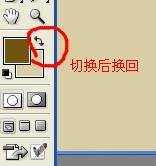
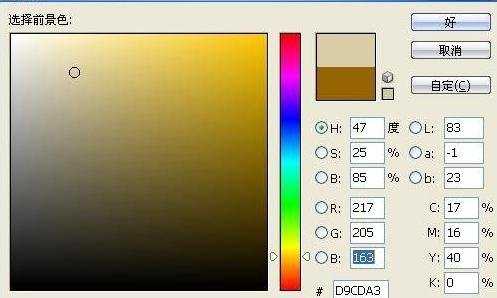
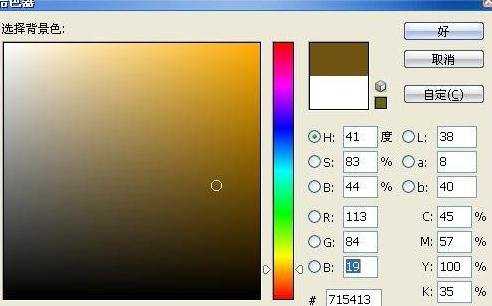
1.新建600×800像素的画布;前景色RGB217/206/163,背景113/84/19;(背景内容为背景色,可先将背景色和前景色切换)
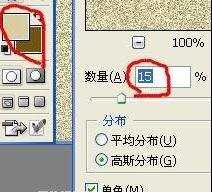
2.滤镜/杂色/添加杂色,数量25%(随你喜欢,可以自行调整);
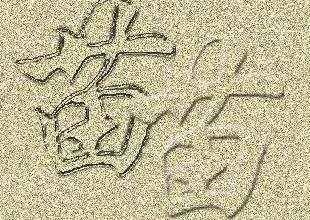
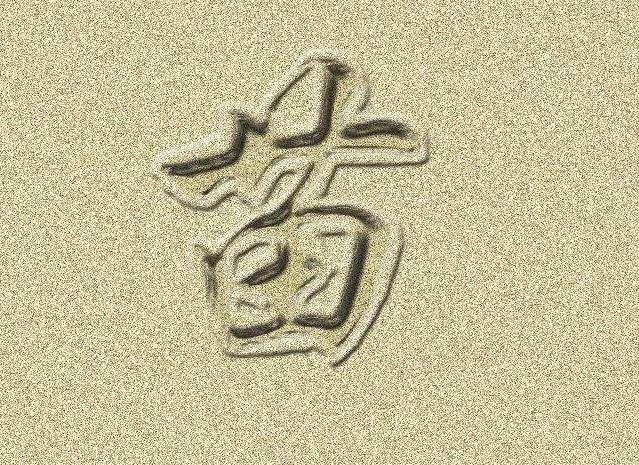
3.选择笔画较细字体打一字
4.图层/栅格化/文字;调整文字大小;
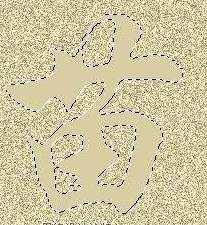
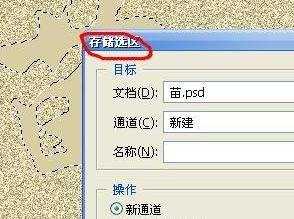
5.将文字用魔棒选出,储存选区;反选;然后删除文字图层;
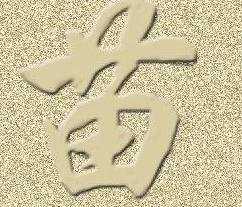
6.回到背景层,用字的选区复制出两个图层,分别为图层2,图层2副本
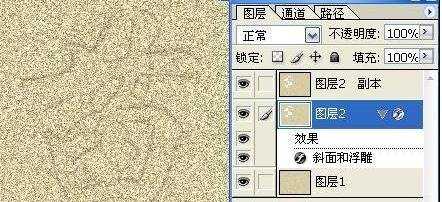
7.对中间的图层2进行斜面和浮雕处理,等高线选择环行,高光颜色改为变暗;
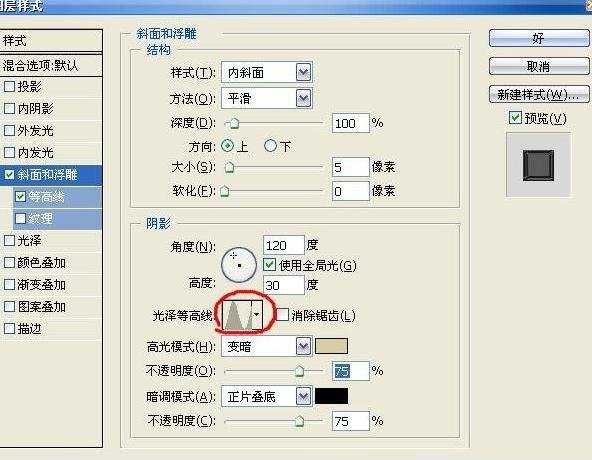
8.对图层2副本进行斜面和浮雕处理,参数默认,然后用橡皮擦把字擦掉(图层样式会保留,下一步用画笔时会出现效果;
9.把背景可视性关闭,选择画笔工具,笔刷样式:滴溅46,在图层2 副本上点画,盖掉下层文字;
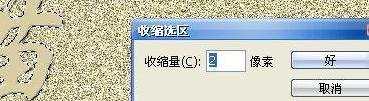
10.选择图层2,载入刚才储存的选区;选择/羽化/2;选择/修改/收缩选区/5;然后DELETE

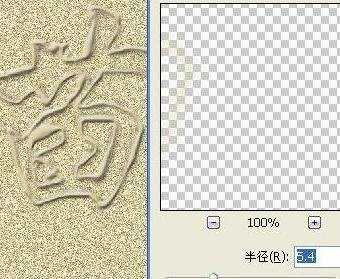
11.选择图层2;高斯模糊5.4
12.最后分别对两个图层再次添加杂色,参数与原来一样,然后用图像/调整/曲线适当降低图层2的亮度完成效果图
Photoshop沙滩字制作教程的评论条评论