
excel表格设置区域保护的教程
发布时间:2016-12-19 18:20
相关话题
Excel中经常需要使用到设置区域保护的功能,部分区域具体该如何设置保护呢?下面是小编带来的关于excel表格设置区域保护的教程,希望阅读过后对你有所启发!
excel表格设置区域保护的教程:
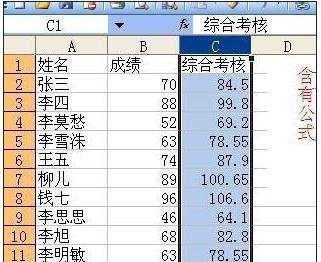
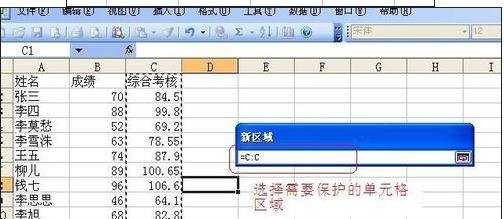
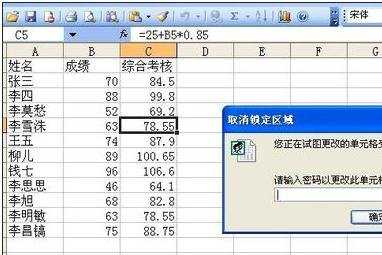
设置区域保护步骤1:在以下表格中,由于c列中含有公式,为防止误操作导致出现错误,需要将c列锁定并保护,在需要修改公式时,要求输入正确密码才可进行下一步操作。
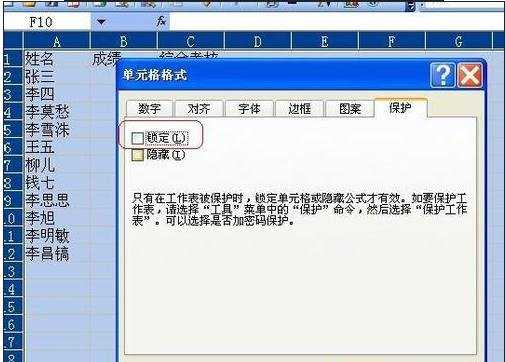
设置区域保护步骤2:按ctrl+A组合键全选工作表,ctrl+1打开“单元格格式”对话框,切换到“保护”标签,取消“锁定”的勾选。
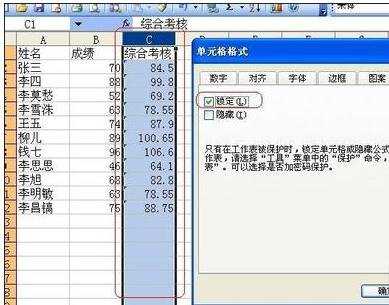
设置区域保护步骤3:选中需要保护的区域(本例为c列),ctrl+1打开“单元格格式”对话框,切换到“保护”标签,勾选“锁定”。
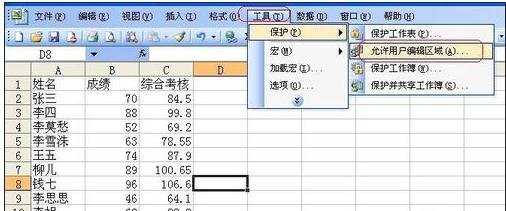
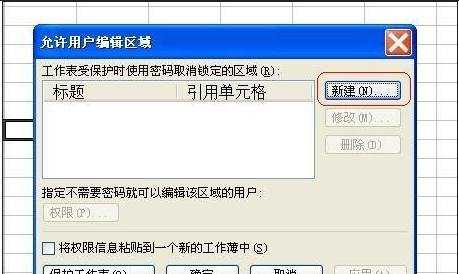
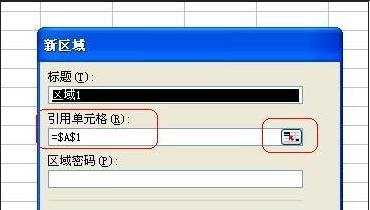
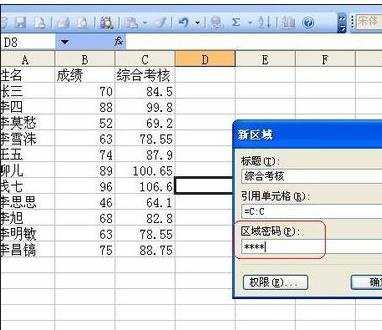
设置区域保护步骤4:菜单栏“工具”→“保护”→“允许用户编辑区域”,打开“允许用户编辑区域”对话框,单击“新建”按钮,打开“新区域”对话框。在“引用单元格”框中输入单元格地址(也可以单击后面的按钮,通过鼠标选取区域)。
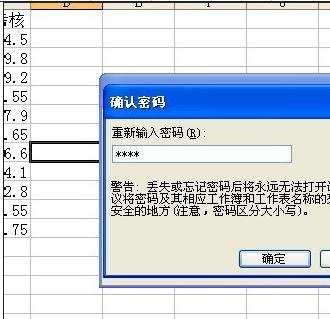
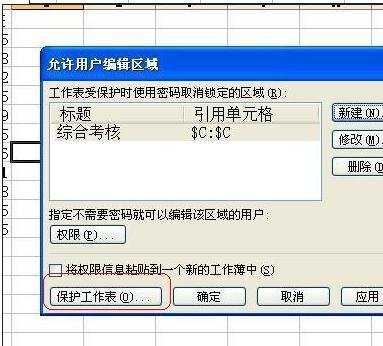
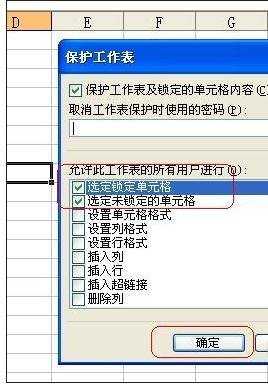
设置区域保护步骤5:在“新区域”对话框输入密码,确认密码,返回“允许用户编辑区域”对话框,单击“保护工作表”按钮,打开“保护工作表”对话框,勾选其中的“选定锁定单元格”和“选定未锁定的单元格”,确定即可。
设置区域保护步骤6:完成以上设置后,当用户试图对保护的区域进行编辑操作时,会弹出“取消锁定区域”对话框,输入正确的密码方可进行下一步操作。
看了excel表格设置区域保护的教程还看了:
1.excel2007设置单元格保护区域的方法
2.excel表格设置保护的教程
3.Excel表格教程
4.excel如何保护表格中单元格的教程
5.excel利用锁保护表格的教程
6.Excel表格的基本操作教程免费下载
7.excel表格保护公式的教程
excel表格设置区域保护的教程的评论条评论