
photoshop如何绘制边框
发布时间:2017-05-03 12:10
相关话题
边框是比较常用的圈定标准工具,我们经常会在一些个性图片中见到,那么大家知道photoshop如何绘制边框吗?下面是小编整理的photoshop如何绘制边框的方法,希望能帮到大家!
photoshop绘制边框的方法
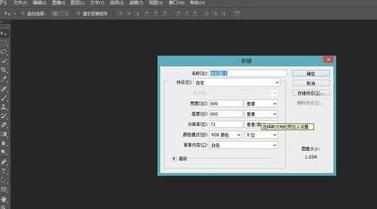
运行photoshop,创建新文件,定义大小为600*600像素。
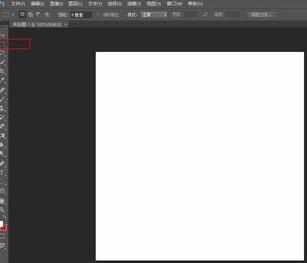
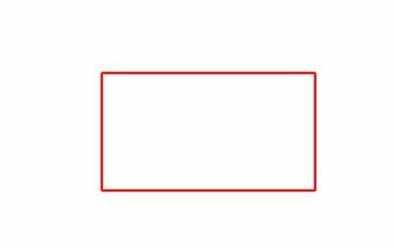
使用工具栏中的长方形工具,按你要求画出合适大小的长方形。
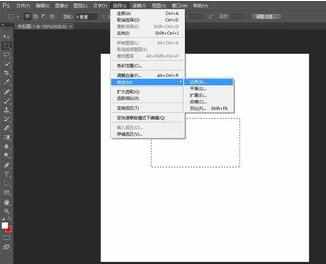
画出长方形后,在工具栏中分别选取“选择”--“修改”--“边界”。
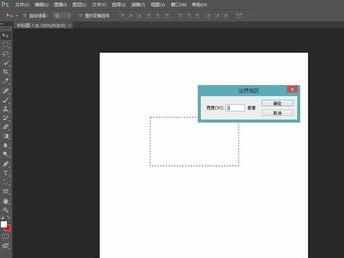
设定边界大小,这就是边框的宽度。在此例中我设置为2像素。
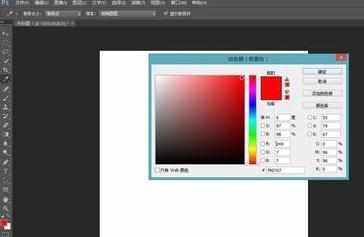
在前景色中选取需要填充的边框颜色。在此例中我选取红色。
填充前景色。同时按“Alt”+"Del"键,填充前景色。这样就完成了红色边框的制作了。
photoshop如何绘制边框的评论条评论