
怎样使用photoshop中的色阶功能
发布时间:2017-06-05 14:15
相比许多人都应该知道色阶是photoshop中用来调光或者调色的工具,其实这个也不算太难,下面就让小编告诉你怎样使用photoshop中的色阶功能的方法,一起学习吧。
使用photoshop中的色阶功能的方法
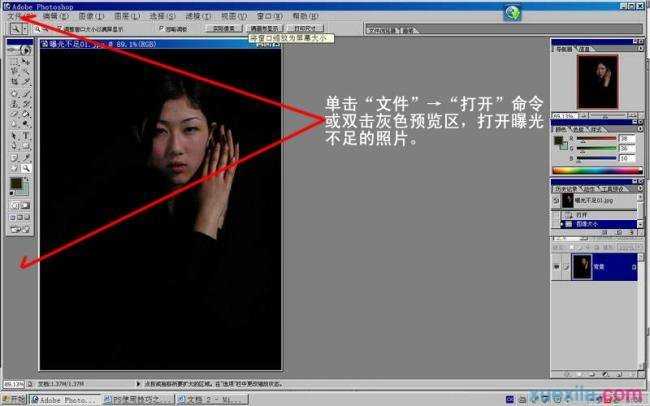
1、打开(通过“文件”菜单或双击灰色预览区)曝光不足的照片,如P01图所示。
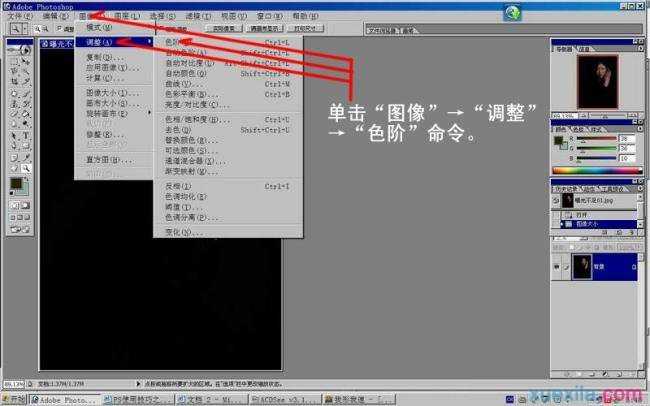
2、点击“图像”→“调整”→“色阶”命令,如P02图所示。
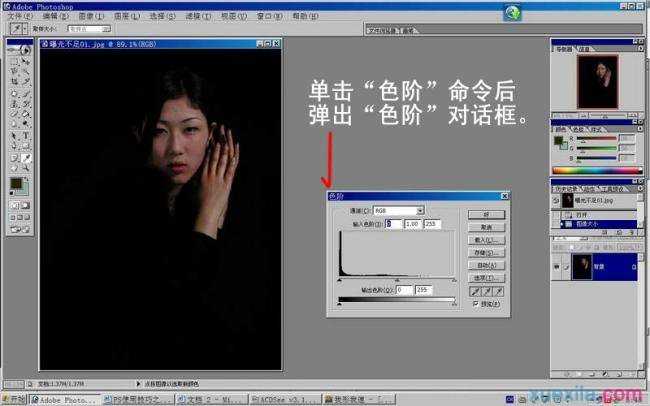
3、点击“色阶”命令后,弹出“色阶”对话框,如P03图所示。
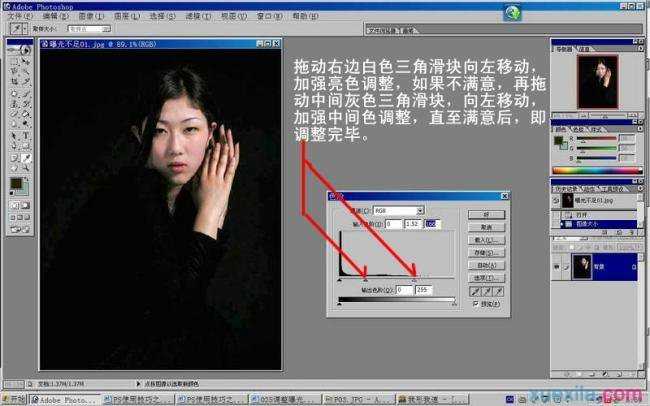
4、在“色阶”对话框中,拖动右边的白色三角滑块向左移动,加强亮色调整,如果对得到的效果不满意,可以拖动中间的灰色三角滑块向左移动,加强中间色调整,直至满意后,即调整完毕,如P04图所示。
5、调整前与调整后的照片对比,如P05图所示。

怎样使用photoshop中的色阶功能的评论条评论