
photoshop怎样模拟镜头光晕
发布时间:2017-06-07 14:06
相关话题
镜头光晕在电影中经常看到,这种效果也可以使用photoshop模拟。那么大家知道photoshop怎样模拟镜头光晕吗?下面是小编整理的photoshop怎样模拟镜头光晕的方法,希望能帮到大家!
photoshop模拟镜头光晕的方法
1.按【Ctrl+O】键打开一幅素材图像文件。

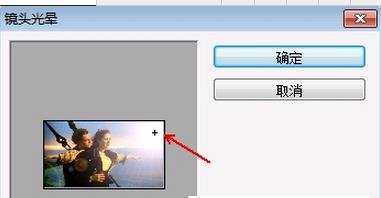
2.在Photoshop CS6菜单栏中选择“滤镜”-“渲染”-“镜头光晕”命令,打开“镜头光晕”对话框。

3. 光晕中心:在Photoshop CS6“镜头光晕”对话框中的图像缩略图上合适位置单击或拖动十字线,可以指定光晕的中心。
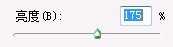
4.亮度:用来控制光晕的强度,变化值为10%-300%。
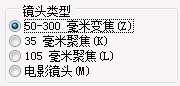
5.镜头类型:用来选择产生光晕的镜头类型。
6.设置好镜头光晕对话框参数值后,单击“确定”,得到Photoshop CS6图像添加镜头光晕的效果如图。

photoshop怎样模拟镜头光晕的评论条评论