
photoshop丝带制作教程
发布时间:2016-12-27 19:15
如何用Photoshop制作一条丝带呢?下面是小编为大家整理的photoshop丝带制作教程,仅供大家参考~
photoshop丝带制作教程如下:
一、新建一个文件,大小自定,用灰色(#cccccc)填充背景层,如下图所示。

二、新建图层,在工具箱中选择【钢笔工具】,在【图层1】中绘制如【图02】所示的路径。

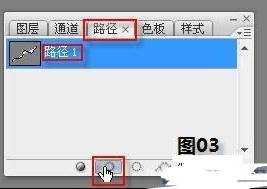
三、在【图层面板】中选择【路径】标签,将路径命名为【路径1】。选择【工具箱】中的【画笔】工具,将画笔大小调整为3像素,颜色为黑色。在【路径面板】中点击【用画笔描边】按钮,如【图03】所示。
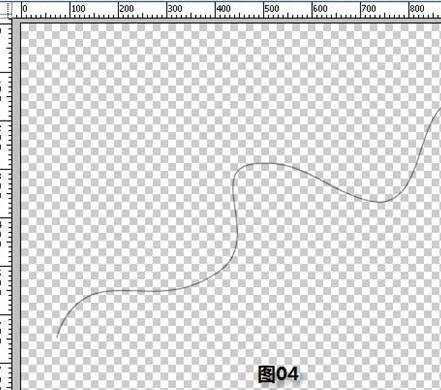
四、回到【图层面板】,隐藏【背景图层】,如【图04】所示,在菜单中选择【编辑】→【定义画笔预设】,在弹出的窗口中将画笔命名为【纱巾】,点击【确定】按钮。
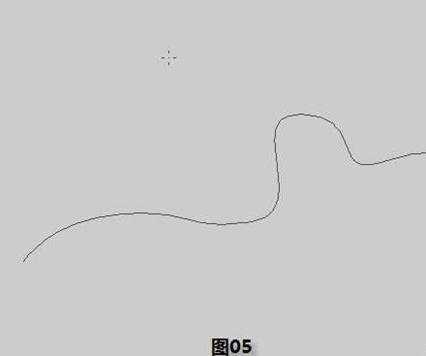
五、按照【第二秉a href='http://www.xx.com/shenghuo/jiankang/' target='_blank'>健康姆椒ɑ嬷迫纭就?5】所示的路径,并将其命名为【路径2】。
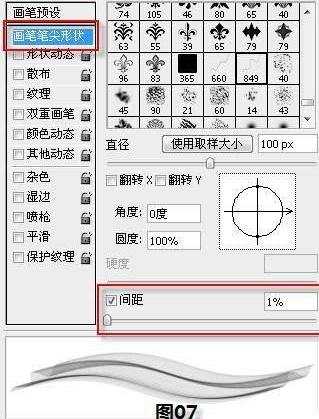
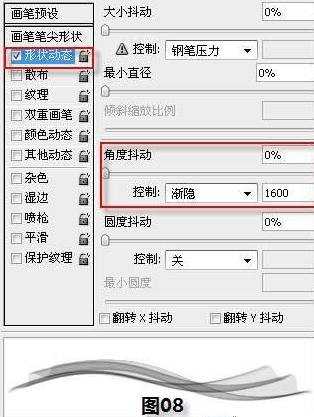
六、将前景色设置为#d343af,在【工具箱】中选择【画笔工具】,此时画笔的形状应该是刚才我们定义的【纱巾】,在【画笔预设中】调整画笔各个参数,数值如下图所示。


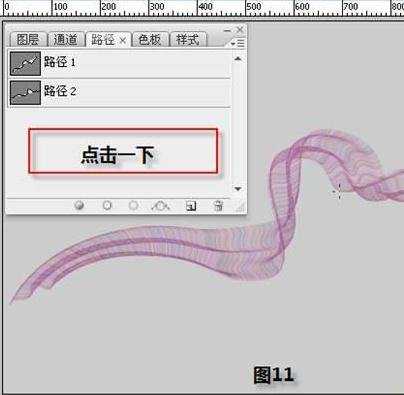
七、在【路径面板】中点击【用画笔描边】按钮,如【图10】所示,在【路径面板】空白处点击一下,可以隐藏【路径2】的显示,效果如【图11】所示。

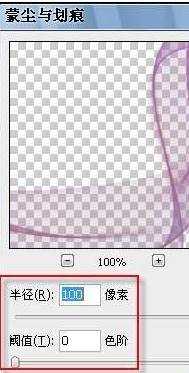
八、在菜单中选择【滤镜】→【杂色】→【蒙尘与划痕】,参数设置如【图12】所示,效果如【图13】所示。

九、在菜单中选择【图像】→【调整】→【色相和饱和度】,参数设置如【图14】所示,效果如【图15】所示。

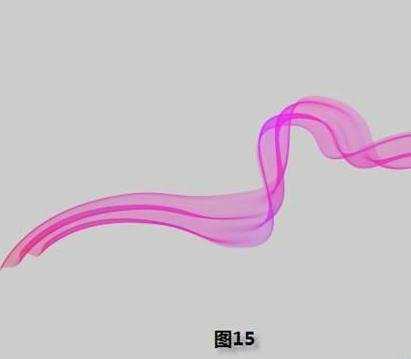
一条飘逸的纱巾就做好了,是不是很简单呢?在教程首页的效果图中,小编用同样的方法制作了另外一条纱巾,并将其图层混合模式调成了【滤色】,你也可以自由发挥制作出自己喜欢的效果。

photoshop丝带制作教程的评论条评论