
word怎么插入图片并进行设置
发布时间:2017-03-22 17:12
相关话题
我们都知道Word是办公的必备软件,但它不仅仅应有文字的排版,进行文字的操作,我们活动的一些图片,需要进行解说,并打印出来,依然要用到它,那么如何在Word中插入图片并进行图片设置呢?那么下面就由小编为您提供插入图片并设置的技巧,希望能帮助您。

插入图片并进行设置的步骤如下:
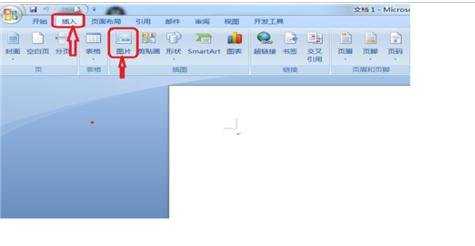
步骤1、打开Word,在工具栏中找到”插入“,单击一下,找到”图片“,再单击一下。
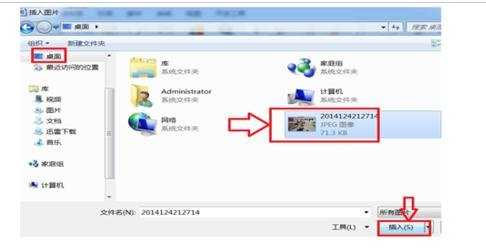
步骤2、找到所插入图片的存放位置,找到后,单击图片,再单击一下”插入图片“,所需要的图片就出现Word中了。
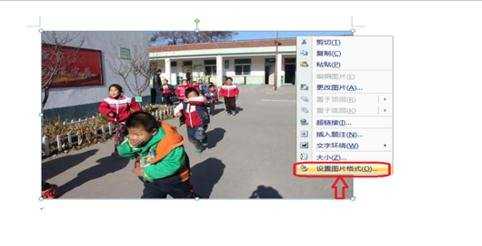
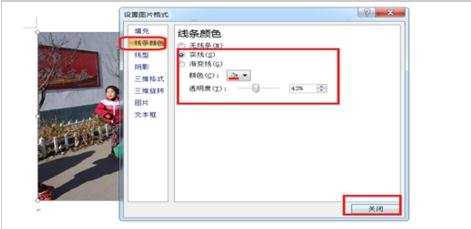
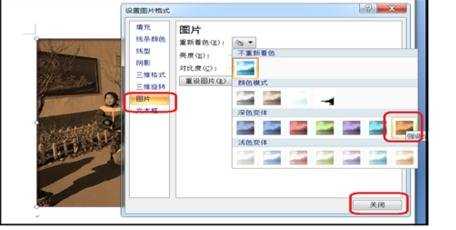
步骤3、鼠标指向图片,单击右键,找到设置图片格式,单击一下,可以对图片进行设置了,设置图片的线条颜色和图片的颜色了。
步骤4、在图片下方单击一下,光标闪动,可以进行文字输入,对图片进行说明。

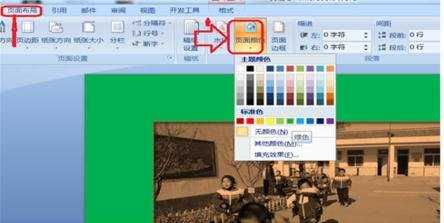
步骤5、找到页面布局,再找到页面颜色,可以对图片的背景颜色进行设置一下,选择自己喜欢的颜色。
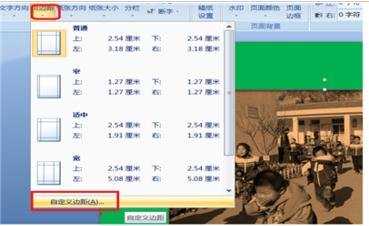
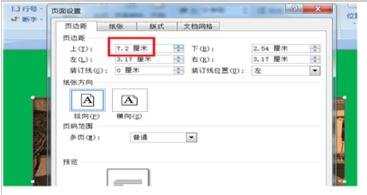
步骤6、如果感觉插入的图片比较靠上的话,可以进行页边距的设置,在工具栏中找到页面布局,找到页边距,单击一下,找到自定义,再单击一下,把页边距的上方设置的数值大一些就可以了。
word怎么插入图片并进行设置的评论条评论