
wpsppt如何设置艺术字
发布时间:2017-01-05 12:16
相关话题
我们知道wps演示是有艺术字这个功能的,那要怎样去设置呢?下面小编就为你提供wpsppt如何设置艺术字的方法啦!
wpsppt设置艺术字的方法:
1. 首先打开WPS演示,新建一个PPT文档。
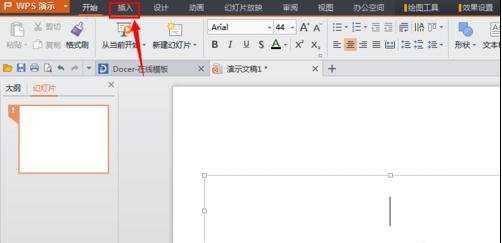
2 .在文档界面,点击上方的菜单栏中的“插入”
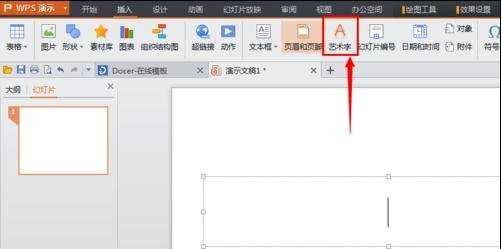
3 .这时候进入了了插入栏的界面,找到“艺术字”,然后点击它。
4 .这时候到了选择艺术字样式的界面,你可以选择你喜欢的一种样式,然后点击,当这个样式的周围出现黄色边框就说明选择成功了。
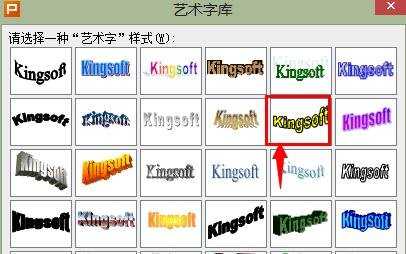
5. 选择成功后,不要忘了点击“确定”。
6 .这时候就要输入文字了,输入你想插入的文字,点击确定就可以了。
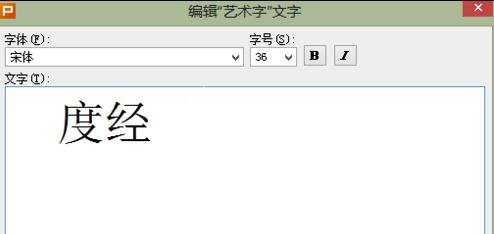
7. 这时候艺术字就已经插入到你的PPT中了。
设置艺术字步骤
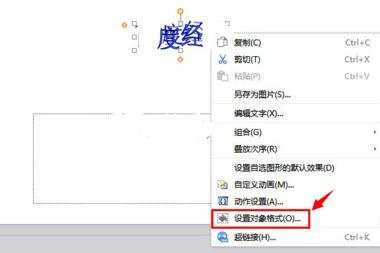
1.设置艺术字可以让你的艺术字与周围的环境融合,点击你需要设置的艺术字,当艺术字外层出现八个小方框时代表已经选定了。

2.然后右键点击,在出现的选择中选择“设置对象格式”。
3.进入到对象格式对话框后,你就可以对艺术字的内部填充颜色、边框、大小、位置等等进行设置了。
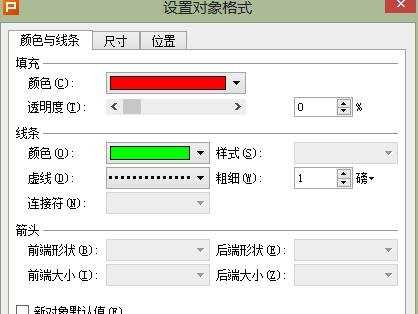
4.当一切设置好后点击“确定”,你的艺术字就变得十分漂亮了。

wpsppt如何设置艺术字的评论条评论