
photoshop花纹字体制作方法
发布时间:2016-12-11 13:56
相关话题
如何在PS中制作出美丽的花纹字呢?下面是小编为大家整理的photoshop花纹字体制作方法,仅供大家参考~
photoshop花纹字体制作方法如下:
首先,打开PS软件。

按“ctrl+o"键,打开一幅图像文件。

单击工具箱的”裁切工具“按钮,按住鼠标左键拖动选择范围,确定后按enter键即可。将图像所需要的纹理裁切下来,效果如下图。


选择“编辑”下的“定义图案”,弹出“图案名称”对话框,设置参数如下图。设置完成后,单击“确定”按钮,这时就将裁剪的图像纹理存储在样式栏中了。

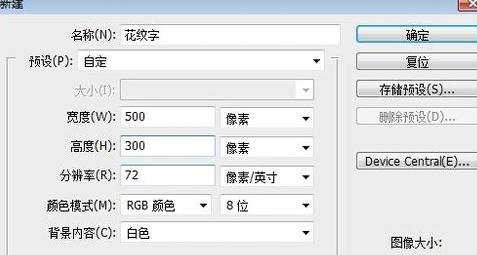
选择“文件”下的“新建”,弹出对话框,设置参数如下图,设置完成后单击“确定”按钮。
单击工具栏中的“横排文字蒙版工具”按钮,属性栏设置如下图。


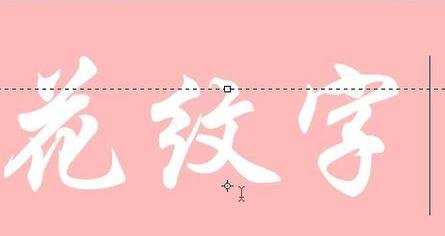
设置完成后,用鼠标在新建图像中创建文字的选区,然后输入“花纹字”三个字。

单击工具箱中的“油漆桶工具”按钮,它的属性栏设置如下图。


设置完成后,在图像中的文字选取内单击鼠标,效果如下图。

按“ctrl+D"取消选取,最终效果如图。

photoshop花纹字体制作方法的评论条评论