
Word中2003版进行设置页眉边距界的操作方法
发布时间:2017-06-13 18:01
相关话题
word作为常用的办公软件,我们常常用它来处理一些资料,需要对打印出来的文档进行一个装订,为了避免装订好后页眉文字被覆盖,今天,小编就教大家在Word中2003版进行设置页眉边距界的操作方法。
Word中2003版进行设置页眉边距界的操作步骤
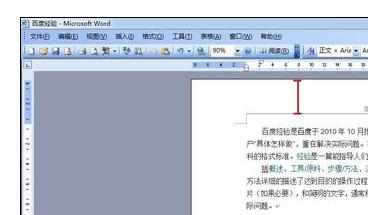
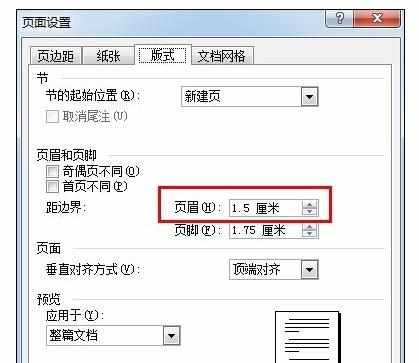
一、打开文档
下图所呈现的就是一个设置前的距边界展示。
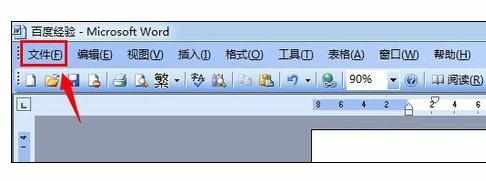
二、选择“文件”
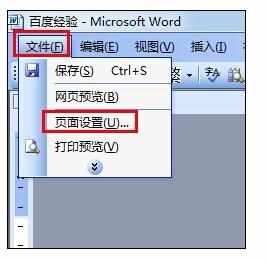
三、选择“页面设置”
在“文件”的下拉菜单中即可看到
四、选择“版式”
在弹出的“页面设置”对话框中进行选择。
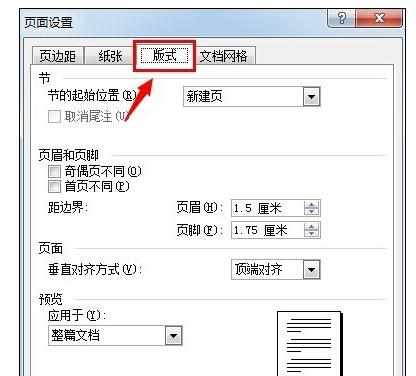
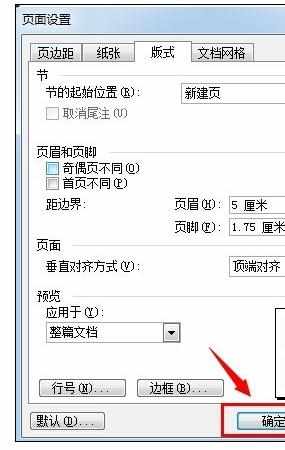
五、设置页眉的距边界
例如:将页眉的距边界设置为5厘米
六、确定
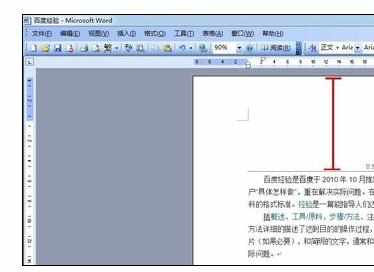
七、查看效果
在下图中我们可以看到,页眉的距边界已经被设置为5厘米。
Word中2003版进行设置页眉边距界的操作方法的评论条评论