
photoshop如何制作图片的边框
发布时间:2017-04-17 11:23
相关话题
很多照片外围都是有一层边框的,我们可以在photoshop中制作这种效果。下面是小编带来关于photoshop如何制作图片的边框的内容,希望可以让大家有所收获!
photoshop制作图片的边框的方法
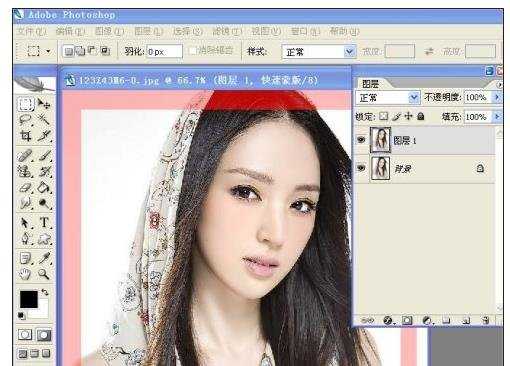
打开一张图片、ctrl+j复制图层1、用矩形选框工具在图片上画一个比图片小缩进
半寸左右的矩形、然后左键点击Q快速蒙版工具。下图:
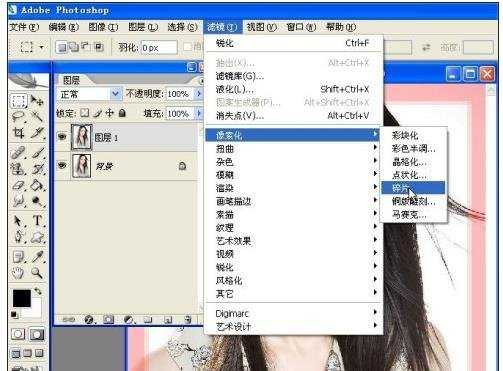
点击滤镜-像素化-碎片两次。下图:
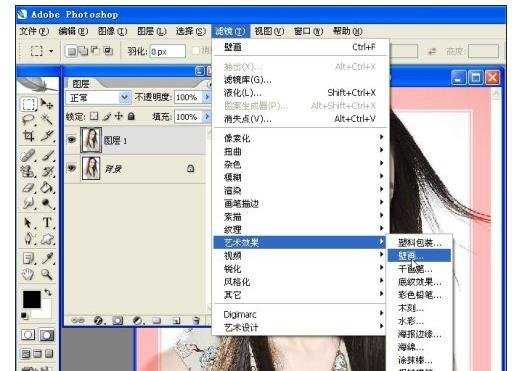
点击艺术效果-壁画设为0、0、3、在碎片一次。下图:
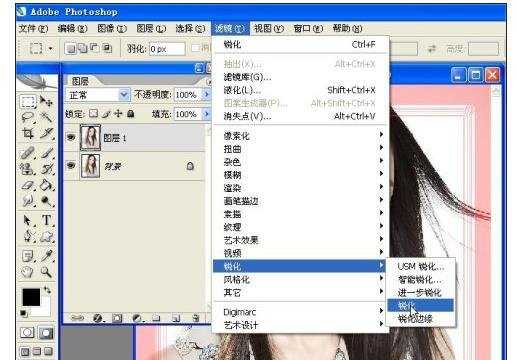
滤镜锐化6次。(目的加深边框)下图
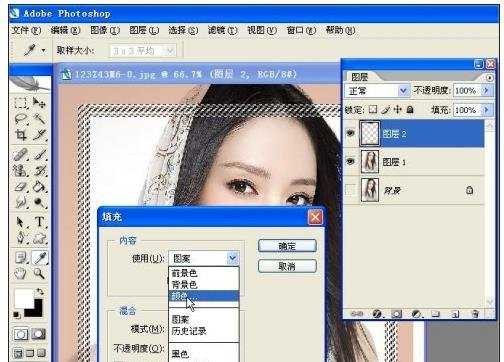
再次点击Q退出蒙版、ctrl+shift+I反选、填充自己喜欢的颜色、这里选的皮肤的
颜色、确定后ctrl+j复制图层2。下图
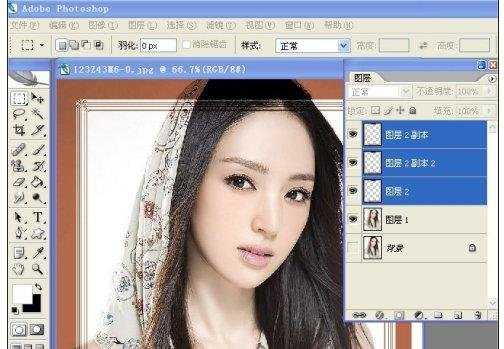
复制图层2两个副本、分别把两个副本都设为正片叠底。下图:
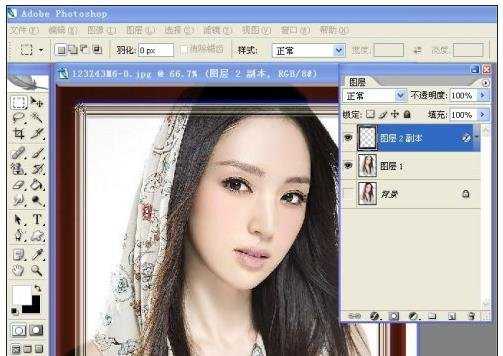
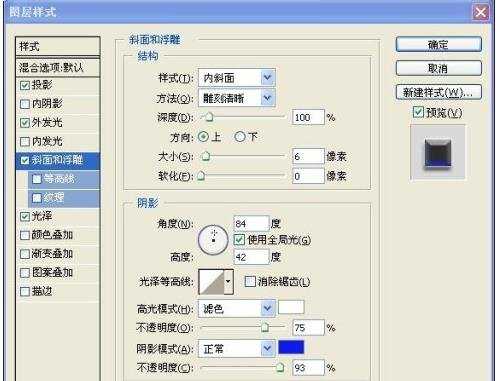
合并图层。再添加点立体感、点击图层下方的斜面和浮雕、样式、方法、光泽、
角度参照下图添加、到此效果出来了。下图:
还可以继续在相框中做简易相框。下图:

photoshop如何制作图片的边框的评论条评论