
photoshop制作龙珠的教程
发布时间:2016-12-30 15:28
相关话题
绘制之前我们先分析龙珠的材质和受光,然后找类似材质的实物参考,找出明暗部,然后用素描的方法把这些都合理的画出来即可。下面是小编为大家整理的photoshop制作龙珠的教程,仅供大家参考~
photoshop制作龙珠的教程如下:
最终效果

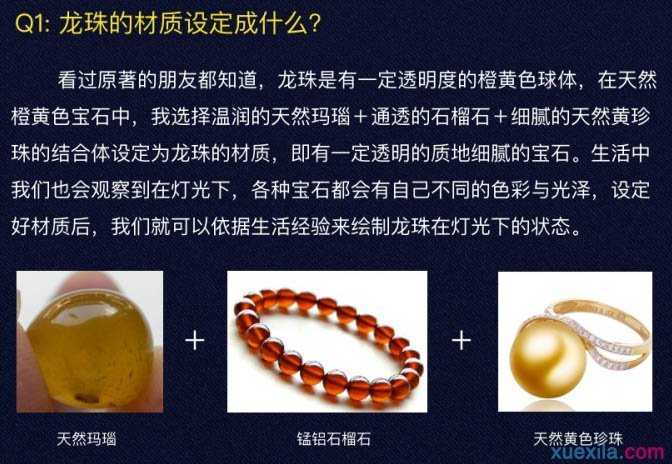
Q1:龙珠的材质设定。
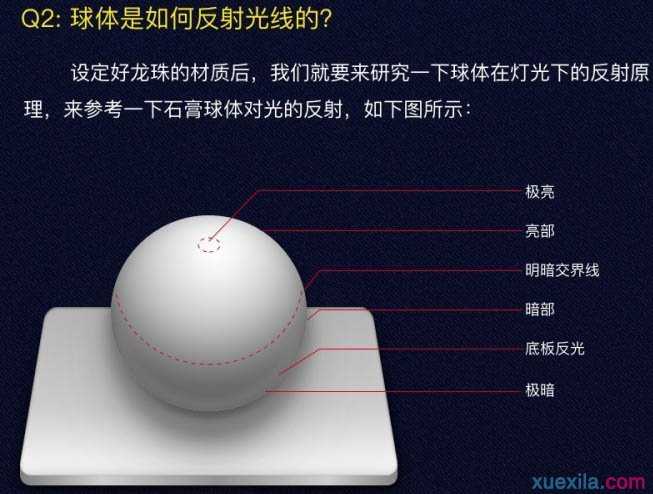
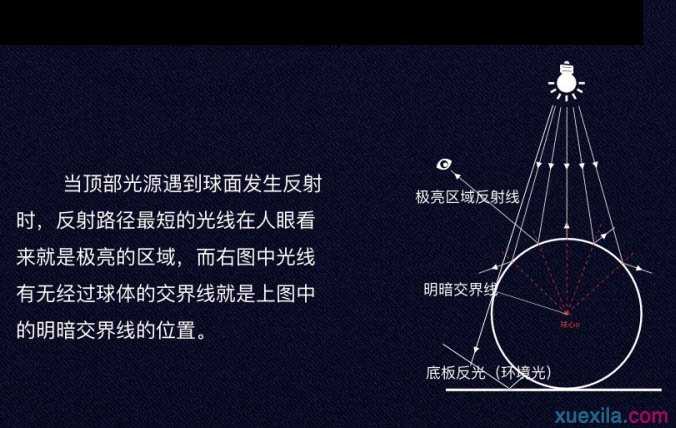
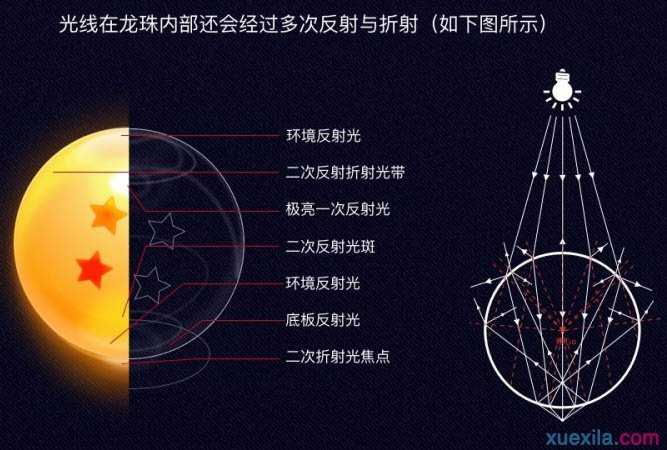
Q2:龙珠是如何反射光线的。
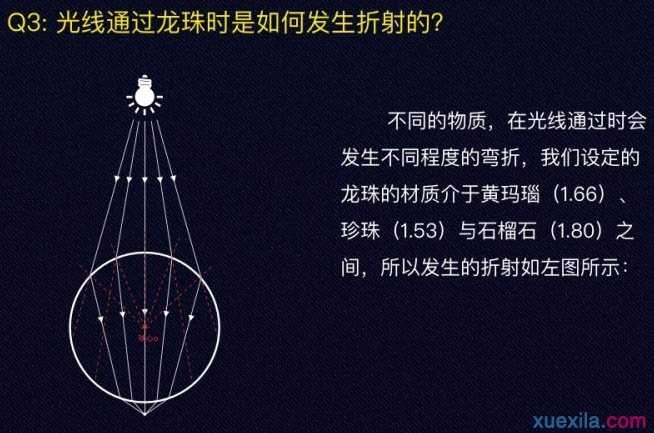
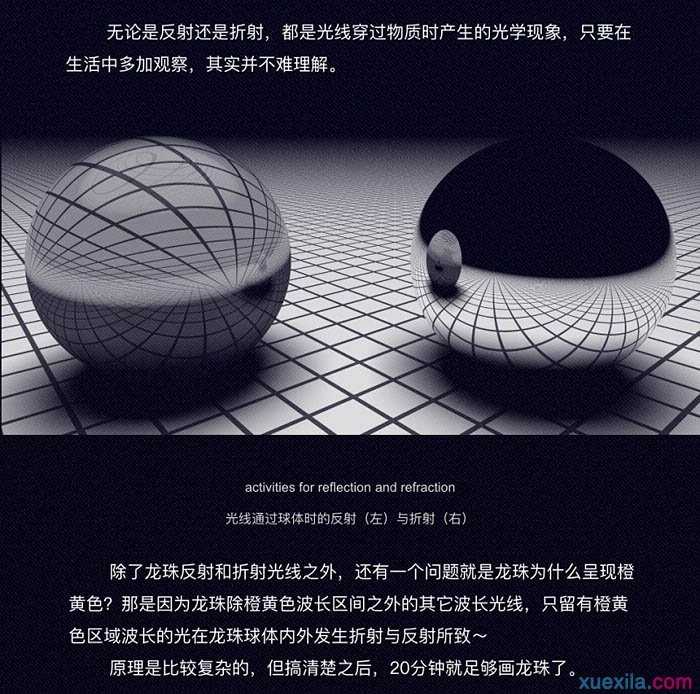
Q3:光线通过龙珠时是如何发生折射的。
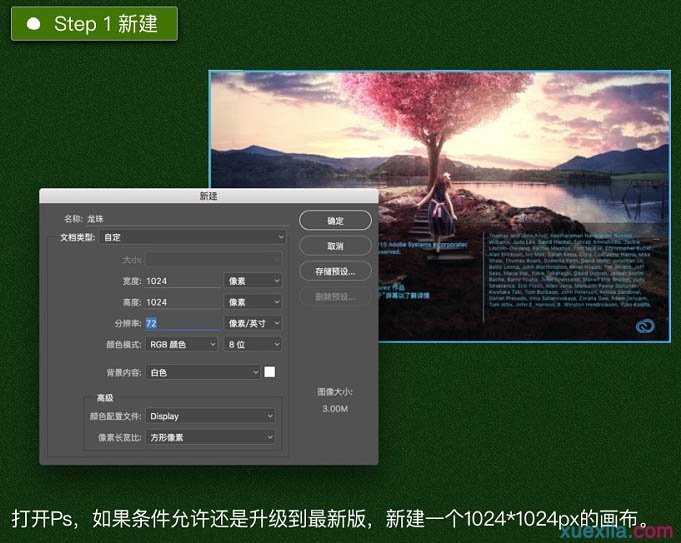
一、新建:
打开PS,新建一个1024 * 1024的画布。
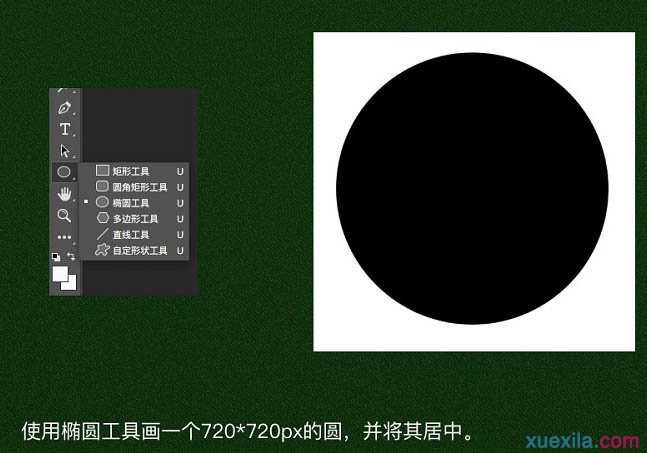
使用椭圆工具画一个720 * 720的圆,并将其居中。
二、色泽:
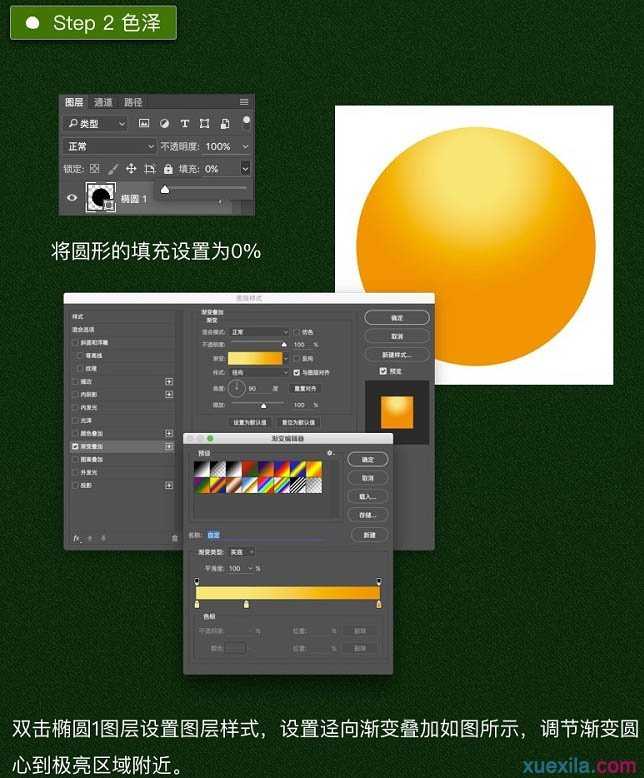
双击椭圆1图层设置图层样式,设置径向渐变叠加如图所示,调节渐变圆心到极亮区域附近。
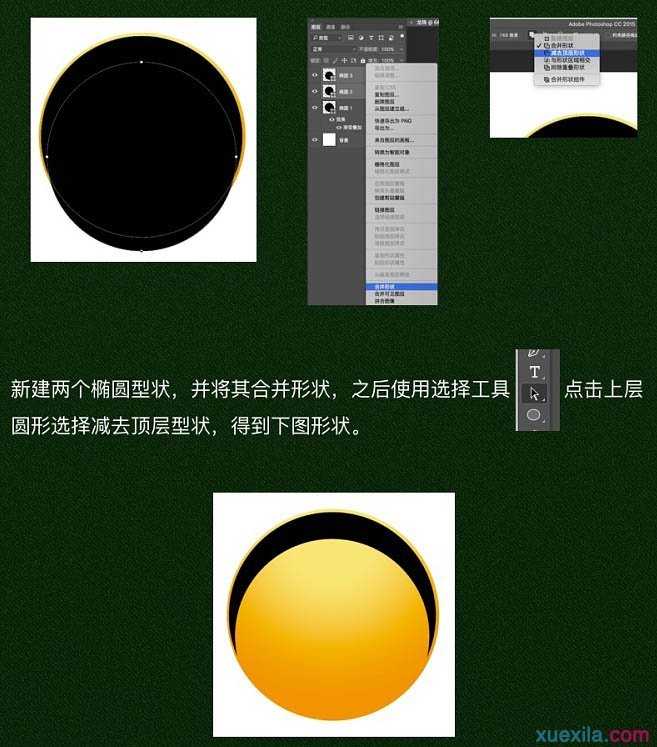
新建两个椭圆形状,并将其合并形状,之后使用选择工具,点击上层圆形选择减去顶层形状,得到下图形状。
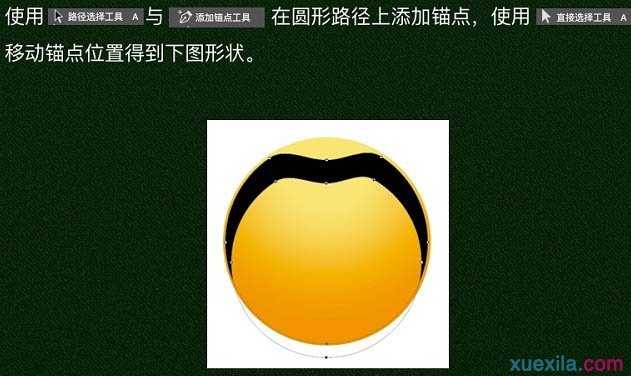
使用路径选择工具与添加锚点工具在圆形路径上添加锚点,使用直接选择工具移动锚点位置得到下图形状。
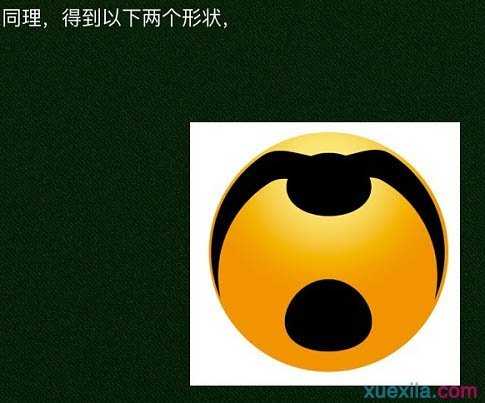
同理,得到以下两个形状。
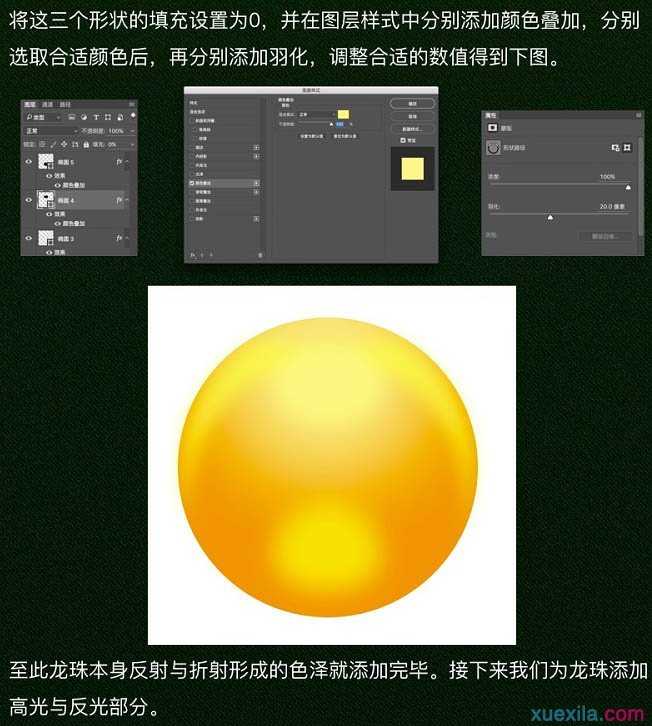
将这三个形状的填充设置为0,并在图层样式中分别添加颜色叠加,分别选取合适颜色后,再分别添加羽化,调整合适的数值得到下图。
photoshop制作龙珠的教程的评论条评论