
photoshop如何制作横幅
发布时间:2017-04-09 08:36
生活中大家应该经常看到一些横幅的,这些横幅是我们常见的东西,我们也能用photoshop制作。其实这个也不算太难,下面就让小编告诉你photoshop如何制作横幅的方法,一起学习吧。
photoshop制作横幅的方法
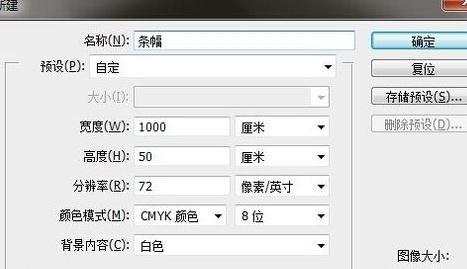
打开ps软件,在菜单栏中点击 文件——新建,设置需要的长度和宽度,颜色模式选择CMYK,点击确定。
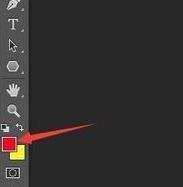
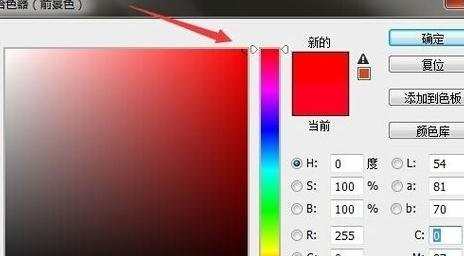
新建图层,选择当前图层后填充背景色为红色。方法:单击前景色,选择红色,确定。alt+delete 当前图层填充为前景色。
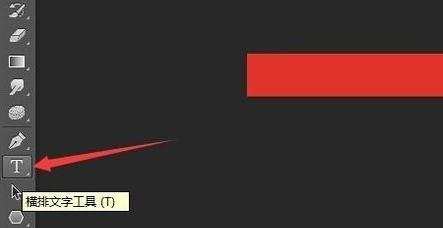
点击文字工具,在上方选择字体 字号 颜色,在红色背景上单击一下,输入文字,ctrl+回车 确定。
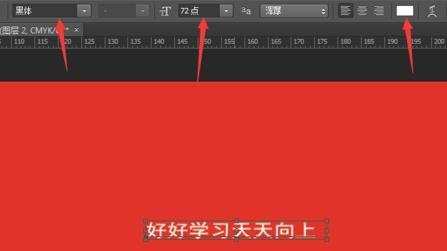
选择文字图层,ctrl+t 改变文字大小,并移动到合适位置。


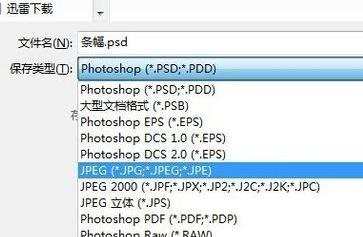
制作完成后,文件,另存为,文件格式改为jpg或者bmp。
photoshop如何制作横幅的评论条评论