
如何掌握ps3.0的抠图方法
发布时间:2017-05-29 14:09
其实ps3.0中抠图的工具也有不少,并且都比较好掌握。很多刚学习的新手小伙伴可能还不知道,下面是小编带来关于如何掌握ps3.0的抠图方法的内容,希望可以让大家有所收获!
掌握ps3.0的抠图方法
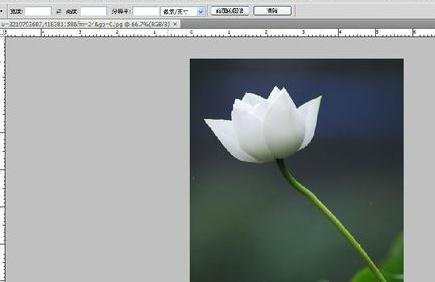
我们打开PHOTOSHOP,打开一张图片,如图
我们选择工具栏上的钢笔工具
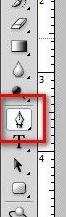
在顶端我们可以看到钢笔工具也有多样选择,有钢笔工具,自由钢笔工具。我们一般就选钢笔工具。

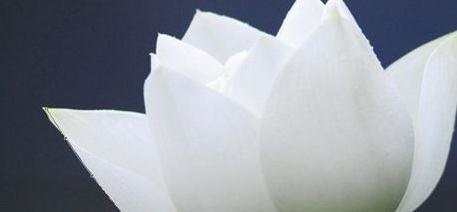
我们在用钢笔工具描边的时候如果想抠图抠得精度高些,可以将图像放大些。钢笔工具描边时要活用CTRL键进行曲线的修证,以及Alt键可以快速增加节点进行快速描边。当勾边错误时可以用DEL键进行删除一个节点。
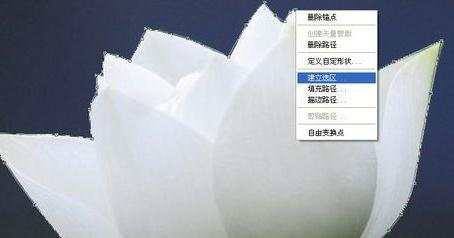
当全部描完后,我们可以右击建立选区。
弹出对话框,我们可以选羽化一下边,我们选3。

点确定后,我们已经选好。我们如果想把这图拷出来我们不按CTRL+C,如果想在这文件中单独留下这荷花,我们可以按CTRL+SHIFT+I。进行反选。

我们按DEL进行删除选择区域的外部文件。
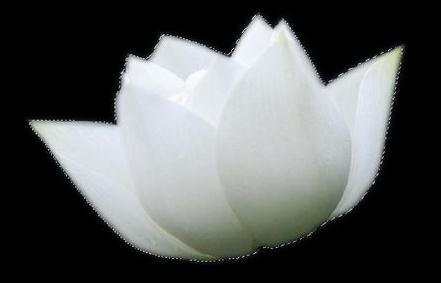
我们按CTRL+D,取消选择区域。完成。

如何掌握ps3.0的抠图方法的评论条评论