
photoshop爆炸字怎么做
我们经常会看别人家的店招,促销公告都非常的漂亮,哈哈,没关系的,今天小编手把手的教大家用PS作出自己喜欢的爆炸字,可以用在图片上吸引眼球哦。。等等之类的。嘿嘿,下面都是图文对照的哦,不管是新手还是刚学PS不久的朋友,都可以学会的哦!
photoshop爆炸字怎么做
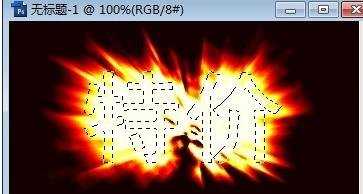
好了,不多说了,我们先看一下面的效果图吧!

一.首先我们打开ps软件,(布布用的是pscs3的版本哦)
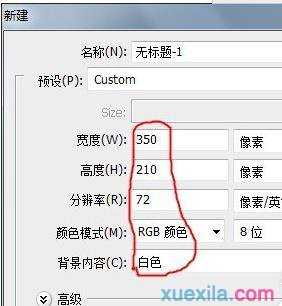
二.新建一个大小为“350像素,210像素”背景色为白色的文件。如下图所示设置。(也可以自己打开自己宝贝的图片哦)
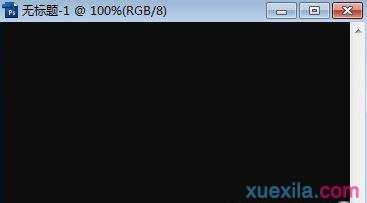
一.在中文模式下按“D”键,设置默认的前景色和背景色,按“Alt+Delete”组合键将背景填充为黑色。如图所示。
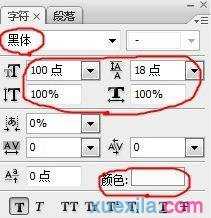
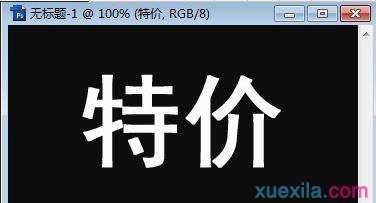
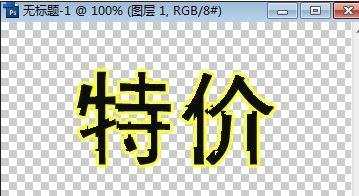
三.在工具箱单击选择文字工具,在图层上输入“特价”,全选后作下图所示的设置.
。
(标注的是需要注意的哦)
二.在“图层”面板中右击文字图层,在弹出的快捷菜单中选择“栅格化文字”将其变为普通图层。
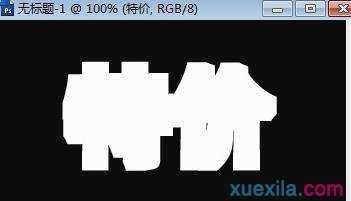
三.按住“Ctrl”的同时,在“图层”面板中单击文字层。效果如下图。

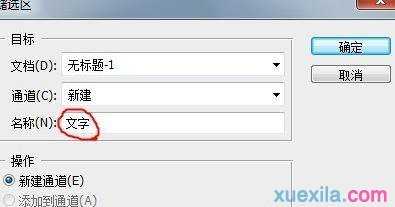
四.选择“选择——存储选区”菜单,打开“存储选区对话框”,在“名称'文本框中输入”文字,如下图所示。
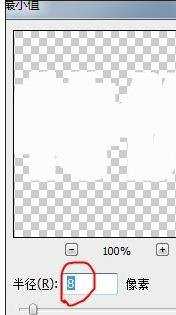
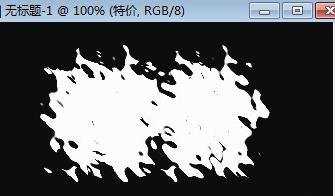
五.按“ctlr+D”取消选区。选择“滤镜”——“其他”——“最小值”菜单,在打开的对话框中设置如下图所示的设置
八.选择“滤镜”——“扭曲”——“波纹”菜单,在打开的对话框中设置如下图所示的设置。
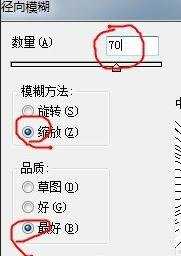
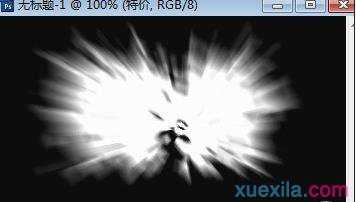
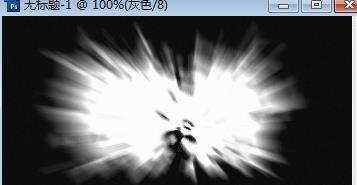
十.选择“滤镜”——“模糊”——“径向模糊”菜单,在打开的对话框中设置如下图所示的设置。
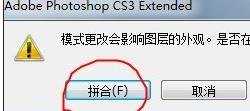
十.选择“图像”——“模式”——“灰度”菜单,在打开的警告对话框如图所示,单击“拼合”按钮。(会出现几个警告对话框,只要默认的就好)
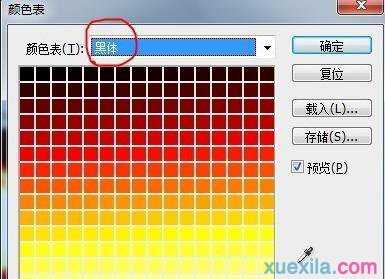
十一.选择“图像”——“模式”——“索引颜色”菜单。
十二.选择“图像”——“模式”——“颜色表”菜单,在打开的“颜色表”对话框中设置如下图所示的设置即可。
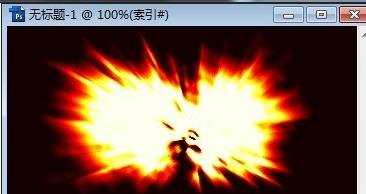
十三.选择“图像”——“模式”——“RGB颜色”菜单。
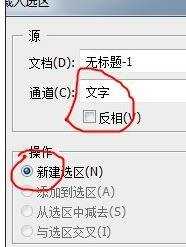
十四.选择“选择”——“截入选区”菜单。在弹出的对话框中设置如下图所示的设置。
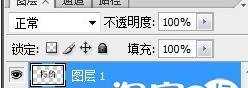
十五.单击“图层”面板上的“创建新的图层”按钮

,新建“图层1”。按“Alt+Delete”组合键将选区填充为黑色。如图。
十.按“Ctrl+D”组合键取消选区。
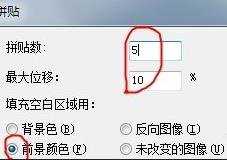
十一.选择“滤镜”——“风格化”——“拼贴”菜单,在对话框中设置如下图所示的参数。
十二.暂时隐藏背景图层。
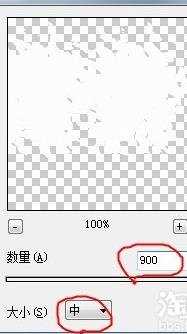
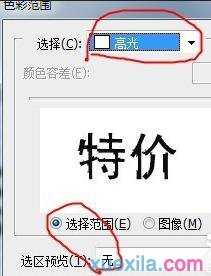
十三.选择“选择”——“色彩范围”菜单,在对话框中设置如下图所示的设置。
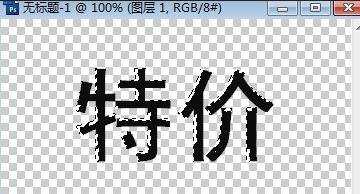
二十.按“Delete”键删除选择的白色区域,然后显示背景层,按“Ctrl+D”组合键取消选区。
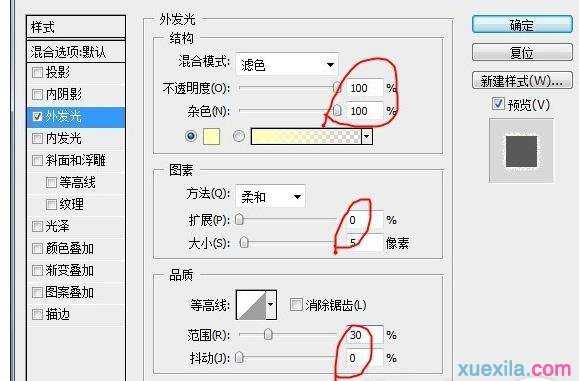
二十一.双击“图层1”打开“图层样式”对话框,单击选择“外发光”,设置数据如下图所示。
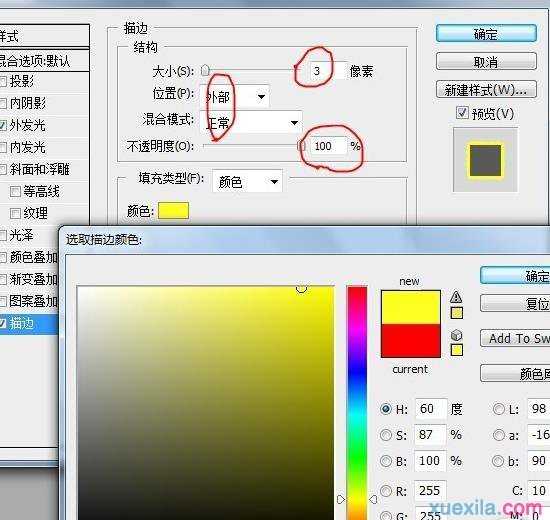
二十二.双击“图层1”,打开图层样式对话框,单击选择“描边”。记得哦,设置描边颜色为“#FFFF20”,其他的均为默认。如下图所示。
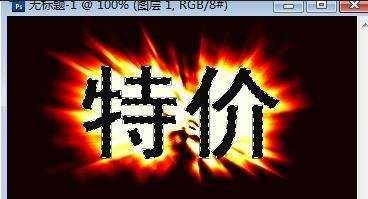
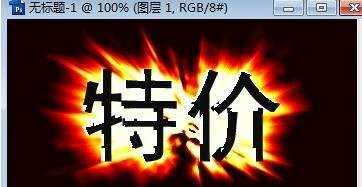
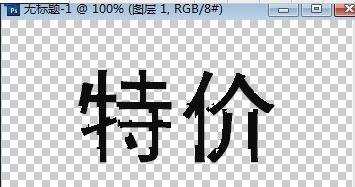
二十三.最后一步,记得把刚才第十八步隐藏的背景图层给还原回来。这样的话我们的爆·炸字做好啦!如图。
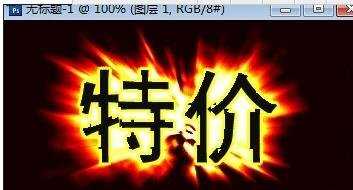
好了,到这里我们的爆炸字就完成了,其实根据这个可以做出不同颜色的爆炸字,特别抢眼。。
photoshop爆炸字怎么做的评论条评论