
如何用photoshop绘图_photoshop绘图方法
发布时间:2017-06-02 13:13
想要绘图的话用photoshop也可以,因为photoshop中有很多工具都可以画图。其实这个也不算太难,下面就让小编告诉你如何用photoshop绘图的方法,一起学习吧。
用photoshop绘图的方法
1、新建一个大小适当的文档。找两张色彩张扬的图片作素材,作者用的是铅笔和水果。把素材拉进工作文档,放好位置。

2、现在使用钢笔工具画曲线。选择钢笔工具(P)在工具属性栏勾选路径。从铅笔的一段画向水果的一段。如下图:

3、现在我们把刚才用钢笔工具(P)描绘好的曲线描边,上颜色。首先设置好笔刷选择 笔刷工具(B),设置笔刷大小 6PX 硬度100% 。新建一层,回到钢笔工具(P),单击右键—选择描边路径—不勾选模拟压力,得到如下图:

4、给我们的曲线增添一些细节。如像液滴效果那些,这个比较简单,画好线条—涂抹工具(或变形工具)–笔刷工具画上小液滴如下图:


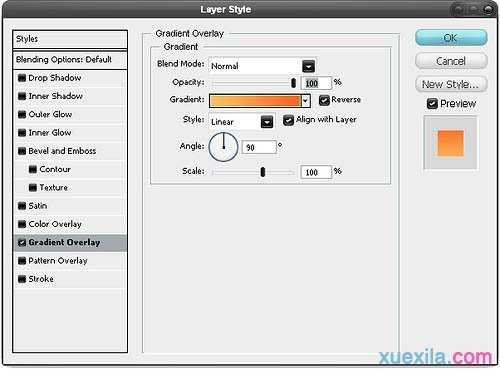
5、给曲线上颜色,选择曲线图层—在图层上单击右键—混合选项—渐变叠加。Tip: 在颜色的选取上作者是使用吸管工具(I),在铅笔一段选取一种颜色,在水果段选取一种颜色,这样做的效果可以使整体和谐,统一。
6、重复以上步骤,继续完成其他的线条,颜色,形状可以自由发挥了!
7、为了更美观,作者又在曲线上添加了琐碎的花纹上去。效果确实不错哈。(没有花纹笔刷的可以去网上下载)


8、接着完善其他细节:

9、下面是作者按自己的想法做出来的,步骤还是重复那些。大胆的去使用各种素材去做吧。


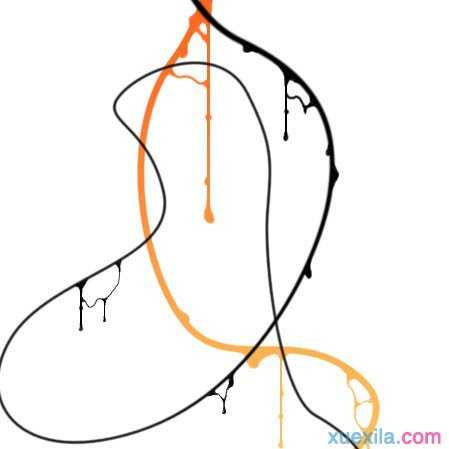
10、添加液滴,作者在铅笔段分别做了不同颜色的液滴。液滴笔刷可以去网上下载。

11、作者把黑色的液滴滴在黄色曲线上。


12、在曲线末端,添加一些树枝的形状。


13、最后一步,添加背景纹理,背景素材随处都可以找到,进工作文档,放好位置,改变混合模式—正片叠底—不透明度50%,完成最终效果。

如何用photoshop绘图_photoshop绘图方法的评论条评论