
photoshop制作动图的方法
发布时间:2017-05-18 11:50
相关话题
hotoshop不仅仅可以画图,我们还能制作动图,接下来就是小编精心整理的一些关于photoshop制作动图的方法的相关资料,供你参考。
photoshop制作动图的方法
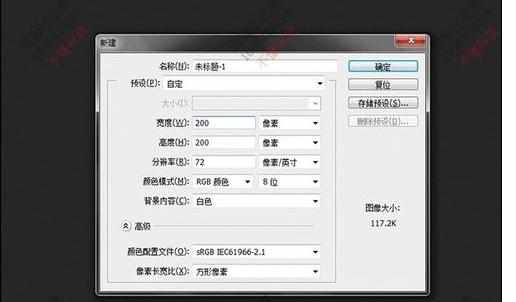
新建一张空白图层
快捷键:CTRL+N
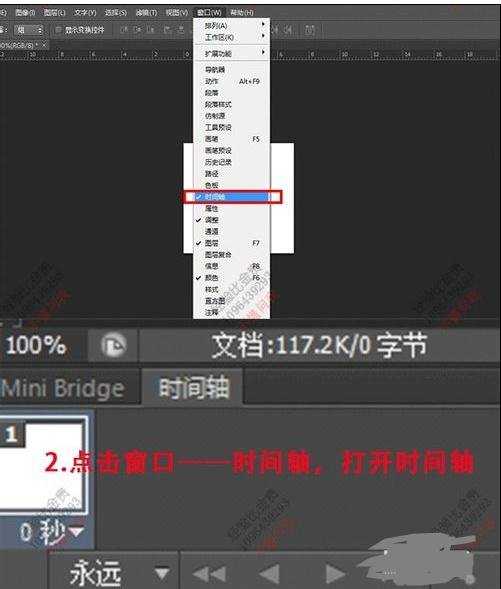
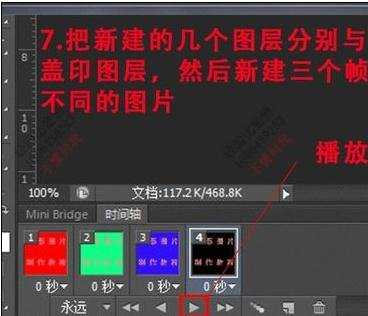
打开时间轴点击窗口——时间轴,打开时间轴
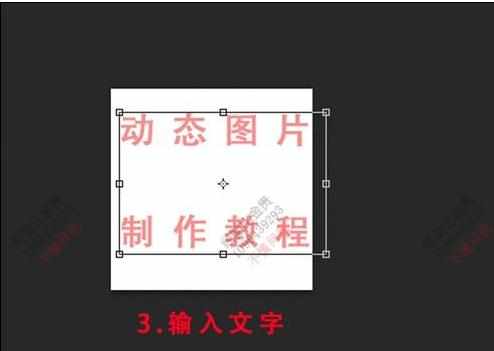
输入文字在空白图层上面输入文字
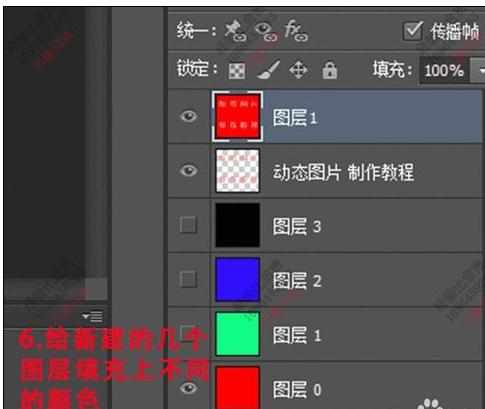
栅格化文字图层栅格化文字的作用是把文字图层变成普通图层

再新建几个图层点击如图所示的新建按钮,新建几个空白图层

填充空白图层我们给新建的几个空白图层填充上不同的颜色
盖印图层把新建的几个图层分别与文字图层盖印图层,然后我们就得到四个新的盖印图层,把四张图片设置在时间轴上面
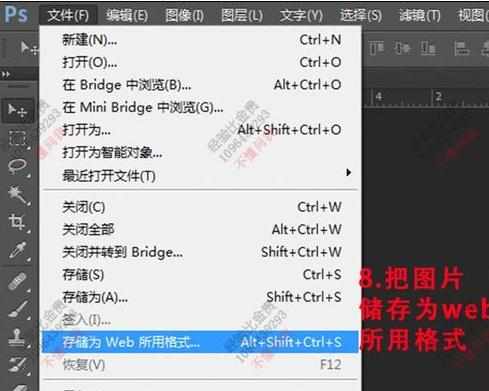
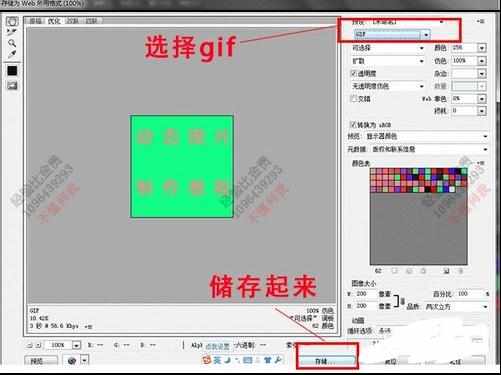
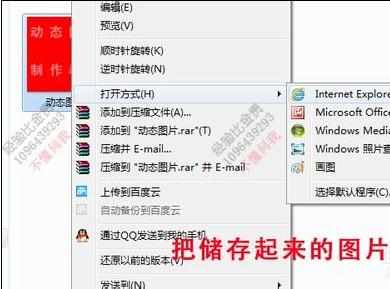
保存图片点击文件——储存为web所用格式,选择gif格式储存。然后把得到的动态图片用IE打开就可以看到效果了。
photoshop制作动图的方法的评论条评论