
如何使用wps 设置水印
发布时间:2017-05-07 17:03
相关话题
主流的办公软件除了微软的office系列,但是它的一些功能你知道多少呢?下面小编教大家在WPS中为文档添加水印 。
wps 设置水印方法
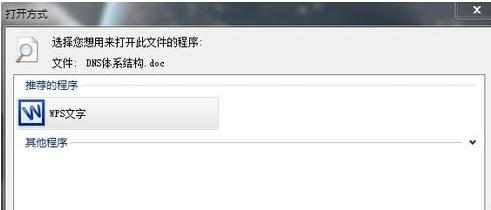
首先,用wps打开需要添加水印的目标文档。如果不是wps关联的文档,在打开方式中选择默认打开程序为“WPS文字”
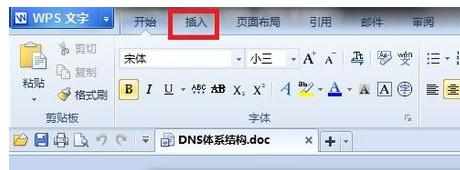
看到主界面最上方的分类功能选项栏,点击“开始”右边的“插入”选项卡
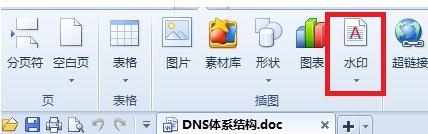
这时就会切换到插入选项卡,下方的插图栏就会弹出常用的插入项,根据需要我们点击选择“水印”
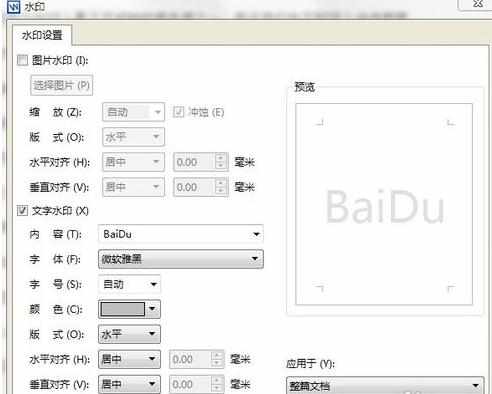
WPS提供了一些常用的预设水印,不一定合适每个用户,我们点击自定义水印中的添加按钮设计自己的水印
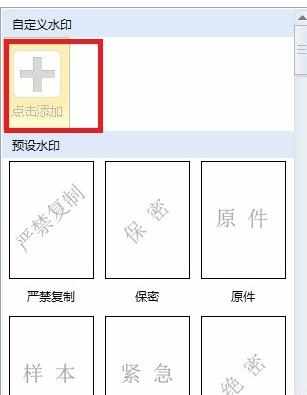
在水印设置的窗口中,有图片水印和文字水印两种,设置都比较简单而且全面,根据自己的需要选择即可,这里设置水印的字体内容为“BaiDu”。设置完成点击下方的“确定”
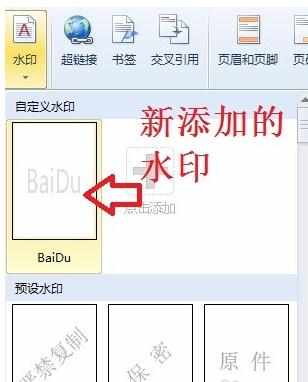
这样就完成了自定义水印的添加。重复步骤3和4的操作之后,可以看到自定义水印中已经有我们设置好的样式了,要使用很简单,点击该水印即可
效果如下,最后,别忘了点击保存按钮或者按ctrl+s保存添加了水印的文档,添加水印的操作到此结束

如何使用wps 设置水印的评论条评论