
怎么设置word文档结构图
发布时间:2016-12-02 21:49
相关话题
当我们编辑数据文字量巨大的文档的时候,我们需要把握整个文档的脉络,对整篇文档进行修改。这就需要运用文档结构图快速定位文档。那么下面就由小编给大家分享下设置word文档结构图的技巧,希望能帮助到您。
设置word文档结构图的步骤如下:
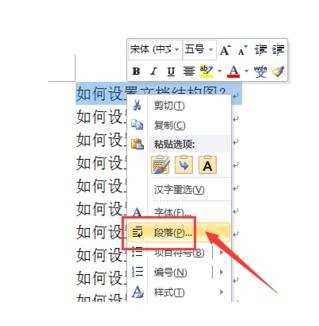
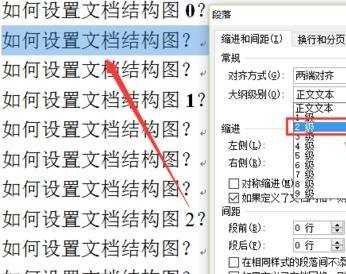
步骤一:首先选择需要设置为文档结构图显示的大标题的文字,单击鼠标右键,选择“段落”选项,进行编辑。
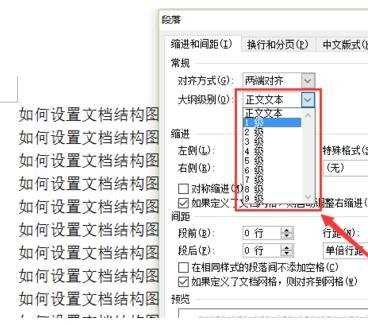
步骤二:在段落中,将其“大纲级别”设置为“1级”,如图所示。
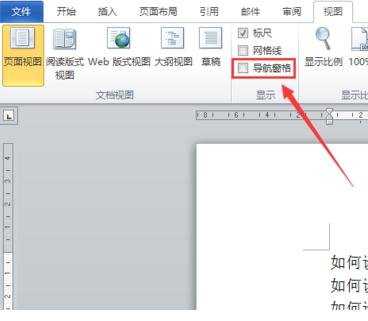
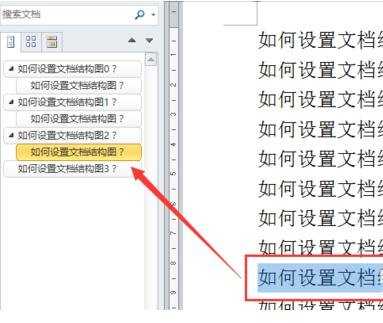
步骤三:接着,点击上方菜单栏“视图”-“导航窗格”选项前面的对钩,如图所示。
步骤四:接着,我们就能看到刚刚设置的“1级”标题显示在左侧了。
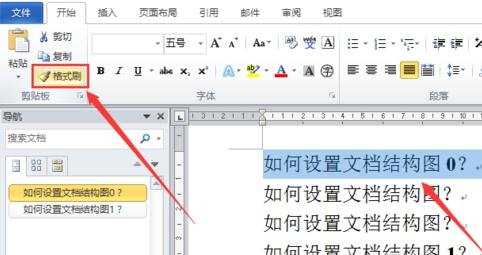
步骤五:这时,选中刚刚设置的“1级”标题,双击菜单栏“开始”-“格式刷”工具,将其它需要设置为“1级”标题的文字选中即可。
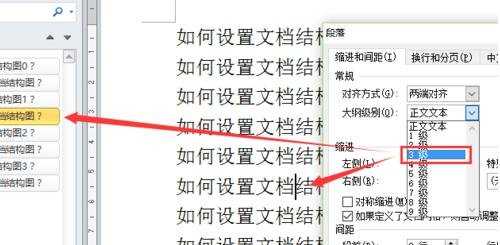
步骤六:用同样的方法,将文中需要设置为“2级”标题的文字选中,设置其大纲级别为“2级”即可。
步骤七:选中刚刚设置的“2级”标题,双击菜单栏“开始”-“格式刷”工具,将其它需要设置为“2级”标题的文字选中即可。
步骤八:最后,按照上述方法设置文中的“3级”标题,即可看到整个文档结构图中文档的结构脉络了。
步骤九:如图所示,即可看到左侧的文档脉络结构了。

怎么设置word文档结构图的评论条评论