
word怎么给图片加水印
发布时间:2016-11-06 14:35
相关话题
很多朋友喜欢拍一些照片,做一些图片上传到网上,结果会很容易被别人盗用。为防止别人盗用,可以在图片上加入自己的水印。那么下面就由小编给大家分享下word给图片加水印的技巧,希望能帮助到您。
word给图片加水印的步骤如下:
步骤一:选择插入菜单中 文本框 横排
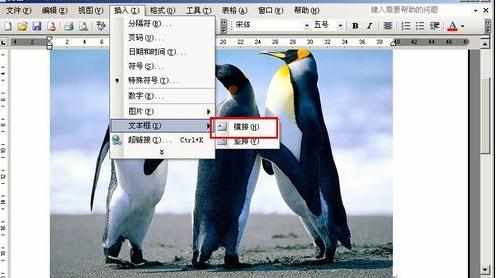
步骤二:插入后编辑好要插入的文字内容.

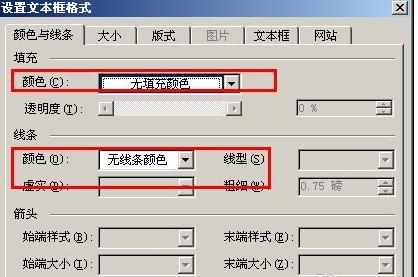
步骤三:右键文本框,选择设置图片格式.

步骤四:格式中设置填充、线条均为无颜色。
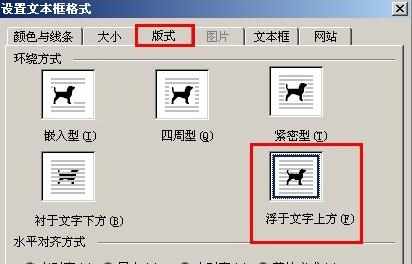
步骤五:设置版式为 浮于文字上方
步骤六:将文本框移动到图片中合适位置

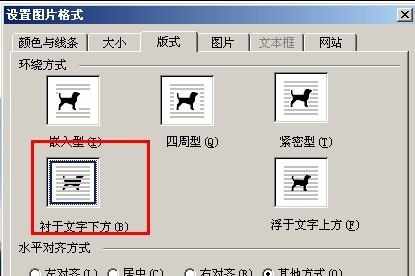
步骤七:选择第一张图片,右键选择 设置图片格式.
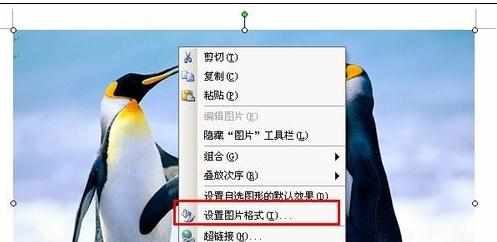
步骤八:设置图片格式中版式为衬于文字下方.
步骤九:按住ctrl,选中图片与文本框.

步骤十:按右键 从弹出的菜单中选择组合 组合选项.

步骤十一:文字形式的LOGO这就制作完成了,效果如下:

word怎么给图片加水印的评论条评论