
photoshop怎样抠取头发丝
发布时间:2017-06-06 13:21
头发丝是抠图比较难攻克的一点,所幸有一些技巧可以使用。但是很多同学还不太清楚。那么接下来下面是小编整理的一些关于photoshop怎样抠取头发丝,供您参阅。
photoshop抠取头发丝的方法
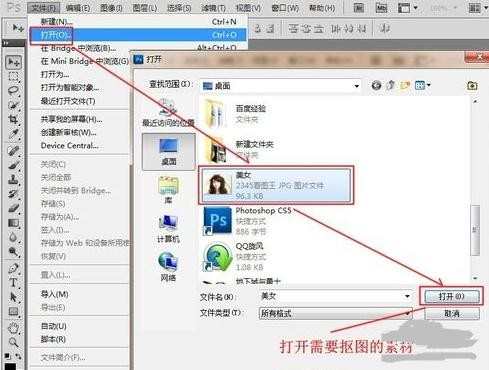
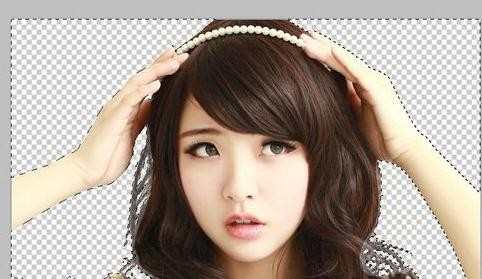
开启PS5软件,打开需要抠图的素材。(文件>打开>点选需要抠图的素材>打开)
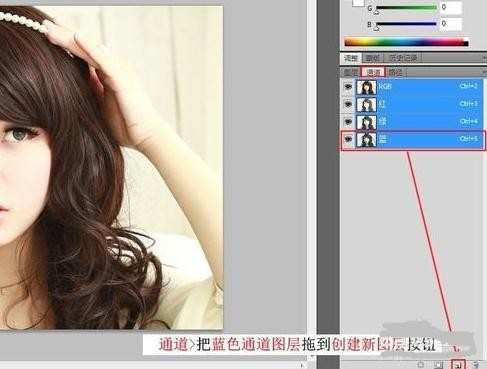
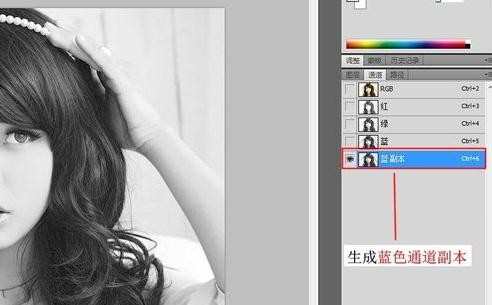
通道>把蓝色通道图层拖到创建新图层按钮>生成蓝色通道副本。
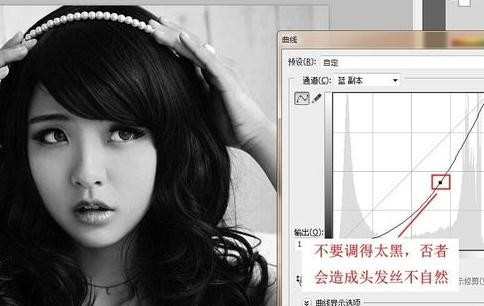
选择蓝副本通道,图像>调整>调出曲线。(或者按Ctrl加M键)
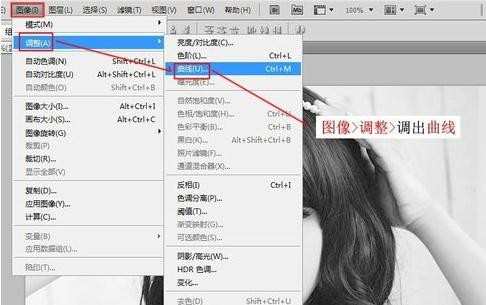
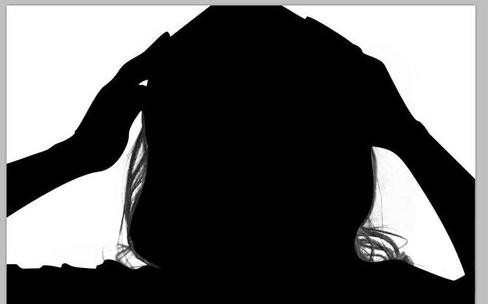
曲线不要调得太黑,否者会造成头发丝不自然。
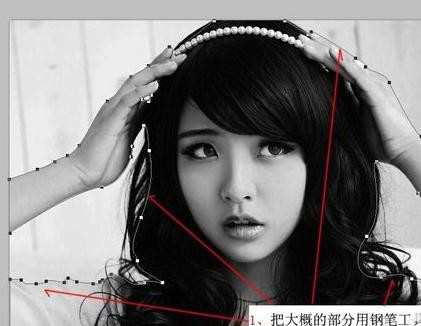
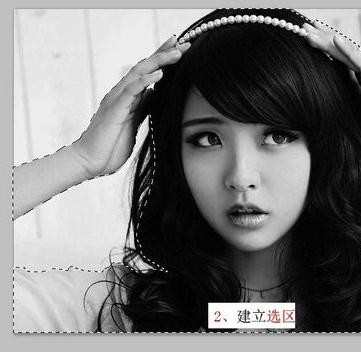
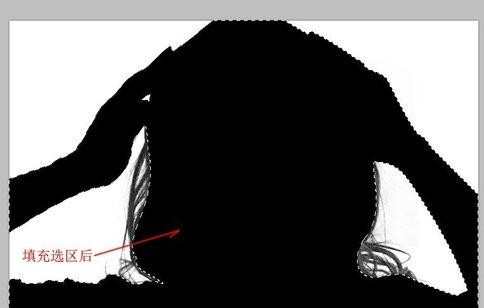
把大概的部分用钢笔工具勾画出,再建立选区。
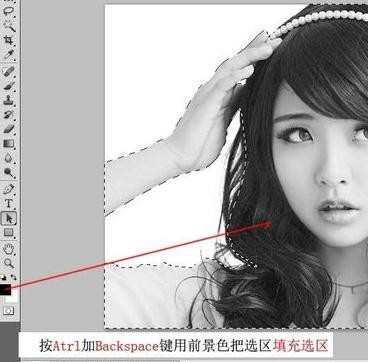
按Atrl加Backspace键用前景色把选区填充选区。
填充选区后,按Ctrl加D取消选区。
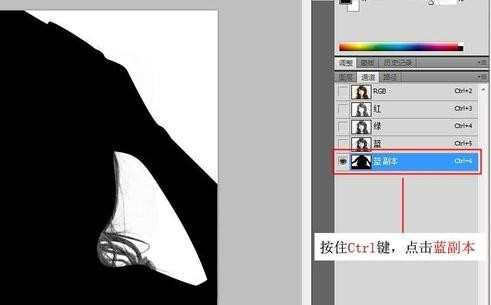
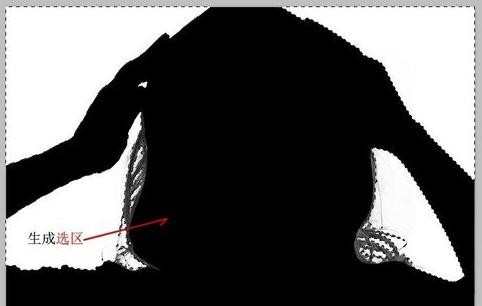
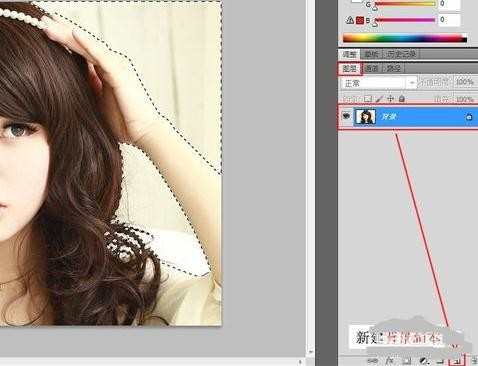
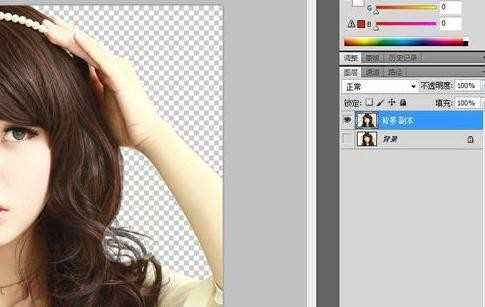
按住Ctrl键并点击蓝副本,生成选区。
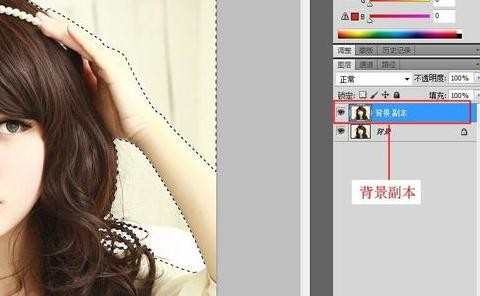
选择图层面板,新建背景副本。
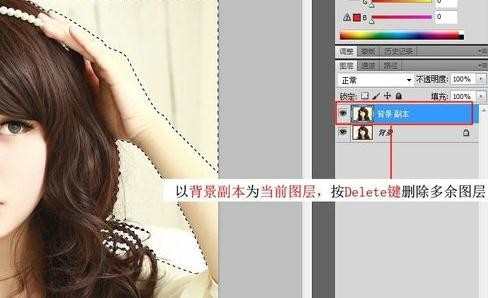
以背景副本为当前图层,按Delete键删除多余图层。
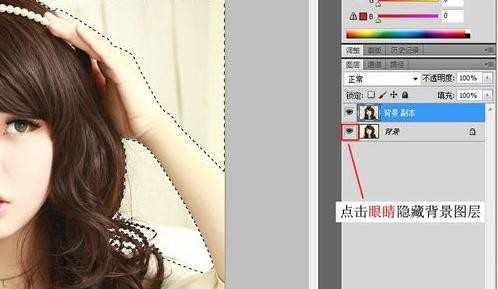
点击眼睛隐藏背景图层。
如何处理半透明的头发,用背景副本复制出背景副本2、3,半透明头发就处理好了。
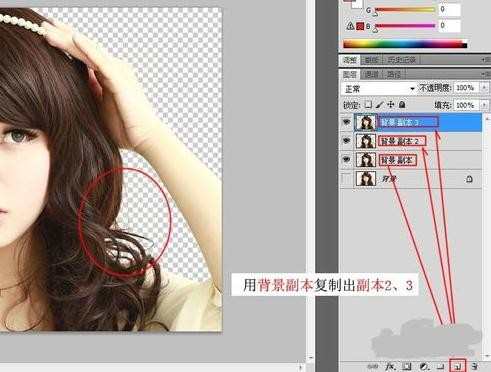
右单击背景副本3,再点击合并可见图层。
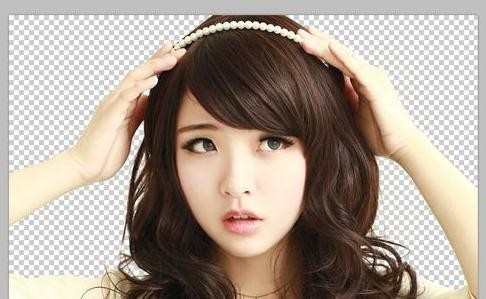
抠图完成,大家要注意每个步骤。
photoshop怎样抠取头发丝的评论条评论