
如何用Photoshop批量处理图片大小
发布时间:2016-12-01 22:34
当你想要修改图片大小或者尺寸时,一张两张还好说如果是几十张几百张呢?会不会很麻烦?不会!来试试Photoshop中的批处理吧。
下面小编教你###如何用Photoshop批量处理图片大小:
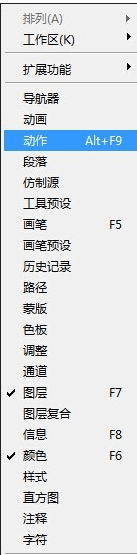
打开Photoshop,选择窗口-动作(快捷键Alt+F9)命令。
在弹出的动作面板中,点击新建动作。
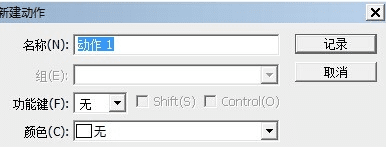
在弹出的新建动作面板中,点击“记录动作。”
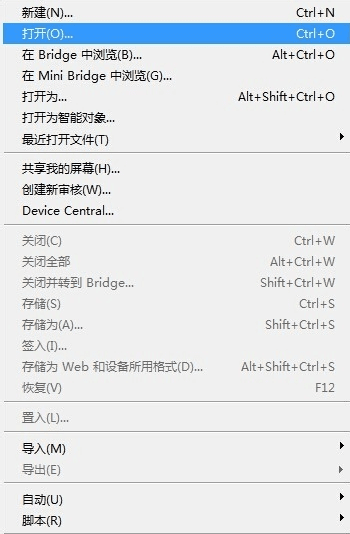
点击文件-打开(Ctrl+O)或者直接拖进来一张需要调整的图片。
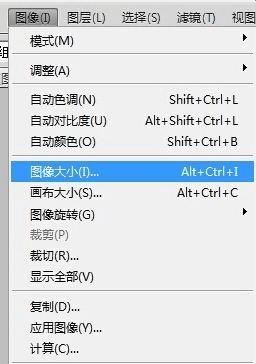
选择图像-图像大小命令。
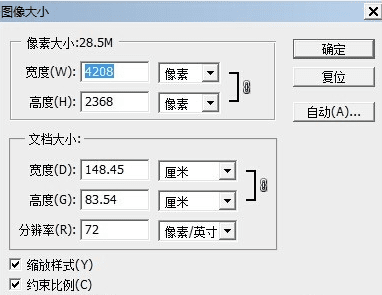
在弹出的“图像大小”对话框中改变图像的宽度和高度,点击确定后关闭图片。
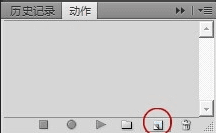
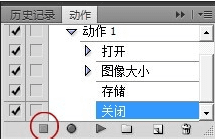
此时图片已修改好,点击停止记录。
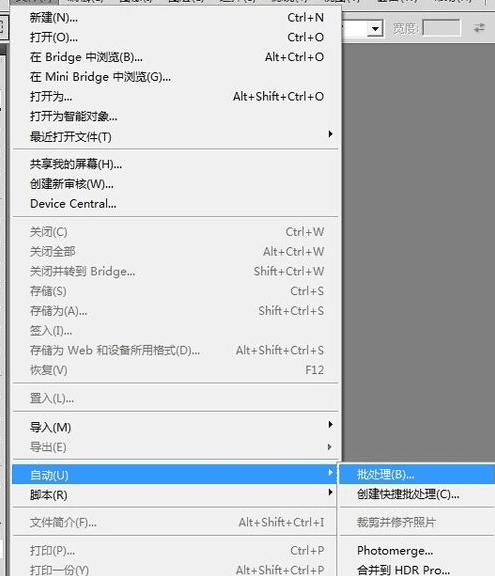
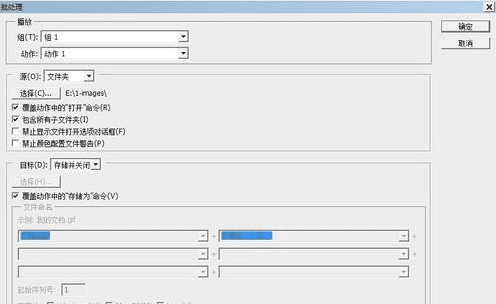
选择,文件-自动-批处理。
在弹出的“批处理”对话框中,设置如下图。
这样就批量修改了所有图片的尺寸,很简单的吧。
如何用Photoshop批量处理图片大小的评论条评论