
如何用photoshop制作冰冻文字
发布时间:2017-05-04 17:51
相信大家肯定经常在海报或者网上图片上看到一些特殊文字,这些文字都是可以用photoshop制作的。下面就让小编告诉你如何用photoshop制作冰冻文字的方法,一起学习吧。
用photoshop制作冰冻文字的方法
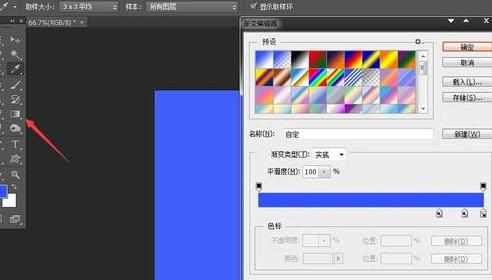
新建800*800px的文件,背景为白色,点击渐变工具,调出喜欢的颜色,按住shift键,自上而下拉出线性渐变,如图:
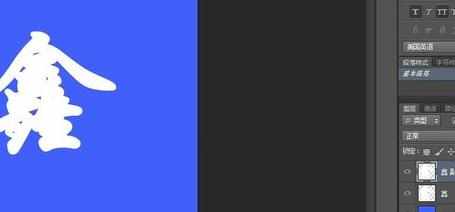
然后使用文字工具,选择适当的字体和字号,输入文字,如图

然后右击文字图层,栅格化文字,接着再复制一层文字图层,如图
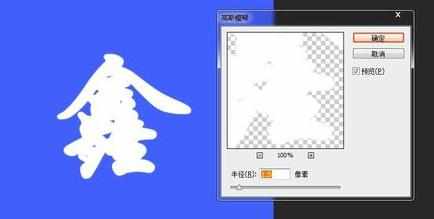
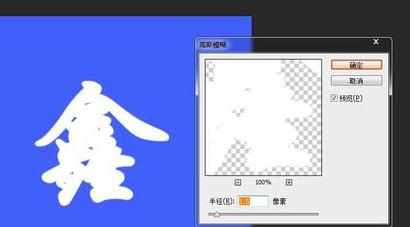
然后对文字副本执行”滤镜-模糊-高斯模糊“,半径设置为1.5,如图
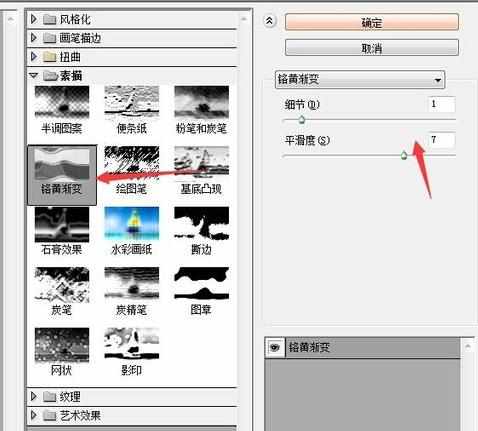
继续执行”滤镜-滤镜库-素描-铬黄渐变“,把”细节“设为1,”平滑度“设为7
隐藏文字副本,然后对文字图层执行”滤镜-模糊-高斯模糊“,半径设置为1.5,如图
接着执行“图像-旋转-逆时针90度”,再执行“滤镜-风格化-风”选择从左,如图
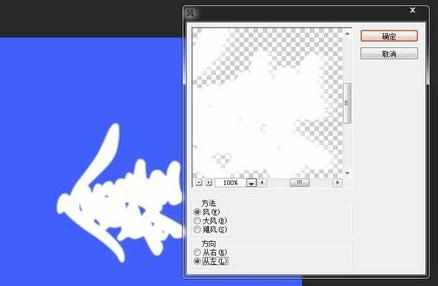
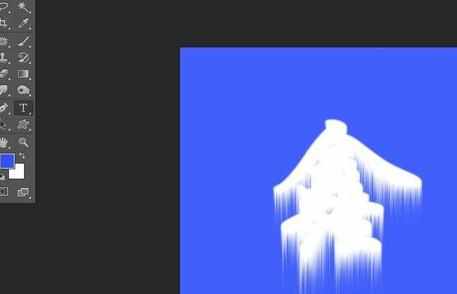
然后使用快捷键ctrl+f再执行一次风,接着执行“图像-旋转-顺时针90度”,效果如图
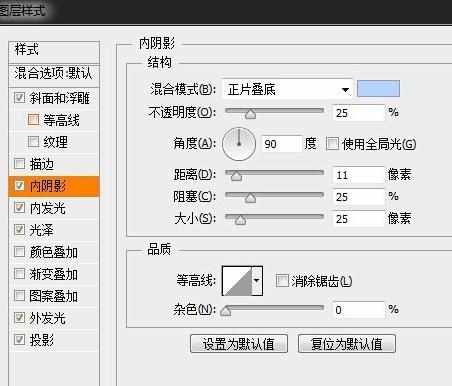
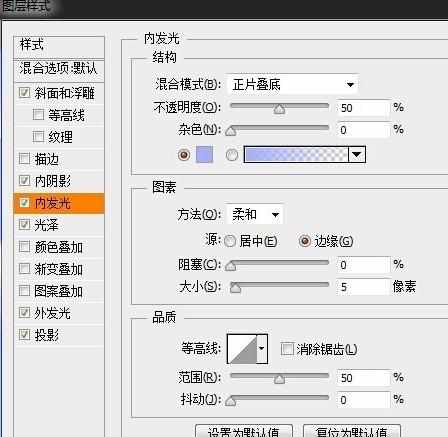
接着双击文字图层,打开图层样式,创建“投影”“内阴影”“外发光”,各种参数设置如图
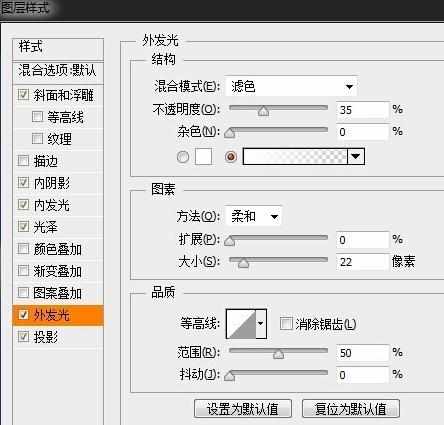
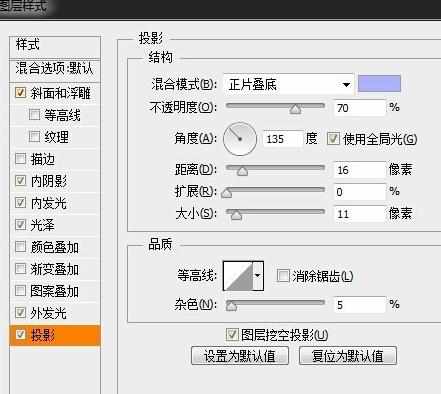
然后继续执行创意“内发光”“斜面和浮雕”“光泽”,各种参数设置如图


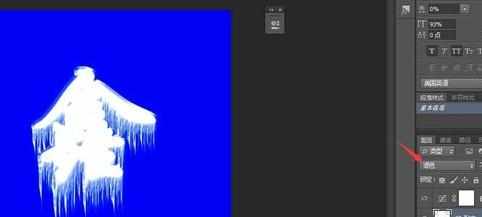
然后打开隐藏的副本,将其混合模式改为滤色,这样冰冻效果就出来了,可以使用曲线调下对比色度,使效果更明显些,如图
如何用photoshop制作冰冻文字的评论条评论