
用photoshop制作简单文字处理的方法
发布时间:2016-12-24 13:13
相关话题
很多时候我们看见网络上很多漂亮的文字,但是根本没有那样的字体下载,到底别人怎么打出来这样的效果呢?对,是Photoshop,利用Photoshop图像处理软件通过对文字编辑后形成的效果。下面是小编为大家整理的用photoshop制作简单文字处理的方法,仅供大家参考~
用photoshop制作简单文字处理的方法如下:
新建一个文档,系统默认是白色的。

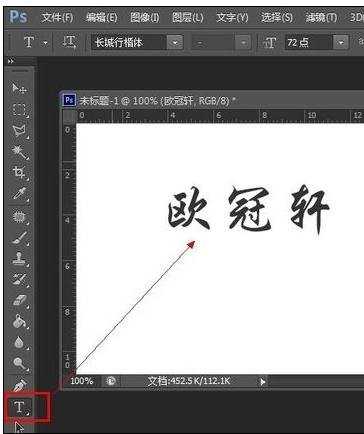
然后我们点击文字工具输入文字,在这里我随便输入几个字
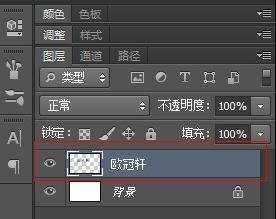
文字输入进去以后,我们在图层界面看到文字图层,点击文字层邮件选择栅格化文字,我们看到文字图层前面的T字图标已经不见,这就说明文字层已经转换成图像模式了。
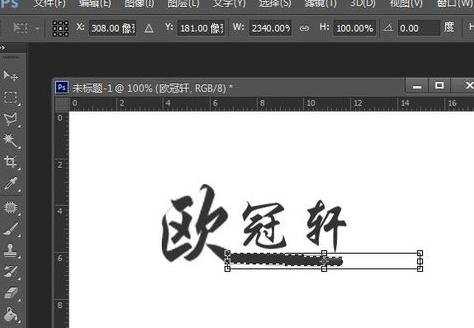
好,接着我们就可以用选区工具选择文字部分进行编辑了,在这里我将前面第一个字变大,方法是利用自由变换工具(ctrl+t键)。
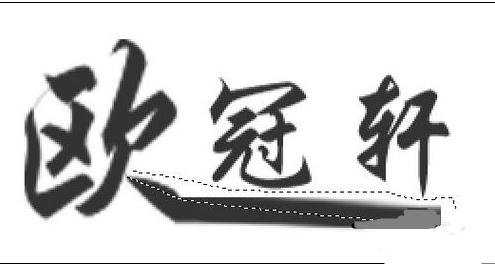
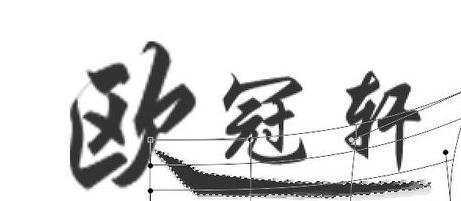
我们再将欧字的最后一笔画拉长,同样选择好区域后自由变换拉长它,得到以下效果。
看上去有点硬,细节上不是很好,我们要修一下,利用多边形工具选择部分删除掉,放大处理。再变形它一下,直到满意为止,我在这里就随便弄一下
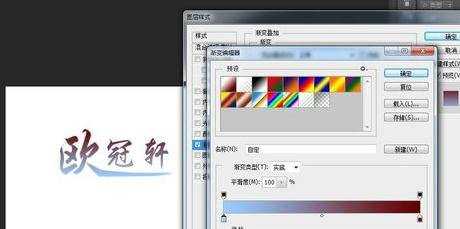
然后给文字上色,我们右键图层,选择混合选项,选择渐变叠加,调出理想的效果就OK了。

用photoshop制作简单文字处理的方法的评论条评论