
photoshop如何制作插画
发布时间:2017-05-16 17:49
相关话题
大家看到市面上有很多插画风格的图片都很好看,其实我们使用photoshop可以制作简单的,下面是小编带来关于photoshop如何制作插画的内容,希望可以让大家有所收获!
photoshop制作插画的方法
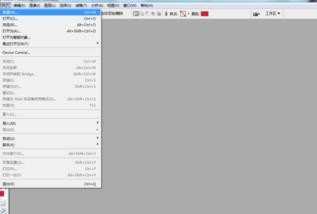
打开Photoshop CS3(中文版),点击左上方【文件】的【新建】
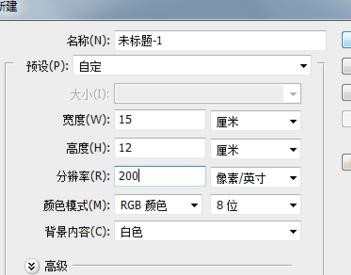
新建一个【宽度】为“15厘米”、【高度】为“12厘米”(没有固定数值,可以用其他数值)、【分辨率】为“200像素/英寸“、【颜色模式】为”RGB颜色“、【背景内容】为”白色“的文件。点击【确定】
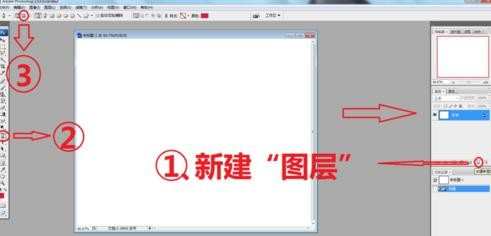
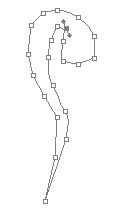
(1)新建”图层1”(2)选择【钢笔工具】,(3)激活属性栏中的【路径】按钮,如下图就可以进行描点,描绘出大体路径形状。
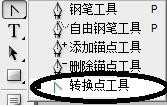
再用【转换点工具】进行调整。画完之后要首尾相连(如下图)
然后按键盘的【Ctrl】+【Enter】键转换为选区,将前景色改为你喜欢的颜色,再用【油漆桶工具】填充上颜色。如图
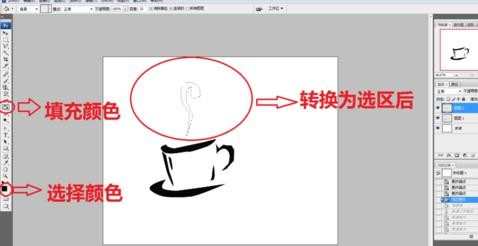
按【Alt】+【D】去除选区,继续用路径工具将标志剩余部分绘制完毕,并填充颜色,这样整个标志就做好了。

photoshop如何制作插画的评论条评论