
用Photoshop滤镜打造漂亮的极光夜空的方法
发布时间:2016-12-27 20:45
相关话题
本教程介绍使用滤镜制作极光云彩。思路:先用滤镜效果制作出云彩效果,然后整体调色及渲染,再加上装饰效果即可。颜色及装饰可按照自己的喜爱设置!下面是小编为大家整理的用Photoshop滤镜打造漂亮的极光夜空的方法,仅供大家参考~
用Photoshop滤镜打造漂亮的极光夜空的方法如下:
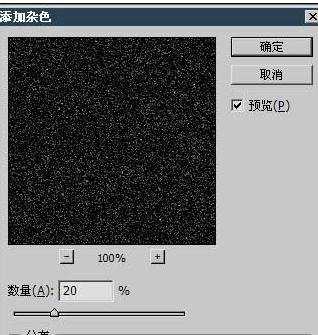
1、新建图像,填充黑色背景,然后使用【滤镜_杂色_添加杂色】,设定及效果分别如下图。
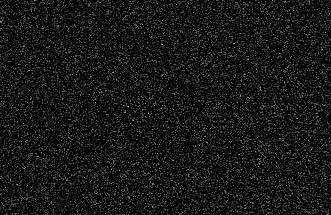
2、使用【图像_调整_亮度对比度】对图像进行调整,分别如下图。


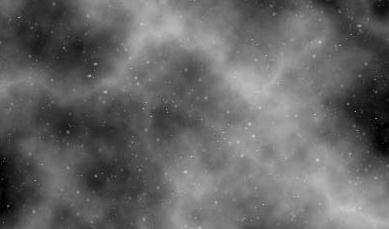
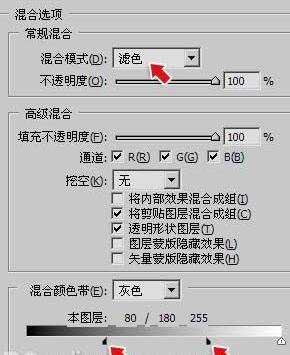
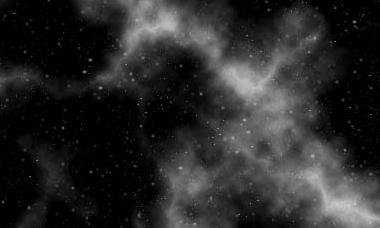
3、新建图层,填充黑色或白色,然后使用【滤镜_渲染_分层云彩】,并按〖CTRL_F〗重复一两次,再将其混合模式改为“滤色”。接着使用【图层_图层样式_混合选项】进行调整,红色箭头处的设定。效果如右下图。
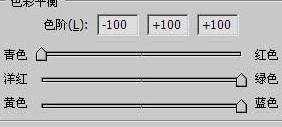
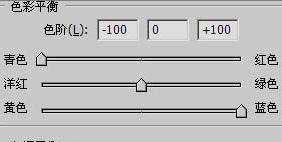
4、使用【色彩平衡】〖CTRL_B〗对灰度图像着色。设定及效果如下各图。
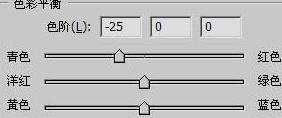
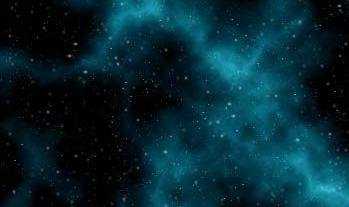
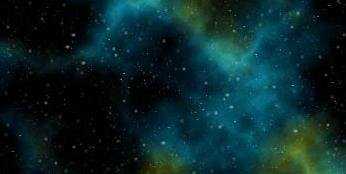
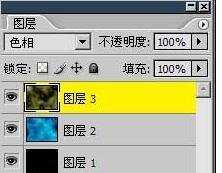
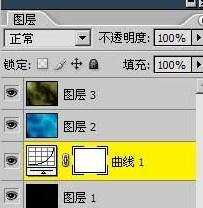
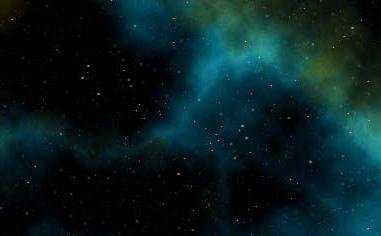
5、新建一个图层,重复第3和第4步的操作。不同的是调整为另外的色彩及将混合模式改为“色相”,图像效果和图层调板如下图。将两个云彩图层一起选择,〖CTRL_T〗启动自由变换,根据需要将部分区域放大到全图尺寸,形成如下图的效果。
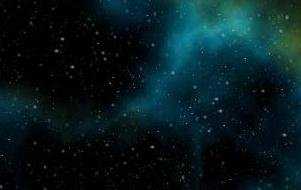
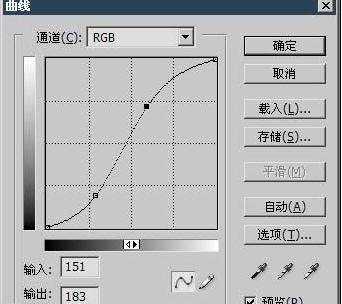
6、如果必要,可以利用曲线调整层来改变星光的亮度。图像效果如下图。
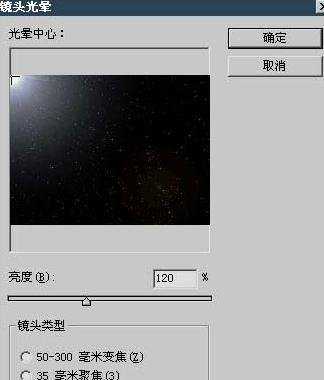
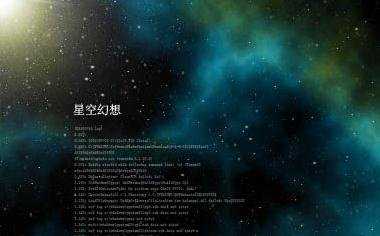
7、对背景图层使用【滤镜_渲染_镜头光晕】,设定如下图18。可在适当位置添加文字。完成最终效果
用Photoshop滤镜打造漂亮的极光夜空的方法的评论条评论