
Word中smartart图片中加入箭头和线条的操作方法
发布时间:2017-04-18 17:59
相关话题
smartart是word文档编辑中一款非常好用的辅助工具,可以大大提高文档的档次,但有许多功能却需要研究开发,作者将持续为您介绍其使用方法和使用技巧。今天,小编就向大家介绍在smartart图片中加入箭头和线条的方法。
Word中smartart图片中加入箭头和线条的操作步骤如下:
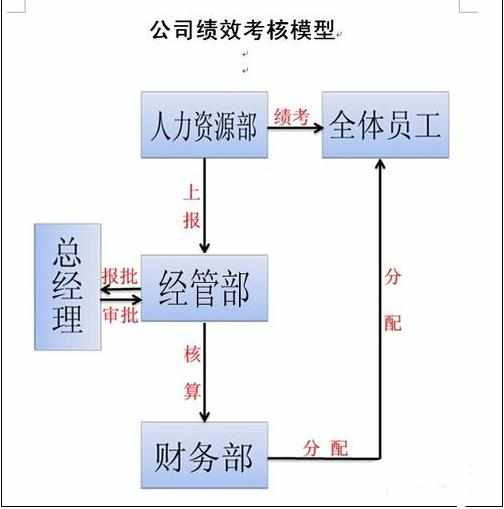
先根据需要制作一个与要求图片近似的smarart图片。如我们要制作一个简单的纯净考核流程图。下图是我们最终想要的。
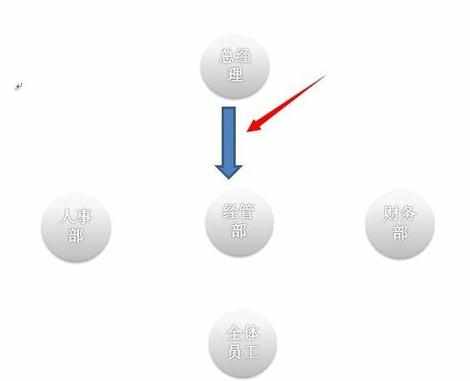
我们首先制作一个近似的流程图。

点击圆圈图,并将它们放置在想要的位置。

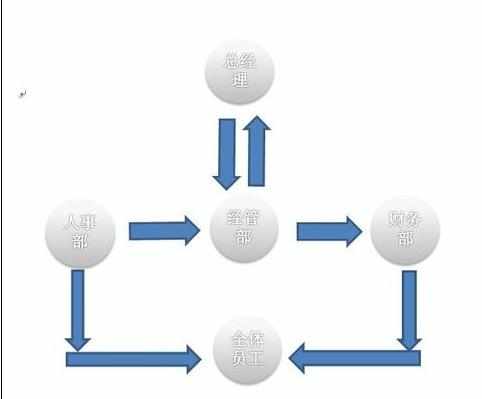
插入-形状,选定想要的箭头或线条,在图中画线。将鼠标指向箭头上的绿点,旋转到想要的位置。
按此方法,再把其它箭头或线段画出就OK了!很简单吧,祝成功!
Word中smartart图片中加入箭头和线条的操作方法的评论条评论