
怎样用photoshop处理粗毛孔的照片
发布时间:2017-06-05 10:38
有一些毛孔一般都是比较粗的,所以我们可以用photoshop来处理一下。接下来就是小编精心整理的一些关于怎样用photoshop处理粗毛孔的照片的相关资料,供你参考。
用photoshop处理粗毛孔的照片的方法
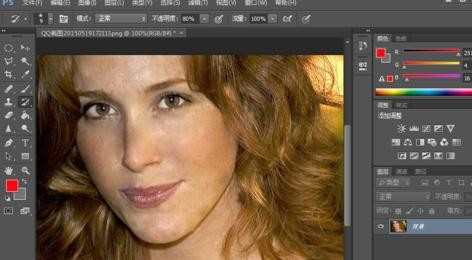
打开Photoshop,按下快捷键Ctrl+O选择要进行出皮肤处理的图片。如图,人物图片已呈现在画布中了。
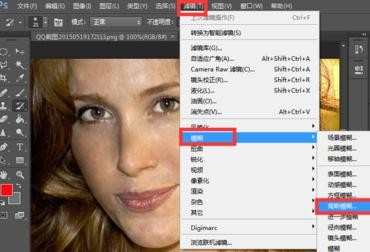
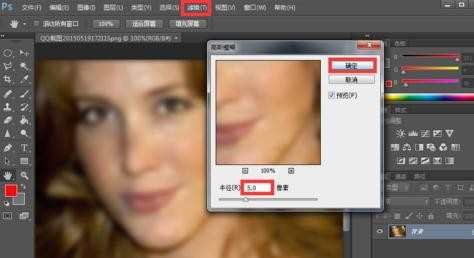
首先选择【滤镜】→【模糊】→【高斯模糊】,将半径改为5.0,单击【确定】。
在左侧工具栏选择【历史记录画笔工具】,并返回到上一步,然户在【高斯模糊】前面的方框内点击一下,将【高斯模糊】设置为历史记录画笔工具的源。
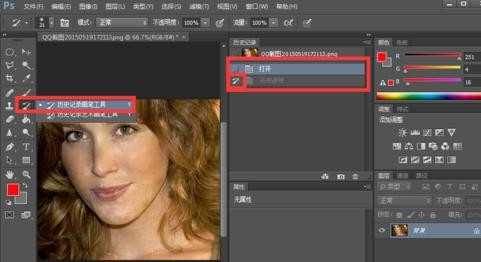
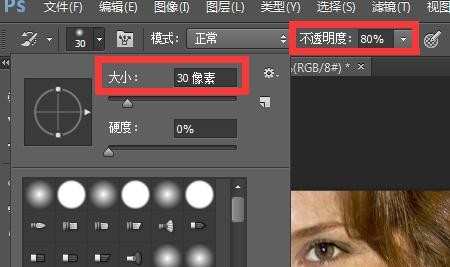
点击属性栏内画笔大小,将像素大小改为30像素,硬度改为0,不透明度改为80%。
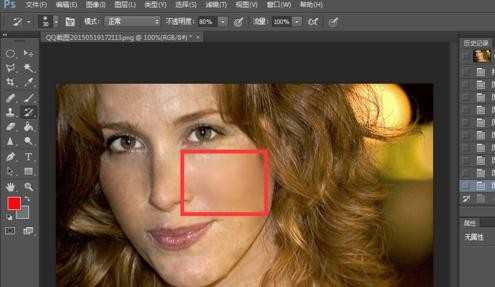
接下来单击鼠标左键,在需要进行皮肤磨白的地方进行涂抹,如图,经过几次涂抹后的对比,较左边脸部而言,右边的皮肤看起来是不是更加细腻呢?
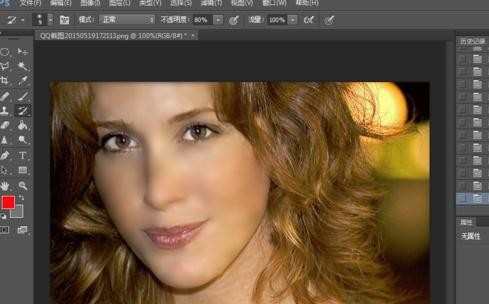
重复之前的动作,单击鼠标左键一直涂抹面部皮肤,知道整张脸都被涂抹过后方能停止,如图,为最终涂抹效果,人物皮肤看上去是不是比之前要细腻柔和多了呢?
怎样用photoshop处理粗毛孔的照片的评论条评论