
excel2010组合框和offset的教程
发布时间:2016-11-08 11:43
相关话题
Excel中组合框和offset具体该如何使用呢?接下来是小编为大家带来的excel2010组合框和offset的教程,供大家参考。
excel2010组合框和offset的教程:
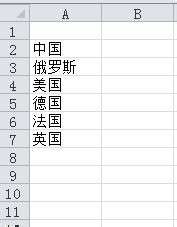
组合框和offset使用步骤1:首先将需要的文字填写在相应的单元格,注意,需在同一列,如图:
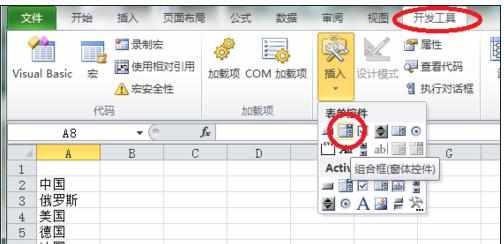
组合框和offset使用步骤2:点击开发工具,插入组合框,如图:
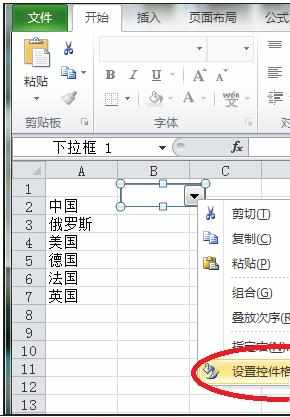
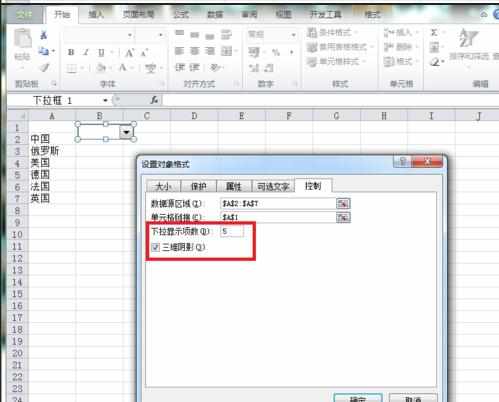
组合框和offset使用步骤3:插入组合框后,调整至自己满意的大小,右键点击设置,如图:

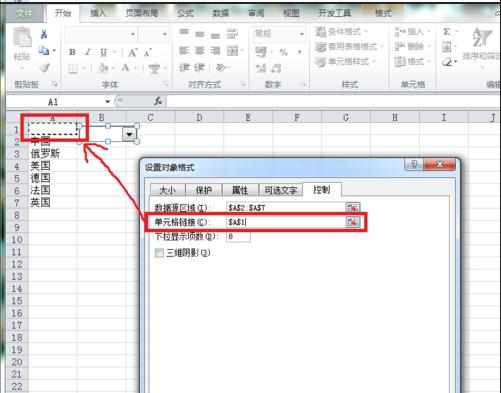
组合框和offset使用步骤4:选择之前填入的内容为数据源,选择A1为单元格链接,根据需要设置下拉显示项数量和三维阴影,点击确定完成。如图:

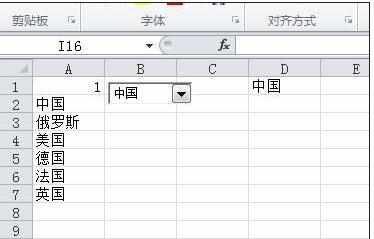
组合框和offset使用步骤5:在D1处输入OFFSET函数,回车。如图:

组合框和offset使用步骤6:接着,我们的目的就达到了,看看,是不是组合框中选择的内容,将会出现的D1的单元格内,如图:
看了excel2010组合框和offset的教程还看了:
1.excel2010动态图表制作教程
excel2010组合框和offset的教程的评论条评论