
photoshop可爱文字制作教程
发布时间:2016-12-11 15:11
相关话题
如何在PS中制作出可爱的字体效果呢?下面是小编为大家整理的photoshop可爱文字制作教程,仅供大家参考~
photoshop可爱文字制作教程如下:
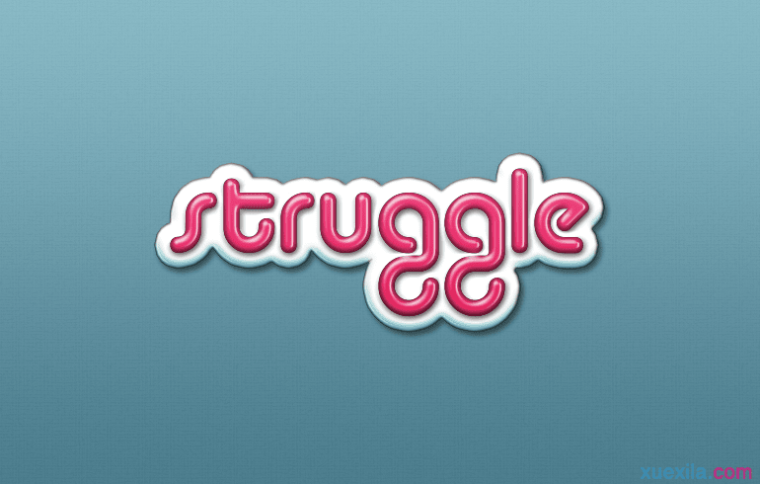
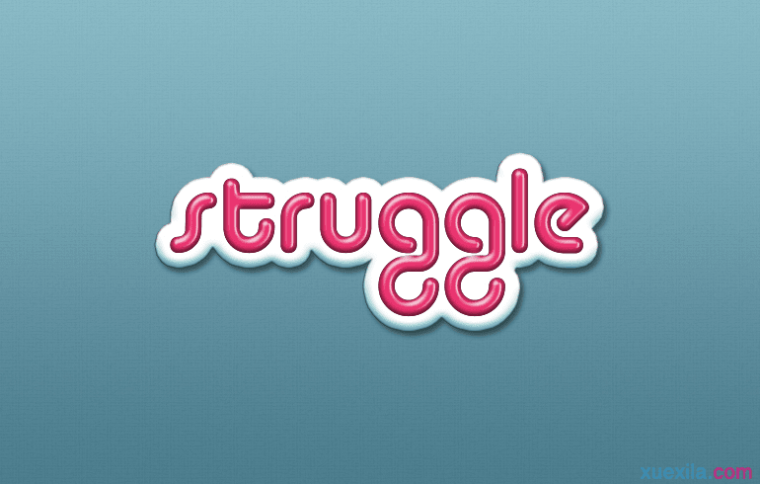
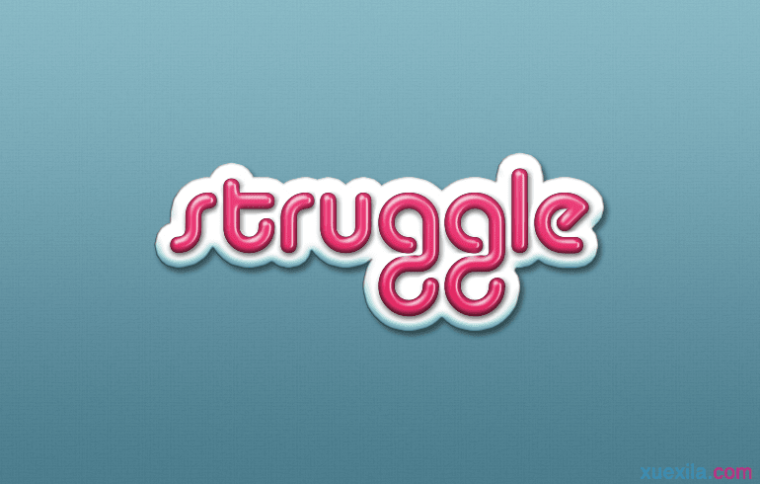
效果图
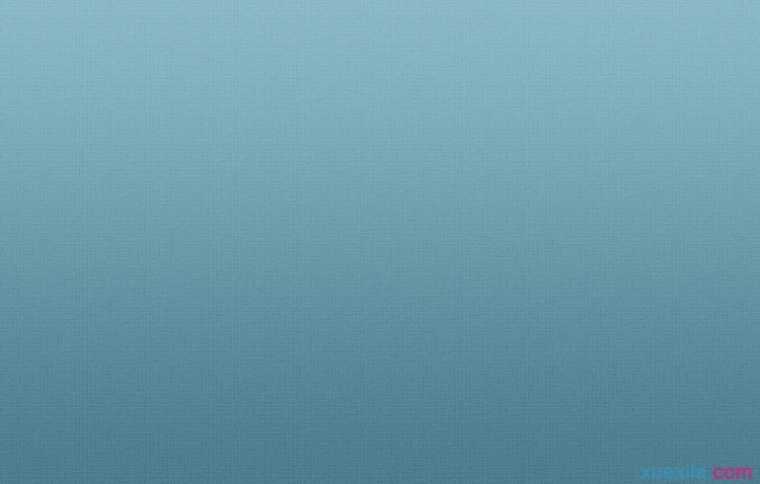
一、新建背景层新建画布770*490px,填充线性渐变,前景色为#4a7b8c,背景色为#88b8c4右键单击图层,混合选项,叠加一个图层样式选择柔光,调整透明度,如图:
二、创建文本和智能对象图层首先使用Alba字体创建黑色文字(我用的是struggle,随意),字体的大小:120pt。命名图层为文字。复制一层,命名为底,描边16px,颜色#dcdcdc。移动到文字下方。
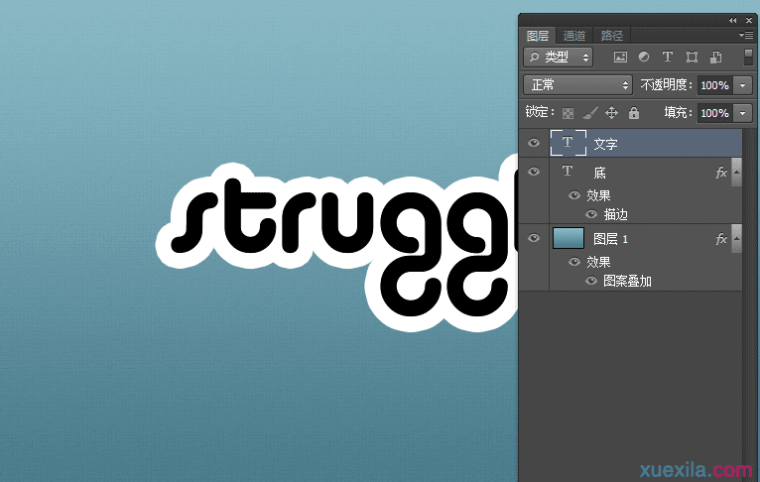
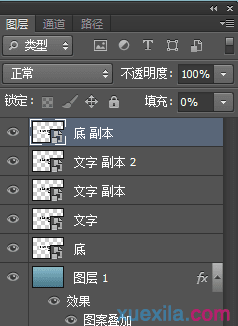
将文字图层和底图层转换为智能对象,并复制2次文字图层,1次底图层,填充分别为0%。
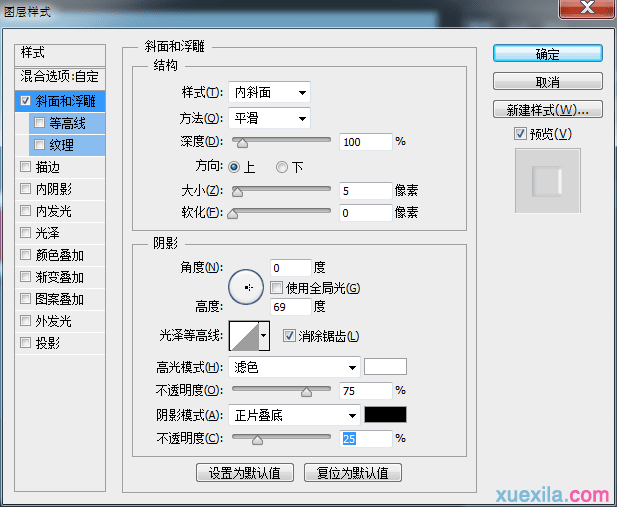
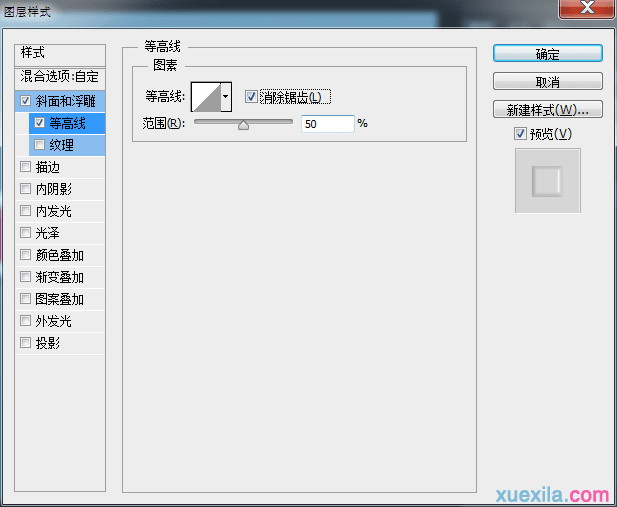
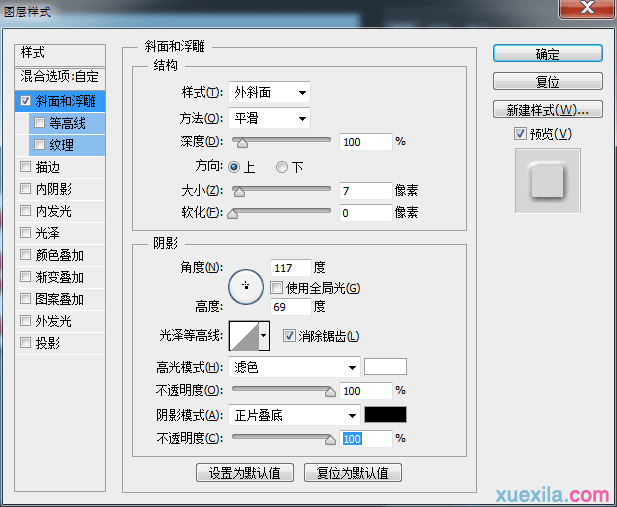
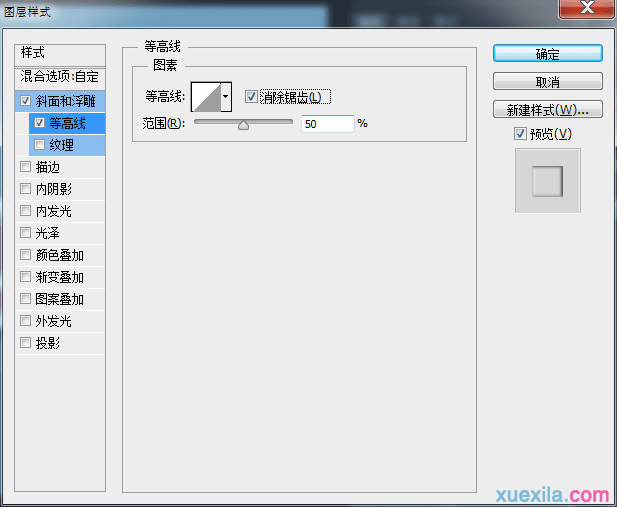
三、设置底图层和文字图层的混合选项底图层的混合选项:

效果如图所示:

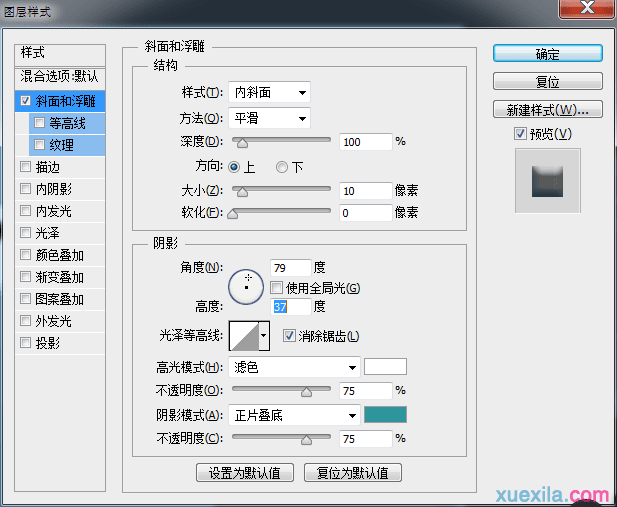
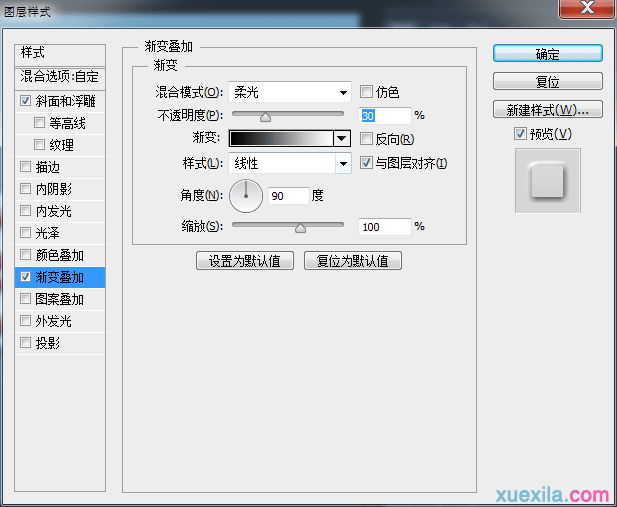
然后设置文字图层的混合选项:
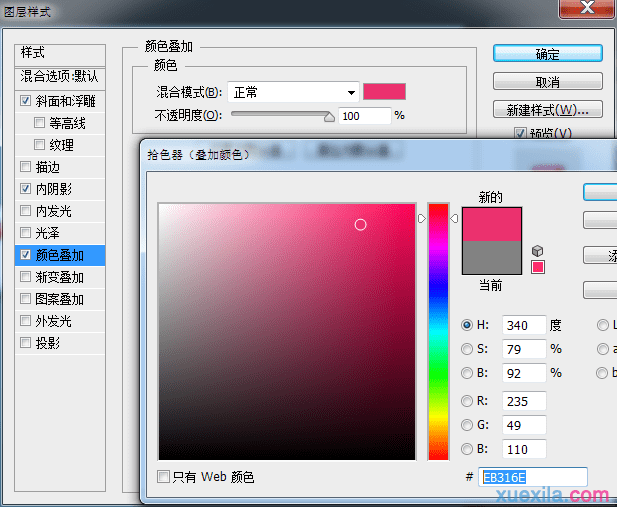
效果如图所示

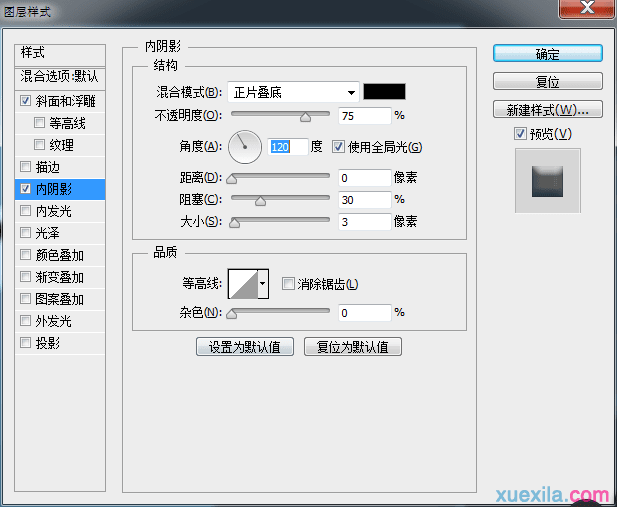
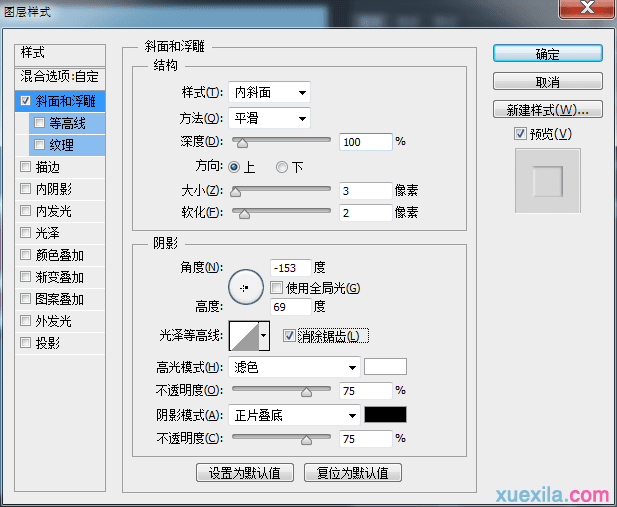
四、设置底图层副本和文字图层副本1、2的混合选项,设置文字图层 副本1的混合选项
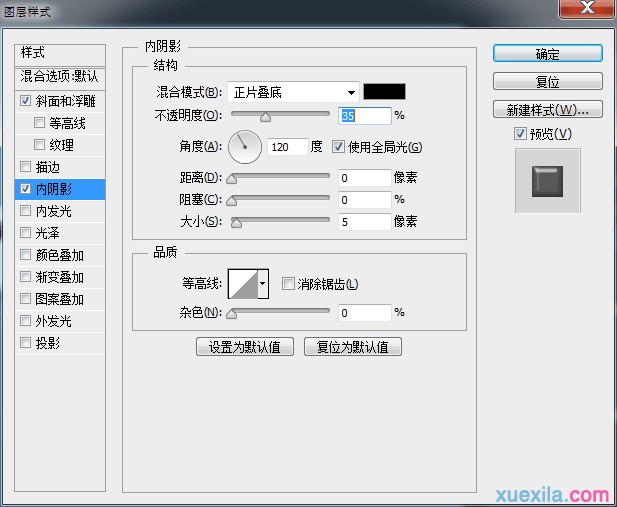
设置文字图层 副本2的混合选项
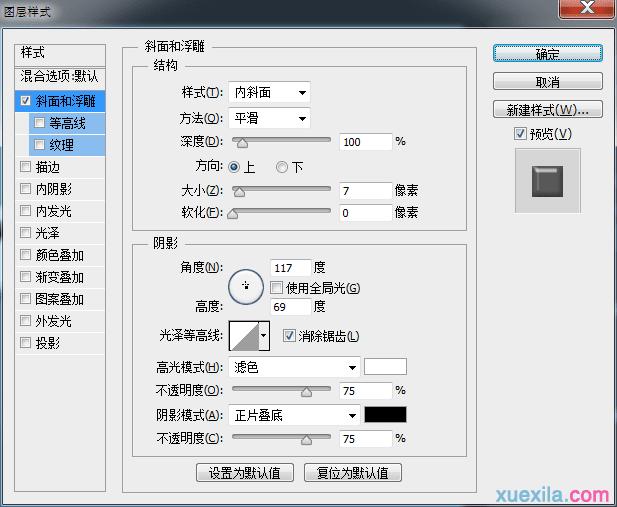
最后设置底图层 副本1的混合选项
好啦,最后的成品就是它了。
photoshop可爱文字制作教程的评论条评论