
用ps做波浪边框的教程
发布时间:2016-12-19 18:01
合适的边框对于一张图片起到很重要的作用,有一些照片需要用到波浪边框。下面是小编为大家整理的用ps做波浪边框的教程,仅供大家参考~
用ps做波浪边框的教程如下:
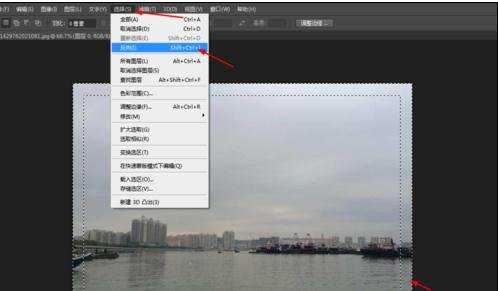
在ps软件中,打开素材,然后双击背景图层为图层,然后在图层框选出一小部分,再按shift+f7反选,如图所示
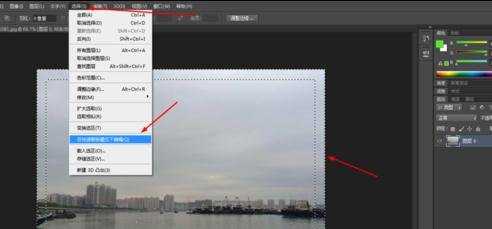
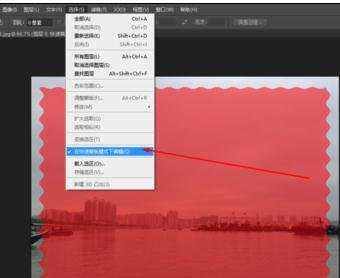
在菜单栏上选择快速蒙版编辑,如图所示
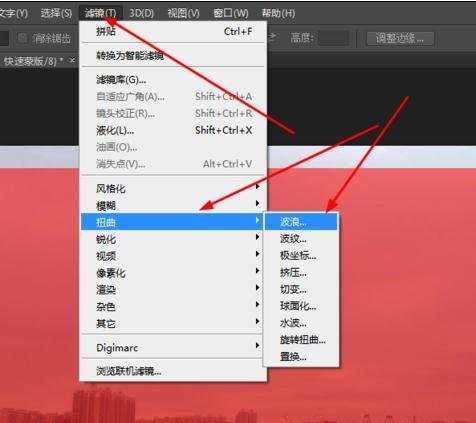
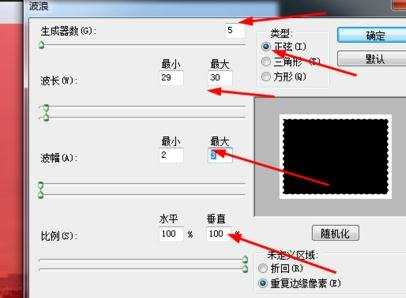
然后在滤镜中添加波浪,如图所示
接着按Q退出快速蒙版,再按delete删除,如图所示
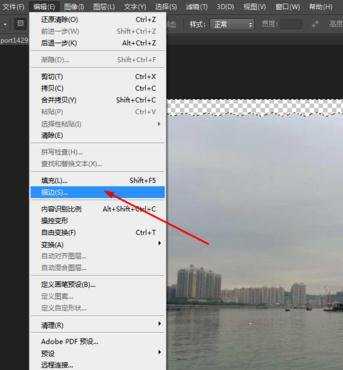
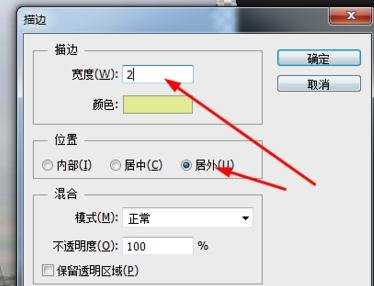
最后按alt+e+s描边,如图所示
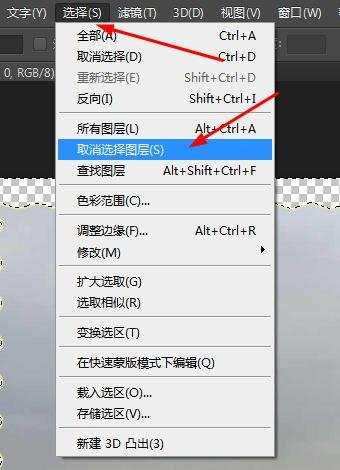
最后按ctrl+d取消选区,效果如图所示

用ps做波浪边框的教程的评论条评论