
Photoshop砖墙效果制作教程
发布时间:2016-12-24 11:15
相关话题
我们平时在3D时可能会用到砖墙,那么我们该如何简单快速的在Photoshop中做墙砖?下面是小编为大家整理的Photoshop砖墙效果制作教程,仅供大家参考~
Photoshop砖墙效果制作教程如下:
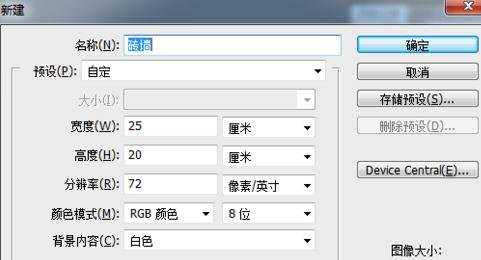
首先,建一个画布,大小随自己需求。
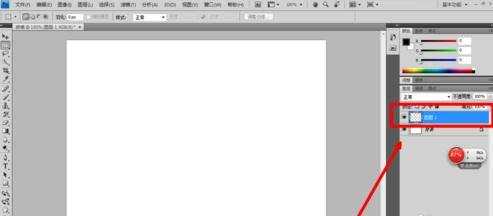
新建一个图层。
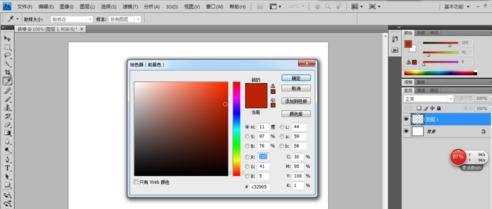
将前景色调为如图所示的颜色。
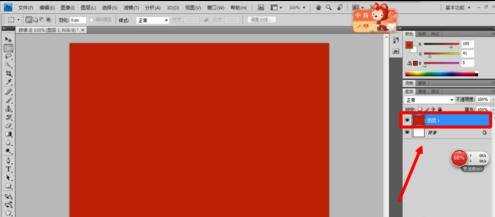
Ctrl+Delete,将图层1填充。
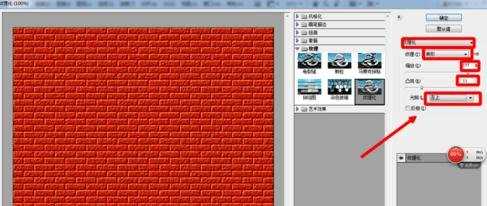
执行“滤镜--纹理--纹理化”。
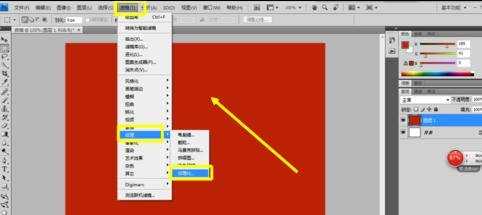
然后以自己需求将该有的数据选项调整。
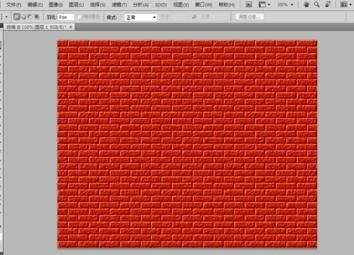
最后得出的效果。
Photoshop砖墙效果制作教程的评论条评论