
photoshop如何制作钢印效果
发布时间:2017-05-26 23:42
照片中的钢印效果其实就是印章,在photoshop可以制作出来。那么大家知道photoshop如何制作钢印效果吗?下面是小编整理的photoshop如何制作钢印效果的方法,希望能帮到大家!
photoshop制作钢印效果的方法
首先制作一个印章 , 这一步略过不谈, 毕竟这里主要是谈印章变钢印。 素材可以用网上下载,有很多,改改字就可以了。

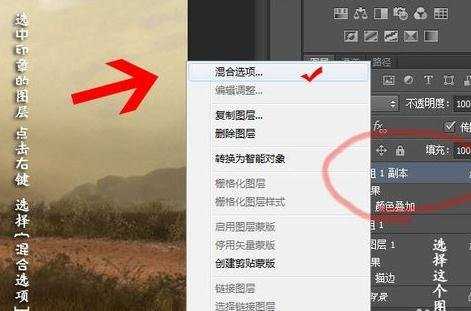
然后,选中印章的图层 点击右键 选择【混合选项】
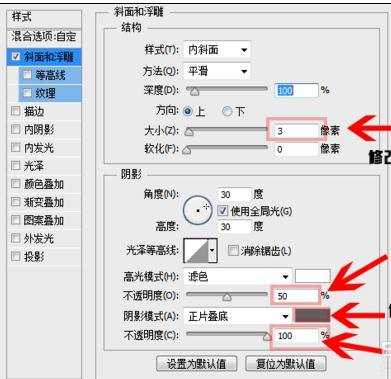
点击【斜面浮雕】 大小改为3像素(2像素也可以)。
高光模式不透明度设置为50%
阴影模式颜色改为灰色
不透明度改为100%
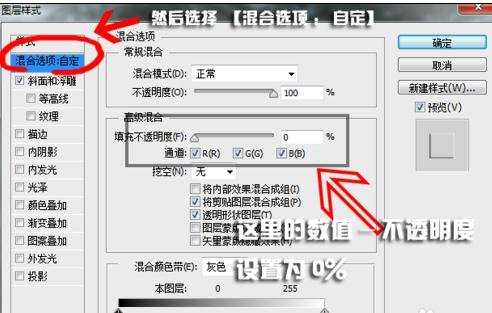
点击【混合选项;自定】 填充不透明度改为 0%
然后,完成了~(可以适当调整图层的不透明度80~photoshop中如何绘制钢印,也可以不调整。)

photoshop如何制作钢印效果的评论条评论