
PhotoShop制作简单的彩色半调字效教程
发布时间:2016-12-11 14:27
相关话题
如何在PS中制作半调图案艺术字呢?下面是小编为大家整理的PhotoShop制作简单的彩色半调字效教程,仅供大家参考~
PhotoShop制作简单的彩色半调字效教程如下:
效果图:

1.新建图层,打入字体。

2.选取字体。

3.在通道新建一层Alpha1通道,然后填充白色。
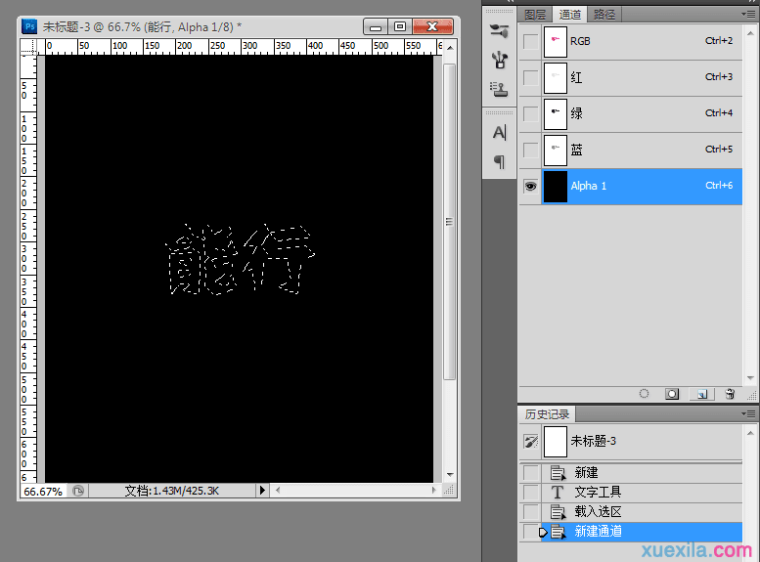

4.然后呢~~描边两次。

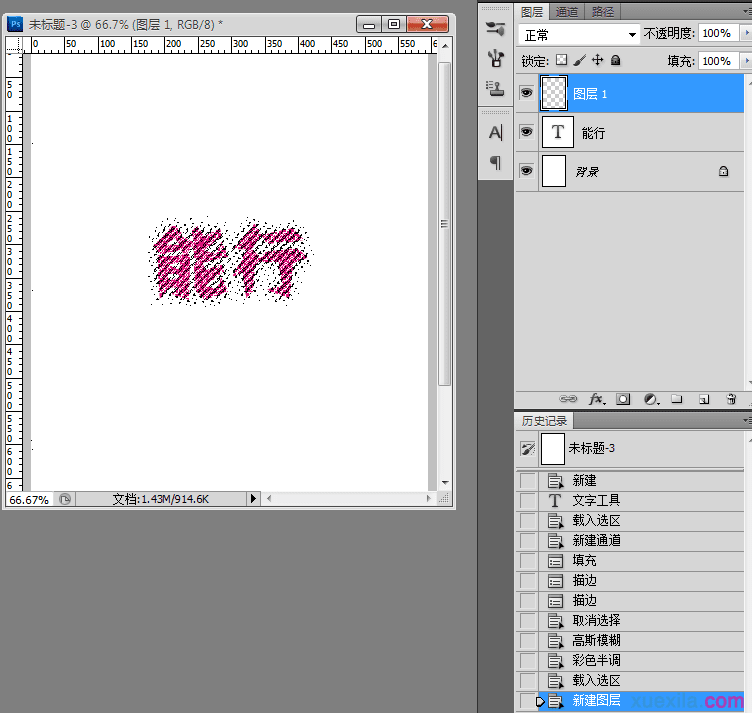
5.描边完成后,取消选取。然后高斯模糊,值大概设置16.8左右(可根据需要自行调整的~~~~);然后“滤镜----像素化----彩色半调”。


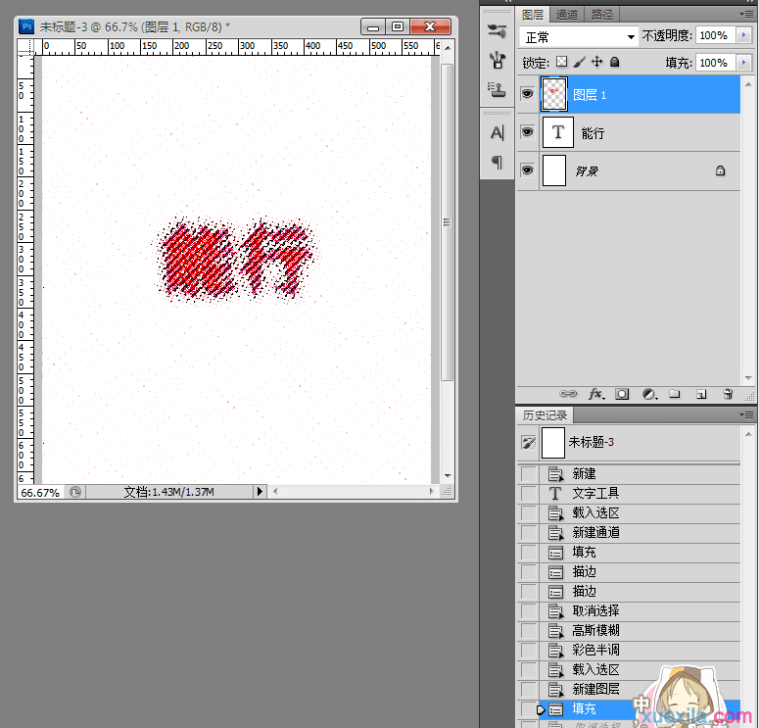
6.按住Ctrl点击Alpha1通道选取,切换到图层界面。新建一层,填充和字体一样的颜色。
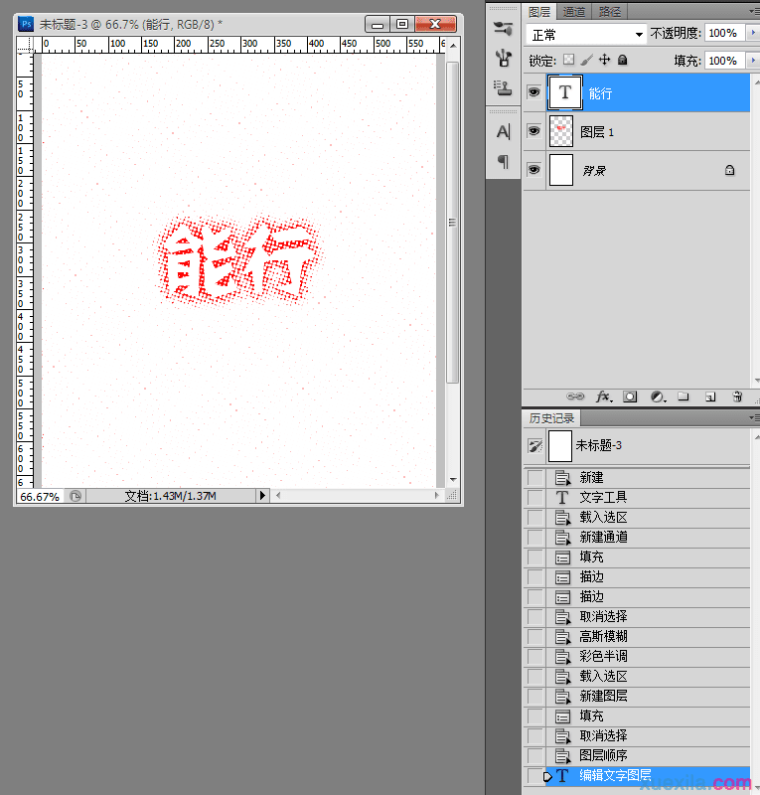
7.将字体图层置顶,填充白色,效果就出来啦~~~~~~~~~!很简单吧~~~嘿嘿~~~~
PhotoShop制作简单的彩色半调字效教程的评论条评论