
photoshop如何使用修复工具
发布时间:2017-06-05 10:48
修补工具是为了修补一些有缺失或者有重复元素的图片,那么大家知道photoshop如何使用修复工具吗?下面是小编整理的photoshop如何使用修复工具的方法,希望能帮到大家!
photoshop使用修复工具的方法
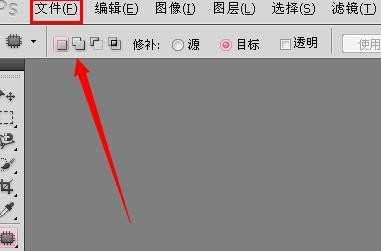
点击“文件”,再点击下拉条中的“打开”。
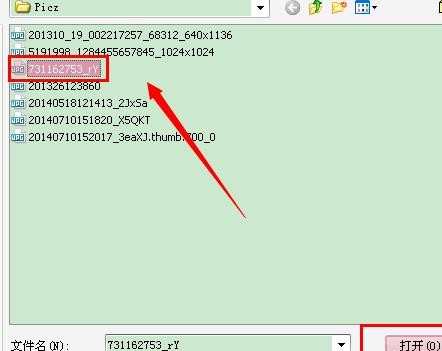
点击选择好的图片,再点击“打开”。
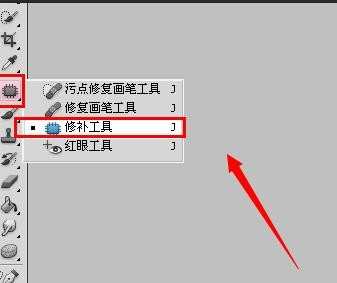
右键点击补丁图标,左键选择“修补工具”。
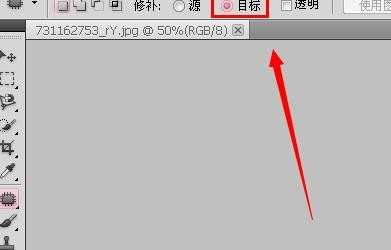
将修补的对象选择为“目标”,即将选择的图像粘贴在目标上的意思。
按住左键,将喜欢的图像圈起来。
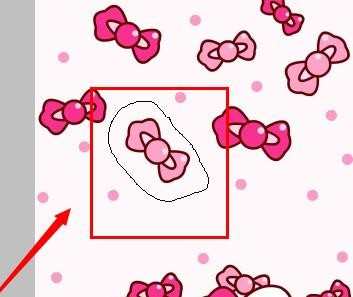
对准圈起来的图像,按住左键,将图像拖动到自己喜欢的地方。
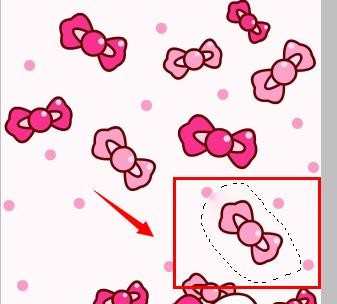
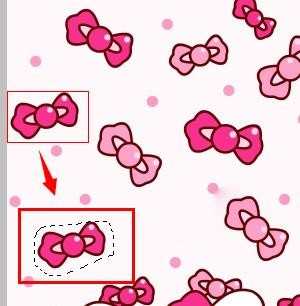
按照以上的方式,选择一个新的图像,并将其拖动要喜欢的位置。
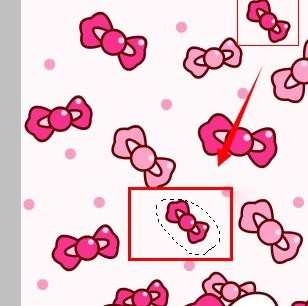
复制足够多的图像,让图片看起来更加完整。
点击“文件”,在下拉条中点击“存储为”。选择保存位置、保存格式后,点击“保存”。
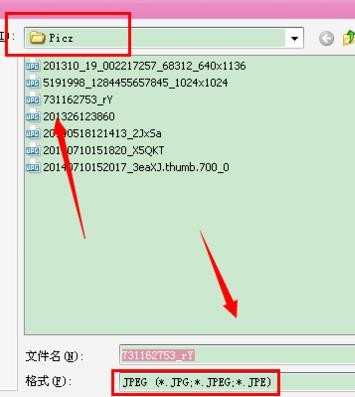
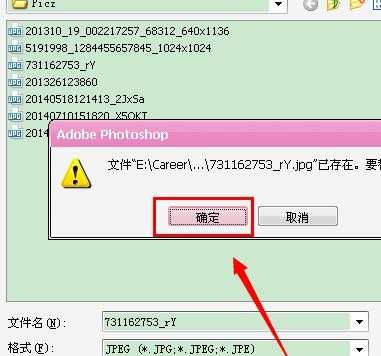
如果选择的位置跟图片打开的位置一样,会提示是否替换。替换的换选“确定”;不替换的话,更改文件名称,或是更改存储位置。
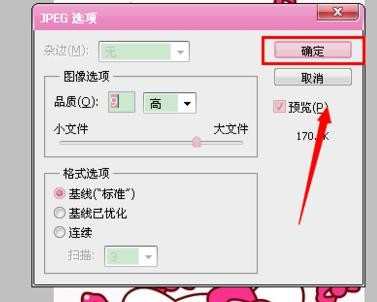
再点击确定即可。
photoshop如何使用修复工具的评论条评论