
win8拨号连接设置教程
发布时间:2017-06-01 09:55
win8的拨号连接虽然和win7相比没有多大变化,但是对于XP用户来说可能就有些陌生了,为此小编制作了这篇win8拨号连接设置图文教程,适用于WIN8 WIN8.1 WIN7,接下来是小编为大家收集的win8拨号连接设置教程,希望能帮到大家。
win8拨号连接设置教程
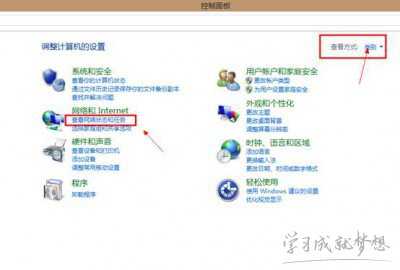
首先打开控制面板,查看方式选择类别,选择查看网络状态和任务:
点击“查看网络状态和任务”
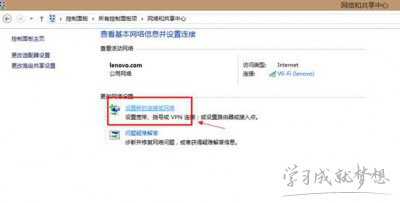
打开网络和共享中心,里面选择“设置新的连接或网络”,如图:
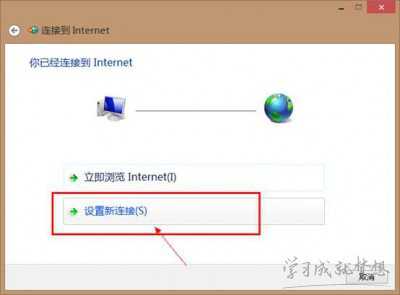
选择连接到Internet,如图

因为已经连接上无线,但是如果没有拨号或者连接成功,我们需要点击设置新连接,如图:
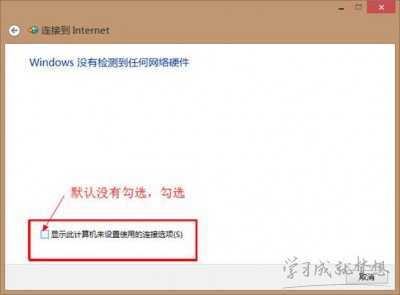
因为Yoga是不带有线网卡的,所以默认情况下里面没有ADSL拨号,我们需要点击显示此计算机未设置使用的连接选项,勾选这个方框,如图:
然后就会出现宽带连接的选项,我们选择宽带(PPPoE),如图:

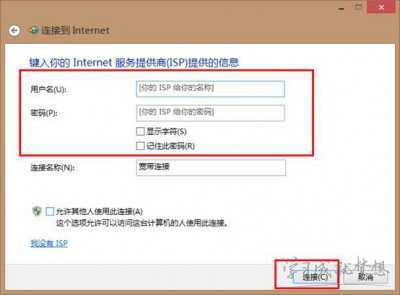
输入好无线ADSL拨号的用户名和密码,点连接即可,如图:
这样我们就可以正常上网了,挺简单的吧~!
看了“win8拨号连接设置教程”还想看:
1.win8拨号连接设置的方法
2.WIN8如何设置宽带拨号连接
3.win8系统怎么创建宽带拨号连接
4.Win8系统宽带连接自动连接设置图解
5.win8怎么建立宽带拨号连接
win8拨号连接设置教程的评论条评论