
photoshop制作反光字的教程
发布时间:2016-12-20 12:56
相关话题
本教程的文字需要较亮的背景来衬托。制作之前需要自己先做出绚丽的背景,可以直接用素材图片。文字部分制作比较简单,用图层样式就可以做出来。下面是小编为大家整理的photoshop制作反光字的教程,仅供大家参考~
photoshop制作反光字的教程如下:
最终效果

1、新建一适当大小文档,我建的是1680×1050PX。在AI中打出如下文字,字体为Bank Gothic。

2、改变文字的形状,如下图所示。

3、给背景图层添加渐变样式,颜色为#fee4c8到#0f0802。

4、新建图层,添加“滤镜->渲染->云彩”,前背景色为黑白。改变其混合模式为颜色减淡,然后为该图层添加蒙版,继续给蒙版添加云彩效果。给蒙版变形“编辑->变换->变形”,选择鱼眼变形,我把弯曲度调为了-100%,呈如下效果。

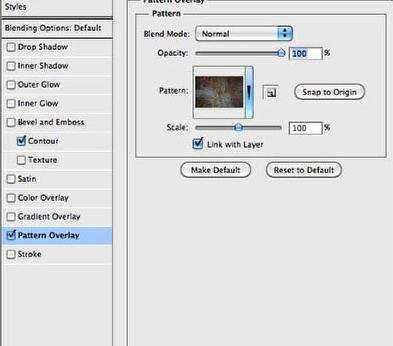
5、将在AI中写好的文字置入到PS中,将字体放到文档的中心位置,因为光芒是从中心向外发散,所以上方的文字是底部反光,而下方的文字是顶部反光。先给CLASH OF THE添加图层样式,图案是作者在网上找的金属质感图片,我用的是PS自带的类似金属质感的图案样式,效果也不错。


6、现在TITANS的图层样式你也一定明白了,把上一步的图层样式拷贝给TITANS,然后将斜面和浮雕中的方向由下改为上即可。

7、作者导入了一张飞马座的矢量图片,给它添加“滤镜->模糊->动感模糊”,角度-35,距离18。

8、添加光的素材图片,模式改为滤色。


盖印所有图层(Ctrl+Alt+Shift+E),给新图层径向模糊,缩放5,这样就完成了。

photoshop制作反光字的教程的评论条评论