
Photoshop科幻效果教程
发布时间:2016-12-24 13:23
相关话题
科幻效果我们并不陌生,还时常为这种绚丽的效果感到震惊。那么在Photoshop中这种科幻效果应该怎么制作呢?下面是小编为大家整理的Photoshop科幻效果教程,仅供大家参考~
Photoshop科幻效果教程如下:
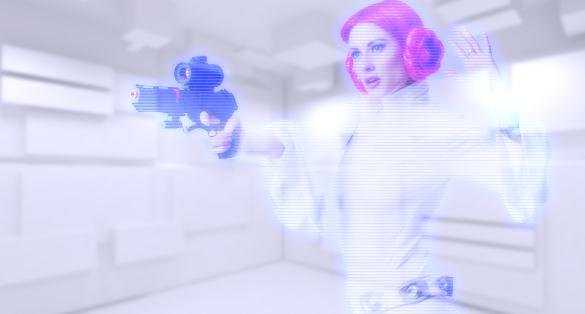
最终效果
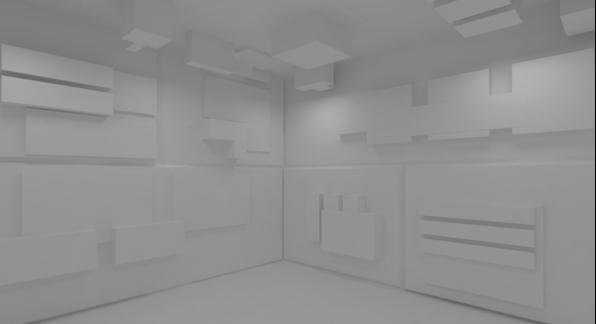
我使用下面的图片作为这个效果的背景
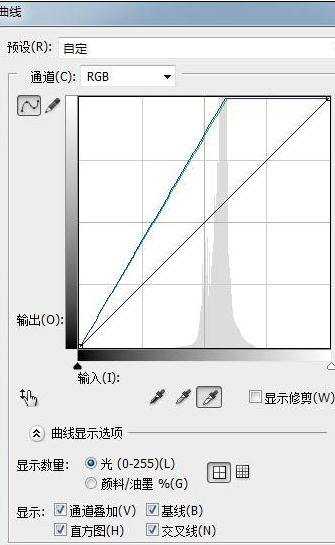
打开图片,首先我们要将这张图片调亮一点,点击"图像>调整>曲线",点击"在图像上取样以设置白场"按钮,在图片上点击
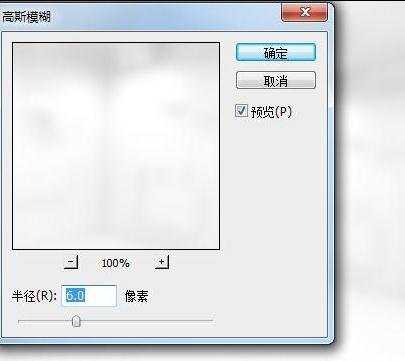
点击"滤镜>模糊>高斯模糊"并如下设置
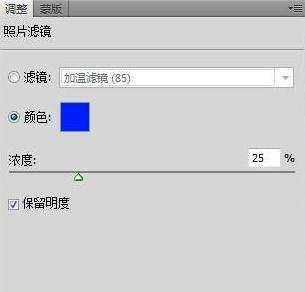
接下来点击图层下方的"创建新的图层或调整图层"按钮,选择"照片滤镜",设置颜色#001eff,如下图
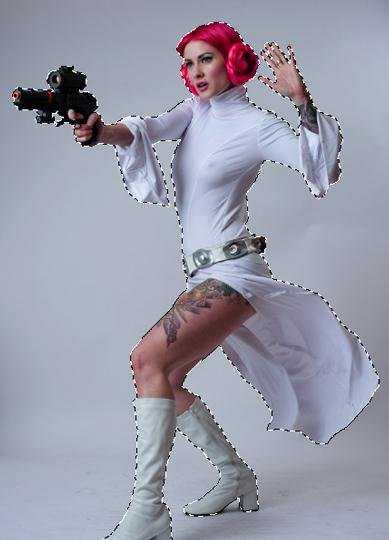
下面我们来加入人物模型,下面是我用到的人物照片

使用你喜欢的方式抠选下来
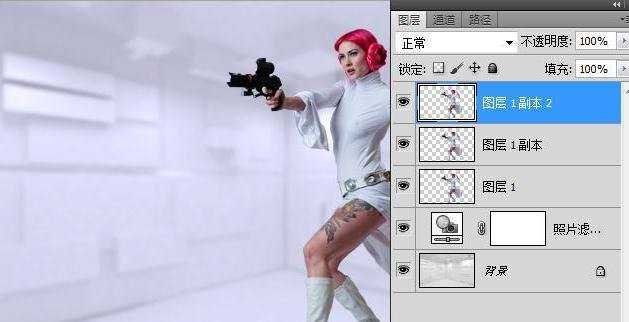
复制并粘贴到画布上,并使用"自由变换"调整大小和位置

复制图层两次,如下图
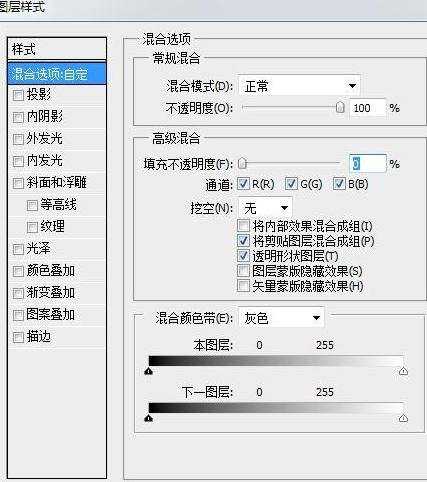
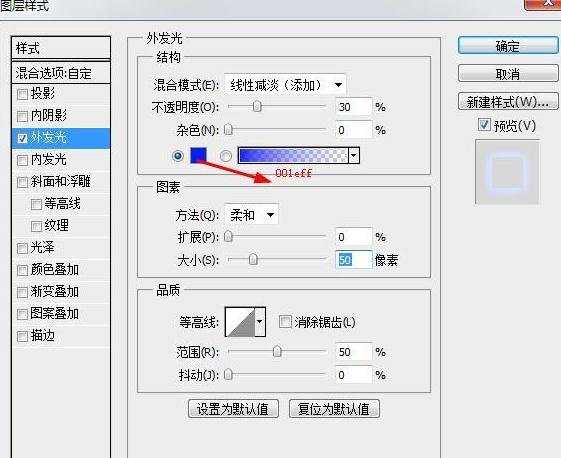
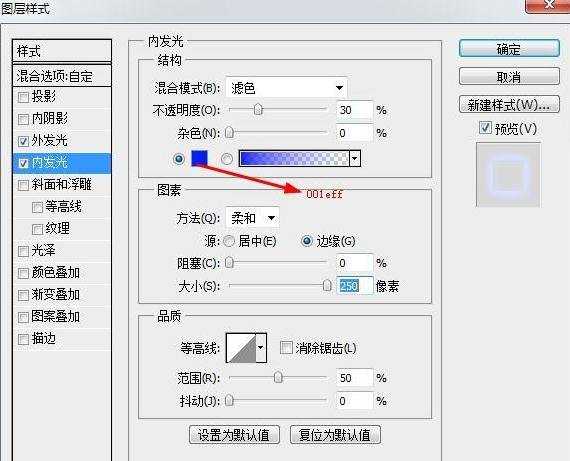
隐藏复制的人物层,双击"图层1"调出"图层样式",我们来做发光效果,如下图设置
混合选项:自定
外发光
内发光
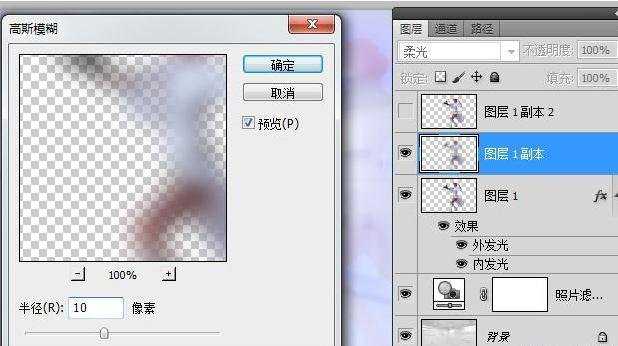
选择"图层1副本",打开隐藏,点击"滤镜>模糊>高斯模糊"并如下设置,完成后将这个层的混合模式设置为"柔光"
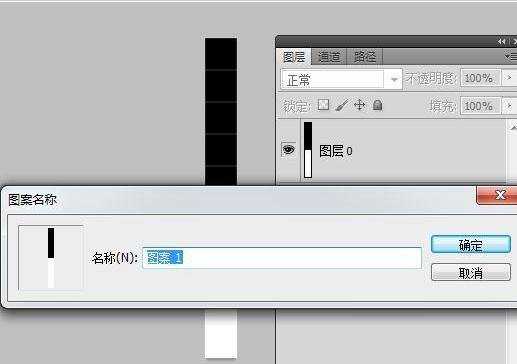
创建一个1*10像素的文档,使用"矩形选框工具"选择一半,并填充黑色
双击背景解锁,点击"编辑>定义图案"如下图所示
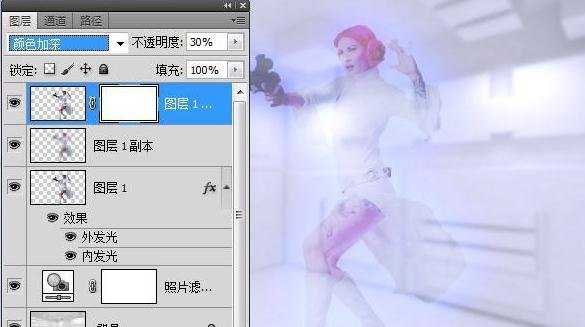
回到画布,选择"图层1副本2",打开隐藏,将混合模式设置为"颜色加深",不透明度30%,并点击图层面板下方的"添加图层蒙版"按钮
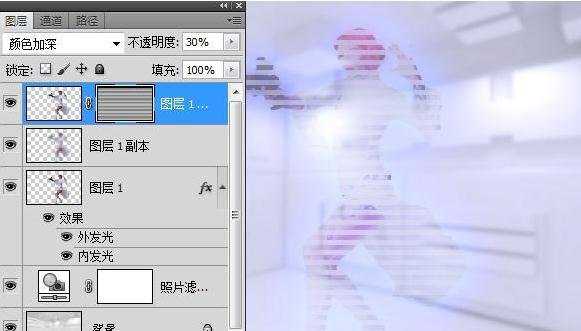
选中图层蒙版,点击"编辑>填充"选择我们新作的图案,并填充,如下图所示

得到这样效果
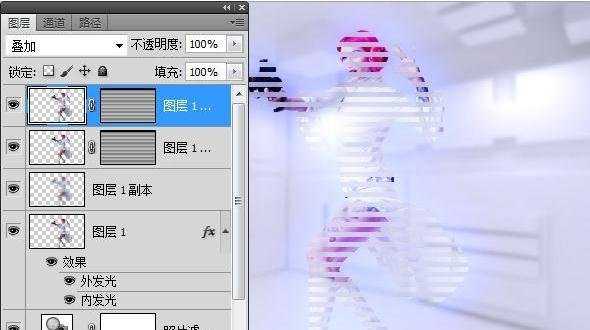
复制这个图层,将混合模式设置为"叠加",如下图
选择图层蒙版略缩图,点击"图像>编辑>变化"并如下设置
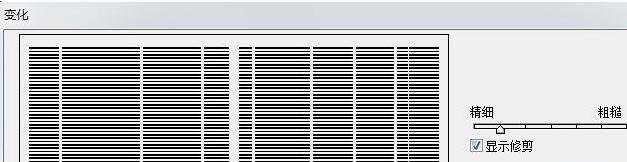
得到下面这样效果
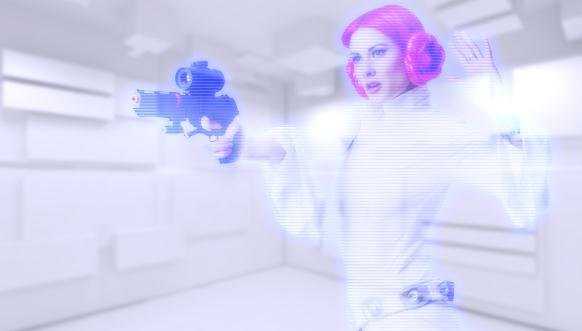
最终效果
Photoshop科幻效果教程的评论条评论