
fireworks模板:制作精细PC图标
发布时间:2017-03-22 21:37
Fireworks 不仅具备编辑矢量图形与位图图像的灵活性, 还提供了一个预先构建资源的公用库,今天我们就来学习另外的绘制技巧,下面小编给大家整理了关于 fireworks制作精细PC图标的方法,希望大家喜欢。
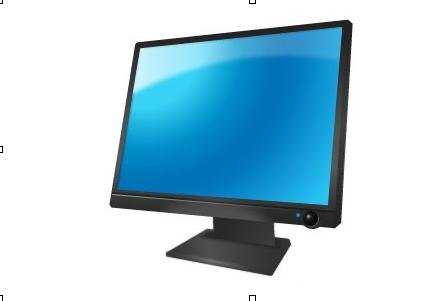
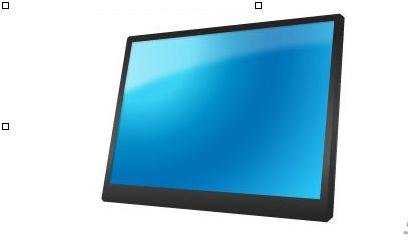
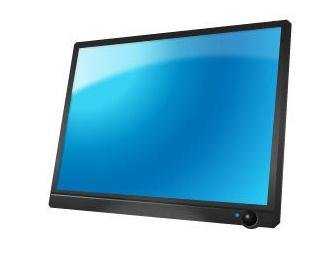
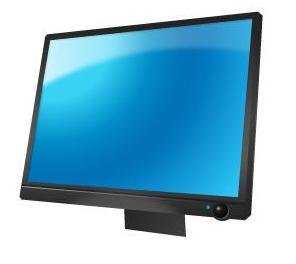
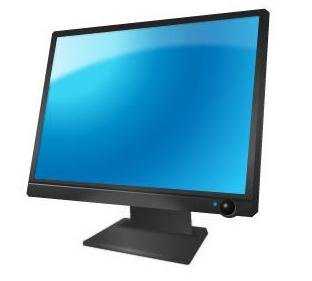
fireworks制作精细PC图标的效果图:
fireworks制作精细PC图标的方法步骤:
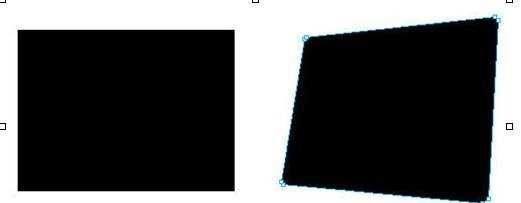
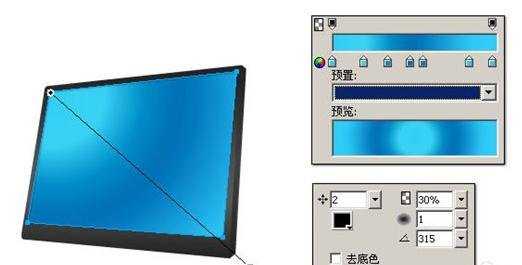
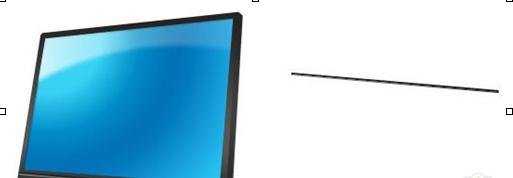
fireworks制作精细PC图标的步骤1. 在fireworks中绘制一个矩形,并通过部分选取工具调节节点。为增加立体效果,每个角均通过钢笔工具增加为2个节点
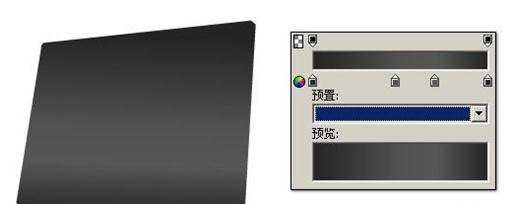
fireworks制作精细PC图标的步骤2. 给矩形添加渐变效果
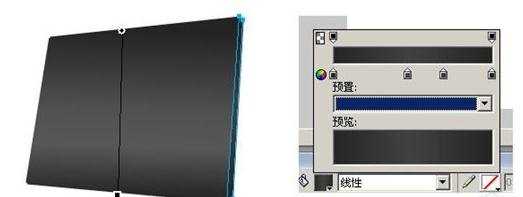
fireworks制作精细PC图标的步骤3. 再给右边的矩形添加渐变效果
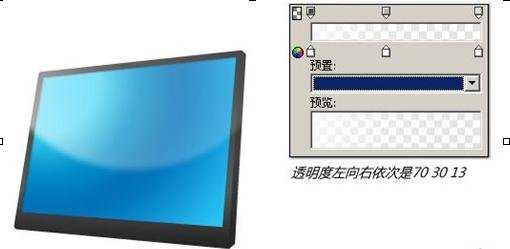
fireworks制作精细PC图标的步骤4. 复制矩形并缩小,作为内框屏幕,实用发射性渐变,添加内部阴影
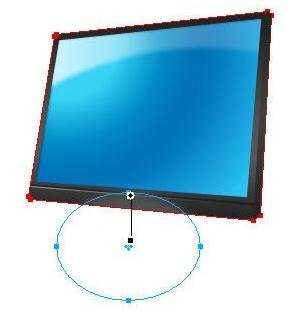
fireworks制作精细PC图标的步骤5. 制作屏幕高光效果,绘制一个圆形,设置线性渐变,羽化为6
fireworks制作精细PC图标的步骤6. 再画一个大的圆,用来切掉我们不需要的部分,选择两个路径,修改-组合路径-打孔
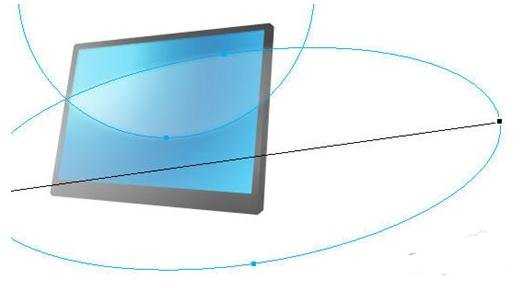
fireworks制作精细PC图标的步骤7. 得到如下路径,然后使用蒙板得到我们需要的内框屏幕,选择蓝色内框屏幕,复制,选择刚才得到的白色渐变路径,反键-编辑-粘贴为蒙板,得到如下效果
fireworks制作精细PC图标的步骤8. 绘制两条斜线,制作屏幕下方立体效果
fireworks制作精细PC图标的步骤9. 使用上述高光绘制方式制作屏幕下方高光效果
fireworks制作精细PC图标的步骤10. 使用放射性渐变绘制显示器开关按钮。并复制一个浅灰色的圆形放在按钮下,产生立体效果
fireworks制作精细PC图标的步骤11. 利用矩形工具绘制底座支撑轴。并使用线性渐变填充
fireworks制作精细PC图标的步骤12. 利用矩形工具绘制底座,使用钢笔工具增加节点并调整。使用放射性渐变填充
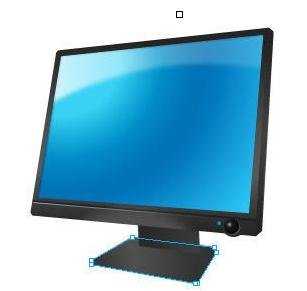
fireworks制作精细PC图标的步骤13. 最后利用矩形工具绘制高3像素的矩形使用放射性渐变填充,绘制底座高光效果
fireworks模板:制作精细PC图标的评论条评论