
photoshop制作裂缝字的教程
发布时间:2016-12-20 13:39
相关话题
如何在ps中制作裂缝字体呢?下面是小编为大家整理的photoshop制作裂缝字的教程,仅供大家参考~
photoshop制作裂缝字的教程如下:
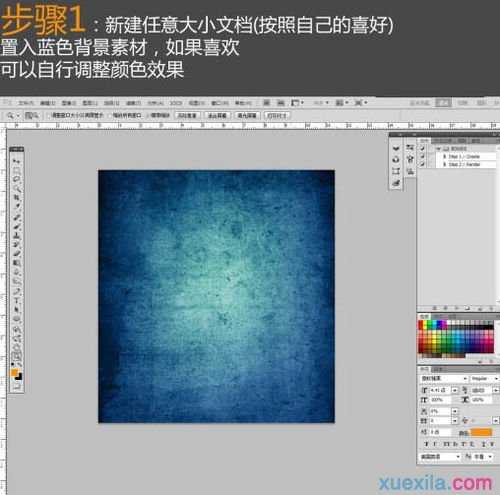
新建一个任意大小文档,置入蓝色背景素材,如果喜欢可以自行调整颜色,效果如下图。
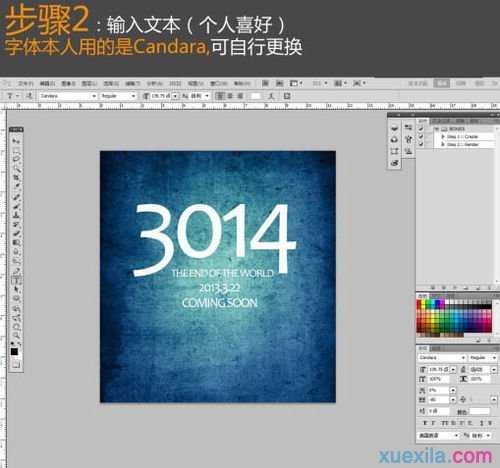
2打上文字,颜色选择白色,效果如下图。
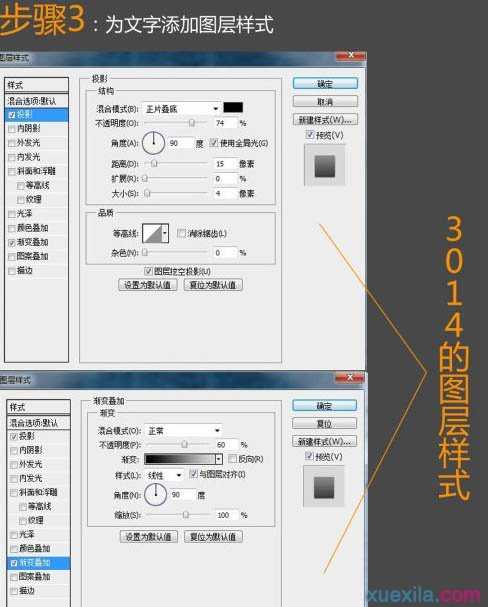
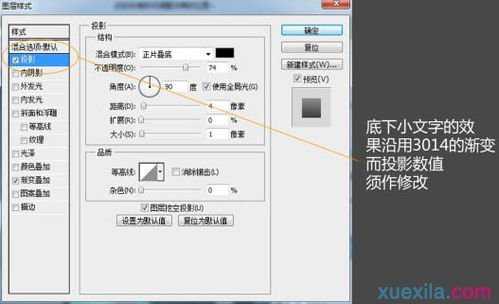
3分别为大字体与小字体设置图层样式,如下图。
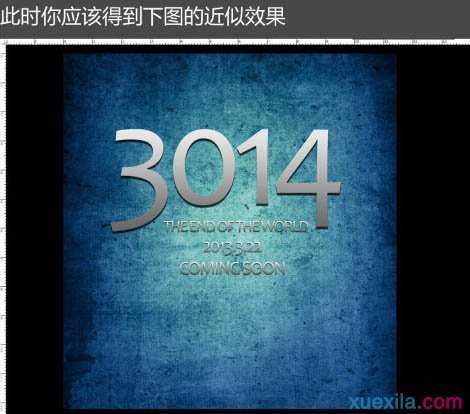
此时你应该得到下图所示的效果。
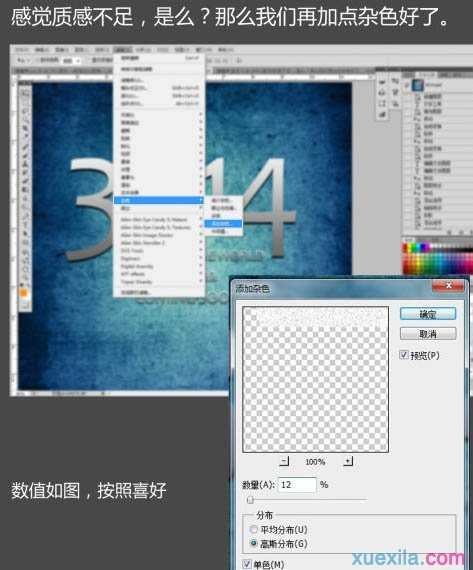
4感觉质感不足,我们再加点杂色,执行:滤镜 > 杂色 > 添加杂色,参数设置如下图。
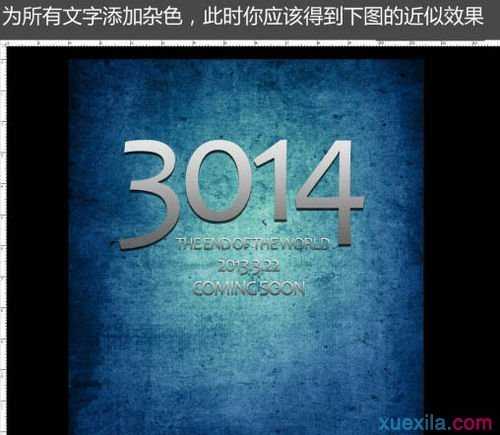
添加杂色后,效果如下图。
5效果还是不明显,我们再来一步为文字创建更深层的投影。
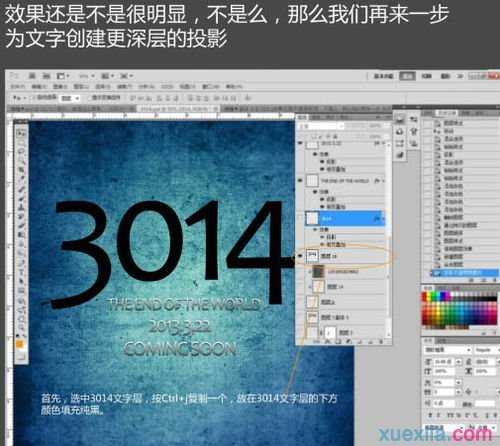
6按照图示文字设置,应该得到下图所示的效果。

7按Ctrl + E 合并所有复制并移动号的黑色文字图层,为其添加:滤镜 > 模糊 > 径向模糊,如下图。
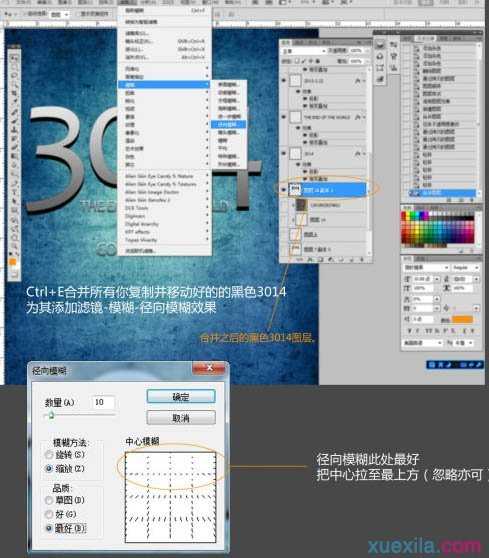
然后通过微调,让投影在文字的下方,效果如下图。

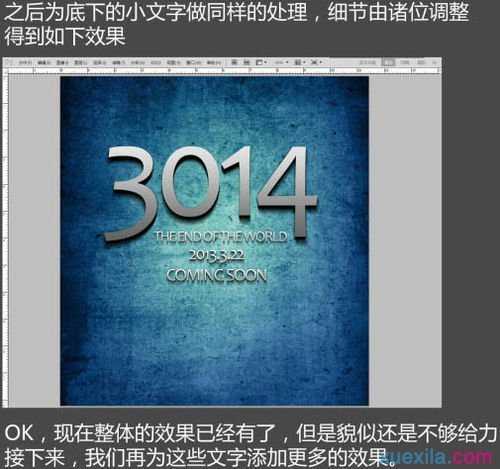
之后为底下的小文字做同样的处理,细节可以由自己调整,效果如下图。
把素材放置到文字的上方,按Ctrl + Alt + G 创建剪贴蒙版,图层混合模式改为“叠加”,效果如下图。

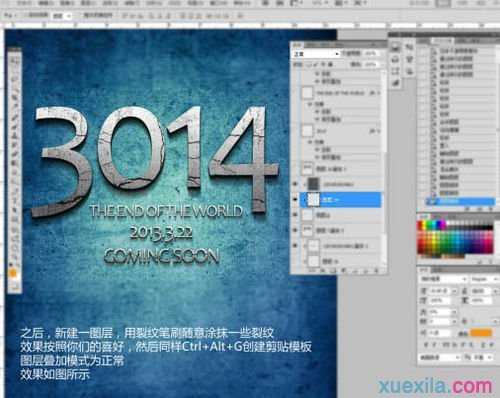
之后,新建一个图层,用裂纹笔刷随意涂抹一些裂纹,然后按Ctrl + Alt + G 创建剪贴蒙版,效果如下图。
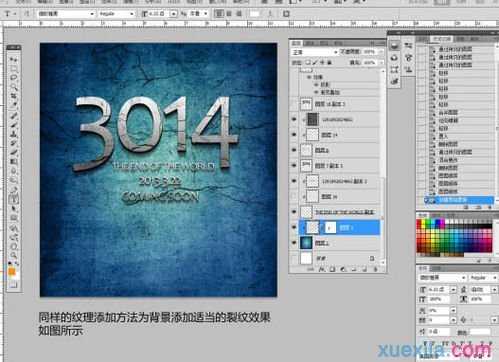
同样的纹理添加方法为背景添加适当的裂纹效果如下图。
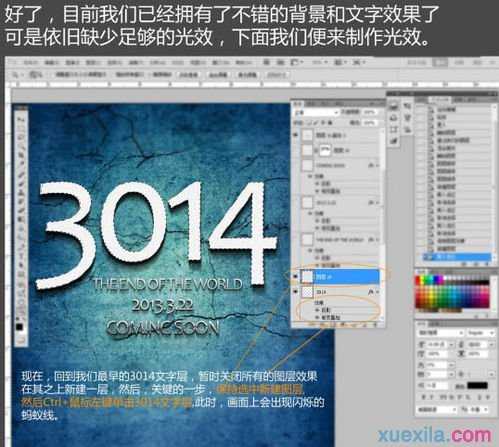
好了,目前我们已经拥有了不错的背景和文字效果了,可是依旧缺少足够的效果,下面我们来制作光效。
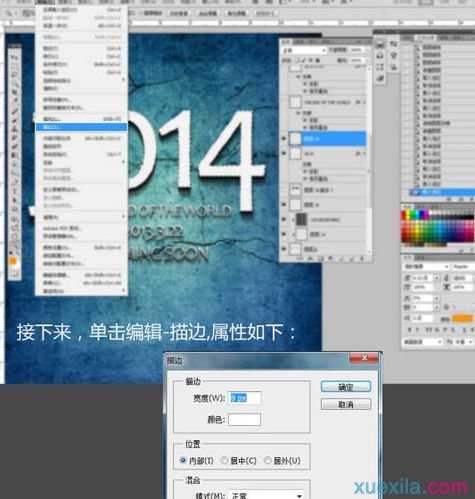
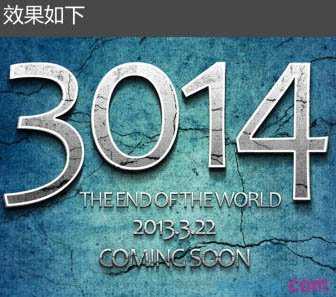
接下来,单击:编辑 > 描边,参数设置如下图。
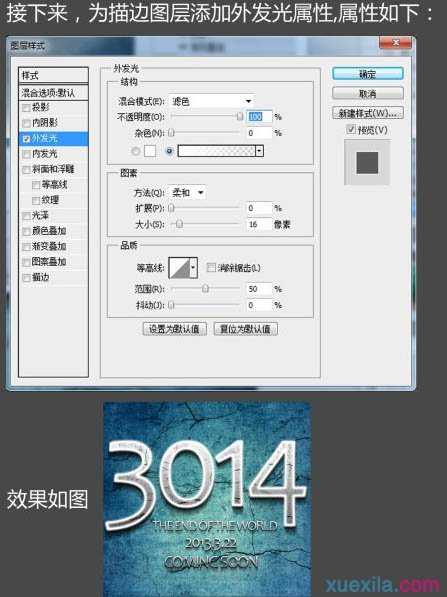
接下来,为描边图层添加外发光图层样式,参数设置如下图。
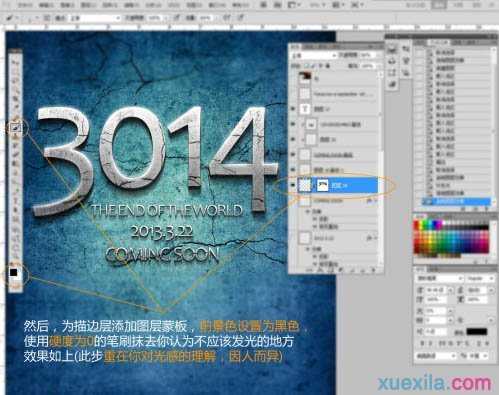
然后为描边层添加图层蒙版,前景色设置为黑色,使用硬度为0的笔刷涂抹你认为不需要发光的部分,效果如下图。
最后加上光晕,完成最终效果。

photoshop制作裂缝字的教程的评论条评论