
photoshop情人贺卡制作教程
发布时间:2016-12-27 19:02
相关话题
情人节当天,自己制作一张贺卡送给对方,相信能让对方十分感动。下面是小编为大家整理的photoshop情人贺卡制作教程,仅供大家参考~
photoshop情人贺卡制作教程如下:
最终效果

1、新建文档1000x800像素,背景白色,新建图层,做一个径向渐变,颜色为#ffb96e和#f18100。
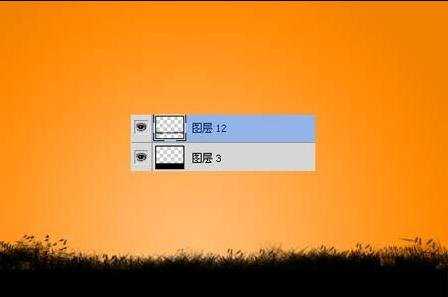
2、新建2个图层,图层3为黑色矩形,图层12载入草丛笔刷涂抹,效果如下,你可以用photoshop自带的草丛笔刷。
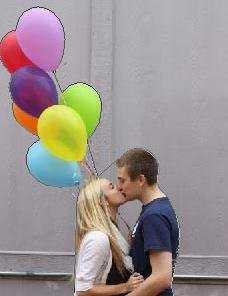
3、打开情侣亲嘴图片,用钢笔抠出,这种图片网上有很多,百度一下即可。也可以直接用下图所示的剪影图,定义成笔刷再刷上去。

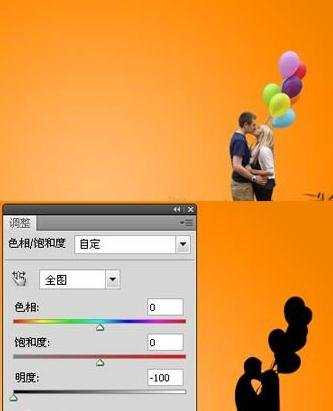
4、拖入文档中,缩小,位置如下,添加色相/饱和度调整层,使之变黑。
5、同样方法处理自行车。


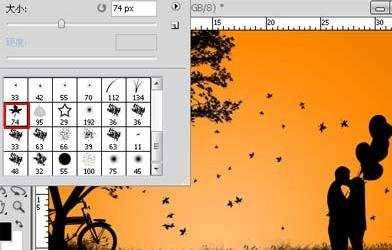
6、新建图层,导入大树笔刷,前景色黑色点一下。

<点小图查看大图>

7、新建图层,使用自带的枫叶笔刷,前景色黑色点几下。
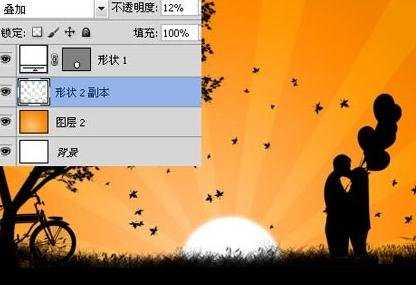
8、底部新建图层,画一个白色正圆,此为太阳,添加外发光样式。

9、底部新建图层,用直线套索做一些选区,填充白色,图层模式叠加,不透明度12%,此为太阳光辉。
10、新建图层画一个心形,颜色#bd1414。
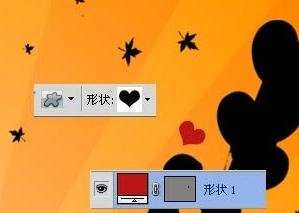
11、添加图层样式。
12、然后复制几个,改变大小、角度和位置,效果如下。

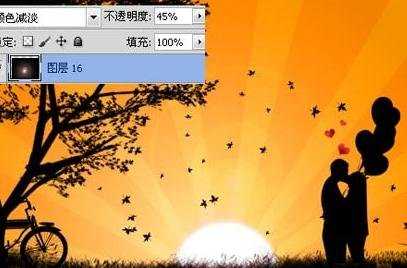
13、新建图层填充黑色,滤镜>渲染>镜头光晕,图层模式颜色减淡,不透明度45%。
14、新建图层,用笔刷添加蝴蝶和飞鸟。


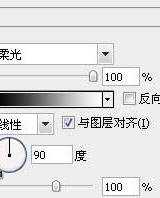
15、顶部新建图层,在草地位置画一椭圆,颜色#103f57。

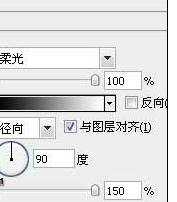
16、添加图层样式。
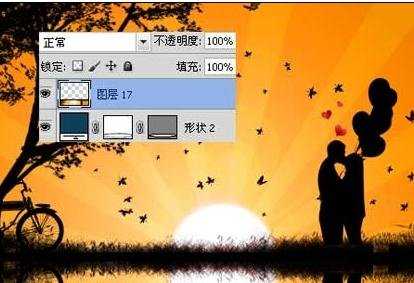
17、之后添加蒙版,前景色黑色用草丛笔刷涂抹四周,此为湖水。

18、做如下矩形选区。

19、Ctrl+shift+C复制,之后去掉选区,ctrl+V粘贴,会生成一个图层,ctrl+T垂直翻转,挪到底部。
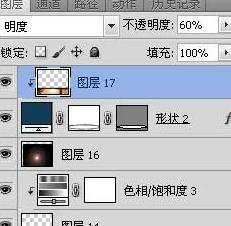
20、图层>创建剪贴蒙版,之后图层模式改为明度,不透明度改为60%。
最终效果:

photoshop情人贺卡制作教程的评论条评论