
如何使用PS进行合成图片
相关话题
有的时候会需要一些特殊的图片,那么这些图片其实可以用PS来进行合成,但是很多同学还不知道。那么接下来下面是小编整理的一些关于如何使用PS进行合成图片,供您参阅。
使用PS进行合成图片的方法
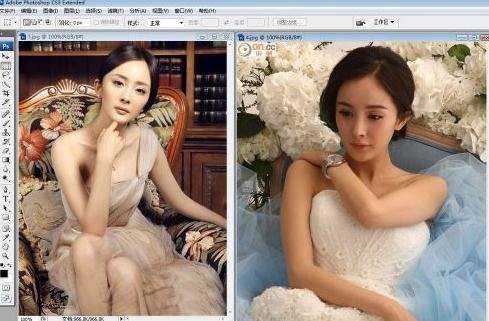
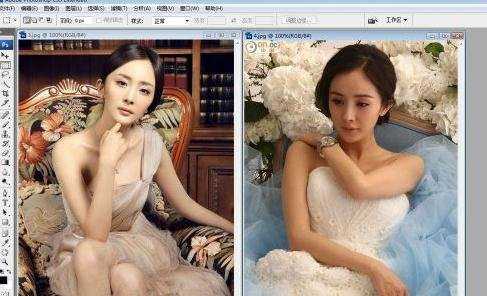
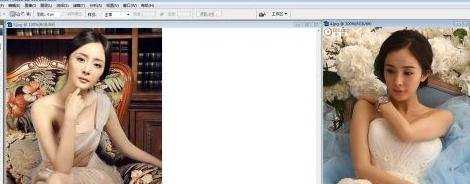
用ps打开杨幂的两个写真。可以很明显的看到,两个图片的尺寸是不一样的。
选中第一个图片,当ps中存在很多张图片的时候,可以通过边框颜色的深浅来快速判断哪个是处于选中状态的,颜色深的表示处于选中状态,很显然,某个时间点,只有一个图片处于选中状态。

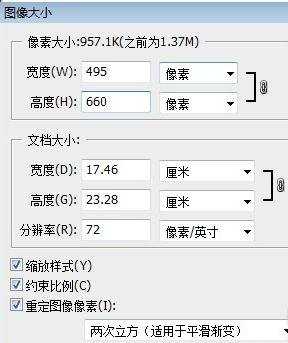
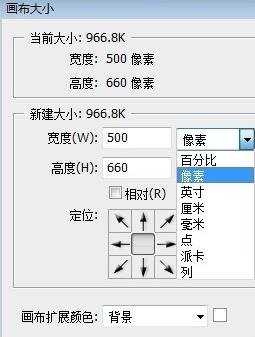
点击“图像”,选择“图像大小”。
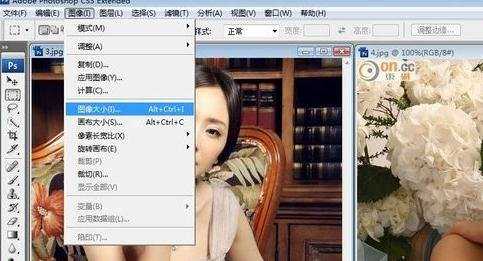
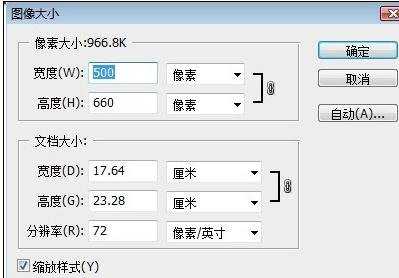
可以看到第一张图片的大小是宽500像素,高660像素。
同样的方法可以查看第二张图片的像素是,宽600像素,高800像素。
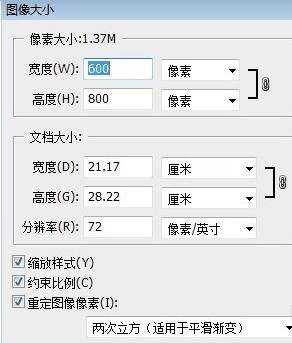
第二张图片明显比第一张大一些,我们就要考虑将第二张图片移动到第一张图片上去,因为反过来的话第一张图片就要被放大,图片就会变得模糊一点。那么,我们就先把第二张图片的尺寸更改一下。由于是要横向拼合,所以要保证高一样,宽不用一样。第一张图片的高是660像素,所以我们把第二张图片的像素更改为660像素,它的高自动被修改成了495像素。之所以会自动修改是因为下面选项里有一个“约束比例”,所以会等比例缩放。
可以看到,两张图片的高变成一样的了。
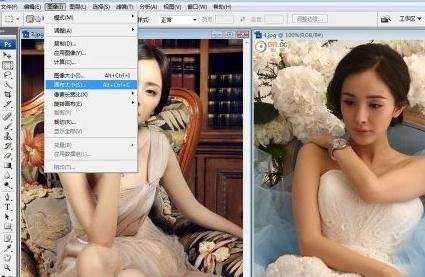
接下来我们要把第一张图片扩展一下。选中第一张图片,点击“图像”,选择“画布大小”。
下图是第一张图片的画布大小信息。
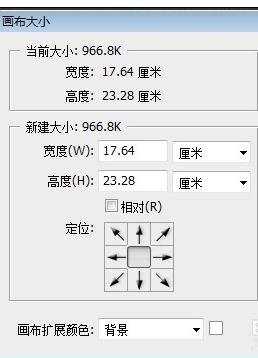
默认是“厘米”,更改为“像素”。
选择“相对”,宽和高变成了0,这是因为相对指的是相对于原图片宽和高的增加量。
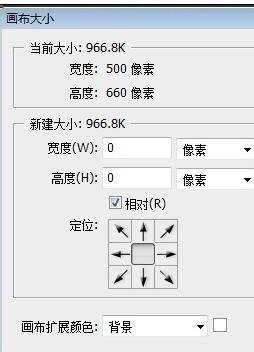
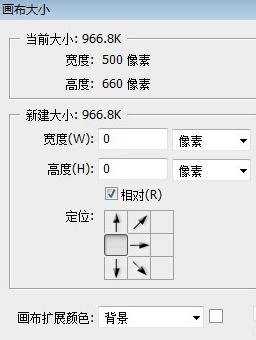
在“定位”里点击左侧中间的小方格。这是因为我们要把第二张图片放到右边。
在“宽度”后面输入“495”,因为第二张图片的宽度现在是495像素。
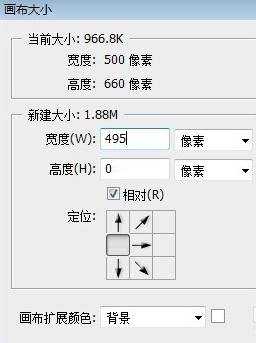
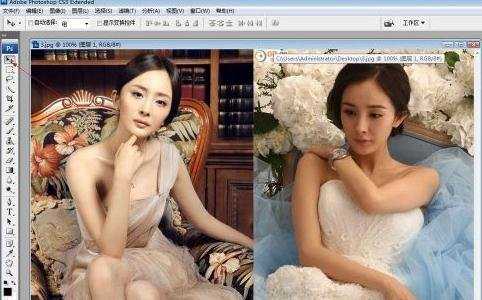
点击“确定以后”,可以看到,第一张图片被扩展了,右边多出一部分。
在工具里选中“移动工具”,把第二张图片拖动到第一张图片的空白处就可以了。这样就完成了两张图片的拼合,最后保存一下就可以了。
如何使用PS进行合成图片的评论条评论