
photoshop的mac版本如何安装字体
发布时间:2017-05-14 11:42
我们肯定在一些广告上在使用Mac系统的时候我们有时需要安装新的字体,下面给出如何在mac系统上的photoshop中安装新字体。下面是小编带来关于photoshop的mac版本如何安装字体的内容,希望可以让大家有所收获!
photoshop的mac版本安装字体的方法
一、
1)点击Launchpad
2)搜索“字体册”

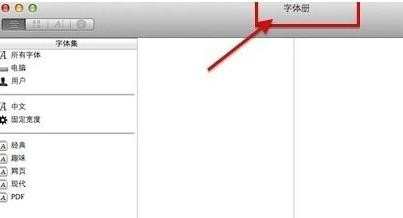
二、
打开字体册
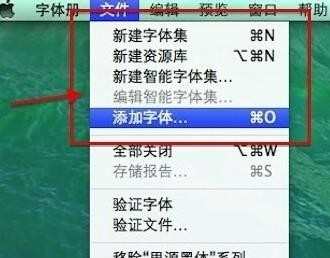
三、
1)选择“文件选项”
2)选择“添加字体”
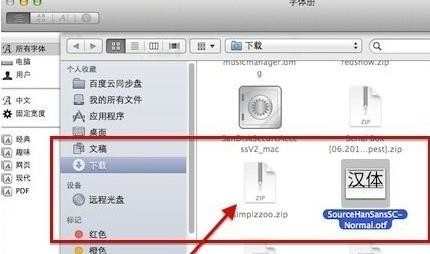
四、
在弹出的对话框中选择自己下载的想要添加的字体
五、
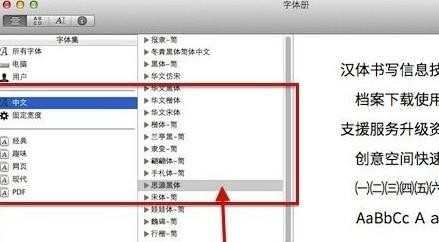
1)选择字体
2)选择“打开”
这样就安装完毕。
photoshop的mac版本如何安装字体的评论条评论