
PhotoShop滤镜制作海水
发布时间:2017-03-21 15:20
相关话题
今天小编分享一个PhotoShop滤镜制作海水的教程,教程很简单,特别是为新手而做的,希望大家喜欢。
PhotoShop滤镜制作海水

1、 新建一幅图像,如400×200,确保颜色为默认的前黑后白。新建一个图层。
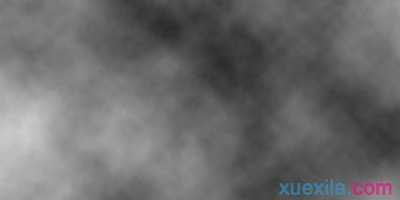
2、 使用【滤镜_渲染_云彩】,图像大致如下图所示。
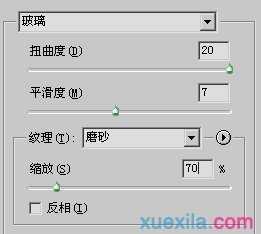
3、 使用【滤镜_扭曲_玻璃】,设置大致如下左图,完成后效果如下图。

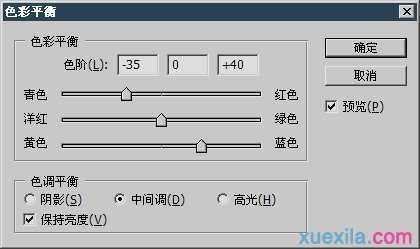
4、 使用【图像_调整_色彩平衡】,将中间调设置如下左图,高光部分也做类似的设置。效果如下右图。

5、 然后〖CTRL_T〗对该图层使用自由变换,然后选择透视,做出一个梯形透视。最终效果如下图。
PhotoShop滤镜制作海水的评论条评论