
CAD图形中的图层怎么设置
发布时间:2017-05-18 11:55
相关话题
大家知道CAD图形中的图层怎么设置吗?其实设置方法不难的,下面就让小编告诉你CAD图形中的图层怎么设置的方法,一起学习吧。
CAD图形中的图层设置的方法
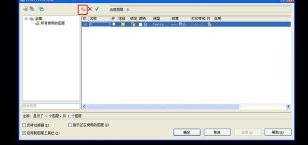
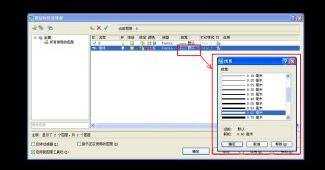
首先在CAD中打开图层设置栏(LA+回车),并新建图层进行设置(如图)
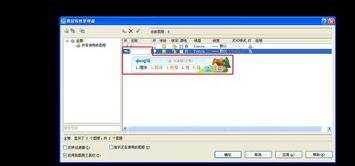
新建图层先设置-----名称------输入本图层的名称如:墙体、门、窗、文字、家具...............
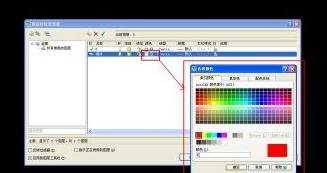
设置完名称后,设置本图层的显示颜色(如图),根据自己的制图习惯可设置各种颜色
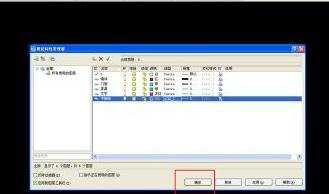
根据制图要求设置线性
然后根据制图要求设置线宽
根据自己的作图习惯,通过新建图层设置完自己常用的图层,并调整完各个图层的特性,当然烟要设置几个图层就看你自己的需要。
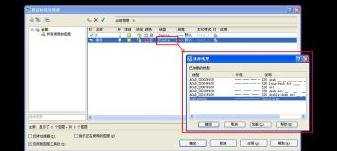
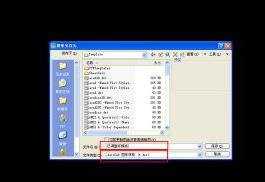
设置完图层后关闭设置栏,然后点击-----文件------另存为,弹出对话框,先输入新设置模板的名称(在存储之前,最好把所有需要设置或修改的命令都调整好,本处略),然后将文件类型设置为DWT的类型。保存即可。
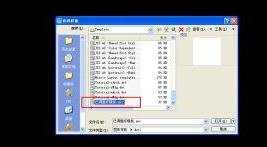
在下次使用时打开CAD安装目录下-----template-----已调整好模板(之前存储的模板),这样就可以使用了,试试吧,很方便哦!
CAD图形中的图层怎么设置的评论条评论